
Solar Panel Characterization and Experiments with Arduino
In this tutorial, the aim is to characterize a solar panel by varying the load at (near) peak solar insolation to identify the panel's nominal values such as open-circuit voltage, short-circuit current, max power voltage and current, and max power output. These values help users understand the expectations from a photovoltaic array and how their power needs may be met with a given PV system. An Arduino board will be used to log the current and voltage values outputted from a small solar panel. The current and voltage are measured using a 16-bit analog-to-digital converter power module, the INA226, which will allow us to track the power outputted from the photovoltaic panel. A potentiometer acting as a rheostat will serve as the varying load on the system, which will be used to identify the peak power points of the system. Finally, analyses will be conducted in Python 3, which will allow us to identify the peak power region and also the total power outputted over a duration of 24 hours.

WS2812 LED Ring Light with Raspberry Pi Pico
This is the second entry into the Raspberry Pi Pico tutorial series dedicated to exploring the capabilities of the Raspberry Pi Foundation's groundbreaking new Pico microcontroller. A WS2812 RGB LED is controlled via the programmable I/O system (PIO) on the Pico microcontroller. The code and methods used to control the WS2812 are based on Raspberry Pi Pico Micropython SDK the project entitled "Using PIO to drive a set of NeoPixel Ring (WS2812 LEDs)." A state machine is used on the Pico to control the WS2812 LED array, which allows users to test a range of algorithms that affect the ring light. The light mappings will subsequently be capable of emulating the LED effects similar to those demonstrated by the Amazon Alexa or Google Home devices. A universal wiring diagram is given that allows for any number of LEDs to be wired to the Pico, which we tested up to 60 LEDs.

Listening to Your Pipes with a MEMS Microphone and Raspberry Pi
A new type of water meter produced by Water Wise Controls (WaWiCo) introduces a novel method for water metering: non-invasive acoustic analysis. Their USB water metering kit allows users to listen to their pipes without the need for plumbing work. In this tutorial, the acoustic profile of a piping system will be explored using a Raspberry Pi computer, the Python programming language, and a WaWiCo USB water meter kit. The resulting analysis will allow users to identify the acoustic profile of their piping system and determine when water is flowing. This is the first of a series of entries into non-invasive water metering from WaWiCo, where open-source technologies will be used to characterize a piping system based on the acoustic profile of a user's home or apartment.

An Introduction to the Raspberry Pi Pico with MicroPython
The Raspberry Pi Pico was recently released by the Raspberry Pi Foundation as a competitive microcontroller in the open-source electronics sphere. The Pico shares many of the capabilities of common Arduino boards including: analog-to-digital conversion (12-bit ADC), UART, SPI, I2C, PWM, among others. The board is just 21mm x 51mm in size, making it ideal for applications that require low-profile designs. One of the innovations of the Pico is the dual-core processor, which permits multiprocessing at clock rates up to 133 MHz. One particular draw of the Pico is its compatibility with MicroPython, which is chosen as the programming tool for this project. The focus on MicroPython, as opposed to C/C++, minimizes the confusion and time required to get started with the Pico. A Raspberry Pi 4 computer is ideal for interfacing with the Pico, which can be used to prepare, debug, and program the Pico. From start to finish - this tutorial helps users run their first custom MicroPython script on the Pico in just a few minutes. An RGB LED will be used to demonstrate general purpose input/output of the Pico microcontroller.

Distance Detection with the TF-Luna LiDAR and Raspberry Pi
The TF-Luna is an 850nm Light Detection And Ranging (LiDAR) module developed by Benewake that uses the time-of-flight (ToF) principle to detect objects within the field of view of the sensor. The TF-Luna is capable of measuring objects 20cm - 8m away, depending on the ambient light conditions and surface reflectivity of the object(s) being measured. A vertical cavity surface emitting laser (VCSEL) is at the center of the TF-Luna, which is categorized as a Class 1 laser, making it very safe for nearly all applications [read about laser classification here]. The TF-Luna has a selectable sample rate from 1Hz - 250Hz, making it ideal for more rapid distance detection scenarios. In this tutorial, the TF-Luna is wired to a Raspberry Pi 4 computer via the mini UART serial port and powered using the 5V pin. Python will be used to configure and test the LiDAR module, with specific examples and use cases.

Audio Processing with The QuadMic 4-Microphone Array on the Raspberry Pi
The QuadMic Array is a 4-microphone array based around the AC108 quad-channel analog-to-digital converter (ADC) with Inter-IC Sound (I2S) audio output capable of interfacing with the Raspberry Pi. The QuadMic can be used for applications in voice detection and recognition, acoustic localization, noise control, and other applications in audio and acoustic analysis. The QuadMic will be connected to the header of a Raspberry Pi 4 and used to record simultaneous audio data from all four microphones. Some signal processing routines will be developed as part of an acoustic analysis with the four microphones. Algorithms will be introduced that approximate acoustic source directivity, which can help with understanding and characterizing noise sources, room and spatial geometries, and other aspects of acoustic systems. Python is also used for the analysis. Additionally, visualizations will aid in the understanding of the measurements and subsequent analyses conducts in this tutorial.

Calibration of a Magnetometer with Raspberry Pi
In this tutorial, methods for calibrating a magnetometer aboard the MPU9250 is explored using our Calibration Block. The magnetometer is calibrated by rotating the IMU 360° around each axis and calculating offsets for hard iron effects. Python is again used as the coding language on the Raspberry Pi computer in order to communicate and record data from the IMU via the I2C bus. The second half of this tutorial gives a full calibration routine for the IMU's accelerometer, gyroscope, and magnetometer. The final implementation will allow for moderate (first-order) calibration of the MPU9250 under reasonable conditions, requiring only the calibration block and IMU. Finally, the complete final code will save the coefficients for each sensor for future use in direct applications without the need for constant calibration. The use of the calibration coefficients will allow for improved estimates of orientation, displacement, vibration, and other relevant control and measurement analyses.

Gyroscope and Accelerometer Calibration with Raspberry Pi
This is the second entry into the series entitled "Calibration of an Inertial Measurement Unit (IMU) with Raspberry Pi" where the gyroscope and accelerometer are calibrated using our Calibration Block. Python is used as the coding language on the Raspberry Pi to find the calibration coefficients for the two sensors. Validation methods are also used to integrate the IMU variables to test the calibration of each sensor. The gyroscope shows a fairly accurate response when calibrated and integrated, and found to be within a degree of the actual rotation test. The accelerometer was slightly less accurate, likely due to the double integration required to approximate displacement and the unbalanced table upon which the IMU was calibrated. Filtering methods are also introduced to smooth the accelerometer data for integration. The final sensor, the magnetometer (AK8963), will be calibration in the next iteration of this series.
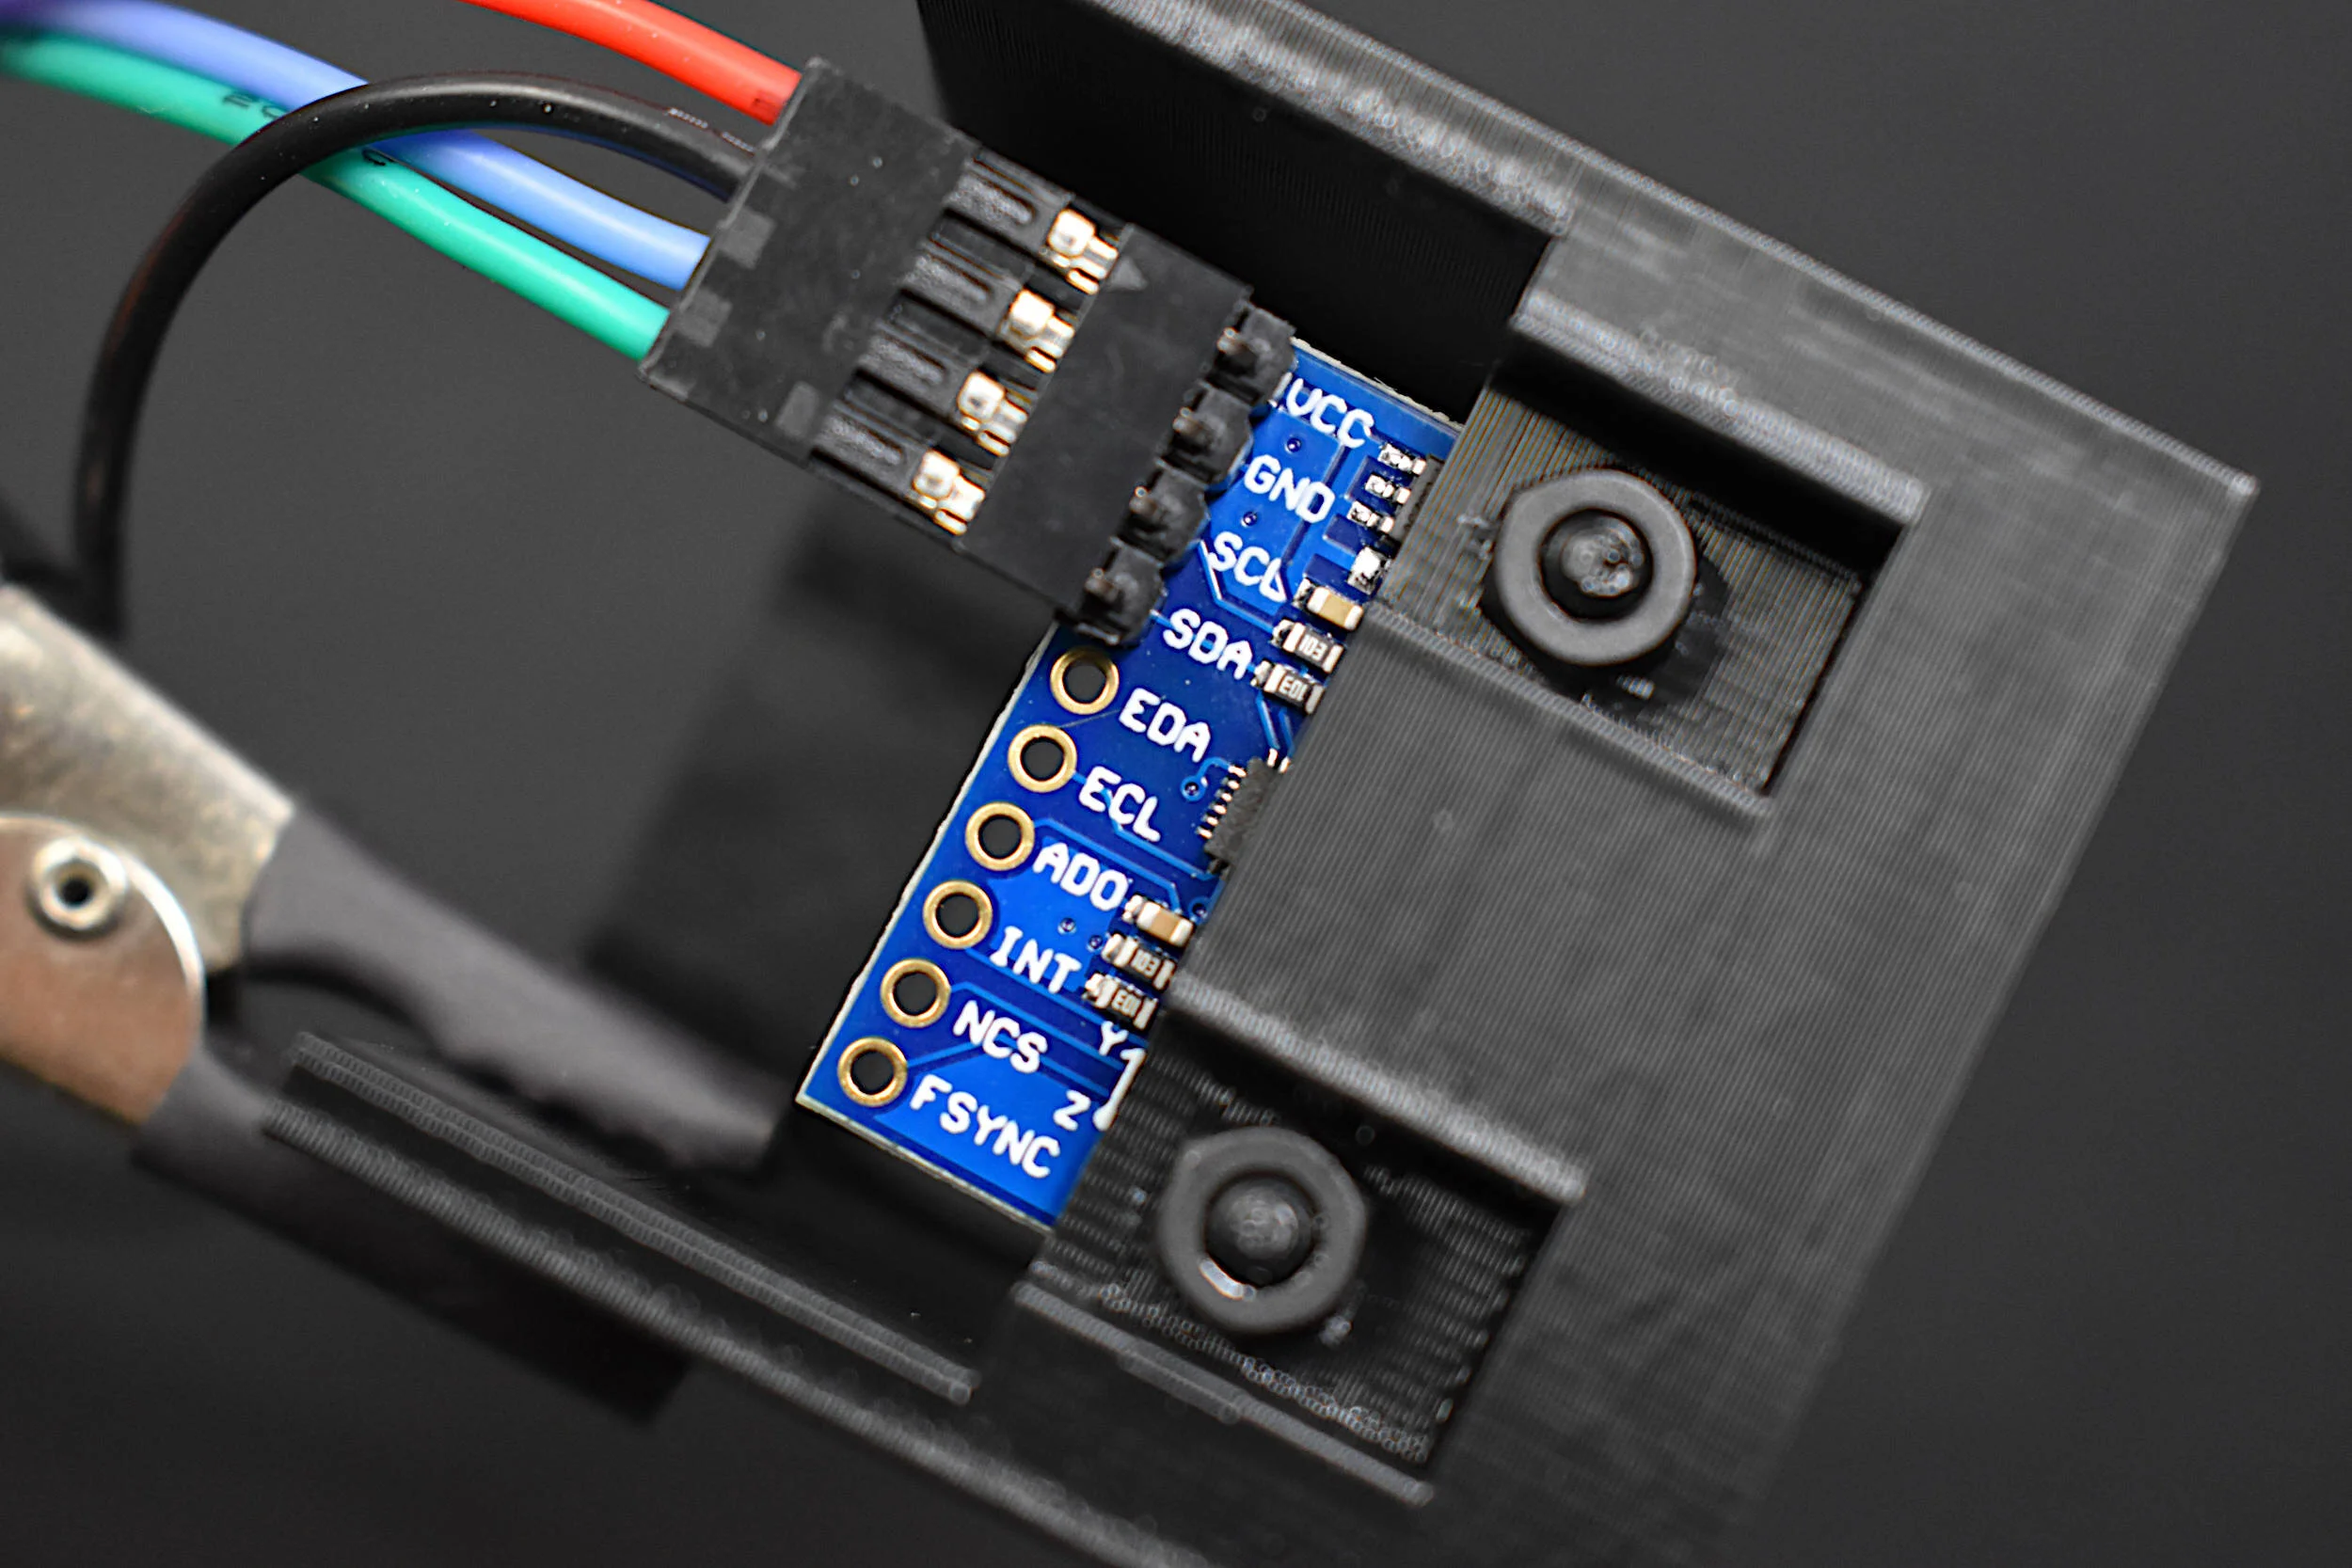
Calibration of an Inertial Measurement Unit (IMU) with Raspberry Pi - Part I
Inertial measurement units (IMUs) can consist of a single sensor or collection of sensors that capture data meant to measure inertial movements in a given reference frame. Acceleration, speed of rotation, and magnetic field strength are examples of sensors contained in an IMU. IMUs can be found in applications ranging smart devices, medical rehabilitation, general robotics, manufacturing control, aviation and navigation, sports learning, and augmented and virtual reality systems. Inertial measurement units have become increasingly popular as their form factors shrink and computational power increases. The ability to use IMUs for indoor/outdoor tracking, motion detection, force estimation, orientation detection, among others has caused the use and availability of inertial sensors to become nearly widespread in smart phones, smart watches, drones, and other common electronic devices. The internet is full of projects involving accelerometers, gyroscopes, and magnetometers, but few cover the full calibration of all three sensors. In this project, the manual calibration of a nine degree-of-freedom (9-DoF) IMU is explored. A common MPU9250 IMU is attached to a cube to manually find the calibration coefficients of the three sensors contained within the IMU: accelerometer, gyroscope, and magnetometer. The IMU is wired to a Raspberry Pi - which will allow for high-speed data acquisition rates of all nine components of the IMU.

Recording Stereo Audio on a Raspberry Pi
The INMP441 MEMS microphone is used to record audio using a Raspberry Pi board through the inter-IC sound (I2S or I2S) bus. The I2S standard uses three wires to record data, keep track of timing (clock), and determine whether an input/output is in the left channel or right channel. First, the Raspberry Pi (RPi) needs to be prepped for I2S communication by creating/enabling an audio port in the RPi OS system. This audio port will then be used to communicate with MEMS microphones and consequently record stereo audio (one left channel, one right channel). Python iS then used to record the 2-channel audio via the pyaudio Python audio library. Finally, the audio data will be visualized and analyzed in Python with simple digital signal processing methods that include Fast Fourier Transforms (FFTs), noise subtraction, and frequency spectrum peak detection.
High Resolution Thermal Camera with Raspberry Pi and MLX90640
Thermal cameras are similar to standard cameras in that they use light to record images. The most significant distinction is that thermal cameras detect and filter light such that only the infrared region of the electromagnetic spectrum is recorded, not the visible region [read more about infrared cameras here]. Shortly after the discovery of the relationship between radiation and the heat given off by black bodies, infrared detectors were patented as a way to predict temperature via non-contact instrumentation. In recent decades, as integrated circuits shrink in size, infrared detectors have become commonplace in applications of non-destructive testing, medical device technology, and motion detection of heated bodies. The sensor used here is the MLX90640 [datasheet], which is a 768 pixel (24x32) thermal camera. It uses an array of infrared detectors (and likely filters) to detect the radiation given off by objects. Along with a Raspberry Pi computer, the MLX90640 will be used to map and record fairly high-resolution temeperature maps. Using Python, we will be able to push the RPI to its limits by interpolating the MLX90640 to create a 3 frame-per-second (fps) thermal camera at 240x320 pixel resolution.

Geographic Visualizations in Python with Cartopy
Cartopy is a cartographic Python library that was developed for applications in geographic data manipulation and visualization. It is the successor to the the Basemap Toolkit, which was the previous Python library used for geographic visualizations. Cartopy can be used to plot satellite data atop realistic maps, visualize city and country boundaries, track and predict movement based on geographic targeting, and a range of other applications relating to geographic-encoded data systems. In this tutorial, Anaconda 3 will be used to install Cartopy and related geographic libraries. As an introduction to the library and geographic visualizations, some simple tests will be conducted to ensure that the Cartopy library was successfully installed and is working properly. In subsequent tutorials: shapefiles will be used as boundaries, realistic city streets will be mapped, and satellite data will be analyzed.

Visualizing COVID-19 Data in Python
This blog post is aimed at creating meaningful visualizations that may or may not be available elsewhere, while instructing users on how to source, analyze, and visualize COVID-19 infection case and rate data using Python. All of the data used herein is publicly available for anyone interested in replicating the figures, with code and links where necessary. The methods used here have been uniquely conceived and developed by Maker Portal, and in no way reflect preferred methods of either the government or any other private entities. Several Python toolboxes will be implemented below, and it is recommended that users install and verify their functionality before attempting to replicate the forthcoming figures.

Radar Emulator with Arduino + Python
In this tutorial, an ultrasonic sensor (HC-SR04) will be used in place of a radio emitter; and a plan position indicator will be constructed in Python by recording the angular movements of a servo motor. An Arduino board will both record the ranging data from the ultrasonic sensor while also controlling and outputting the angular position of the servo motor. This will permit the creation of a PPI for visualizing the position of various objects surrounding the radar system.
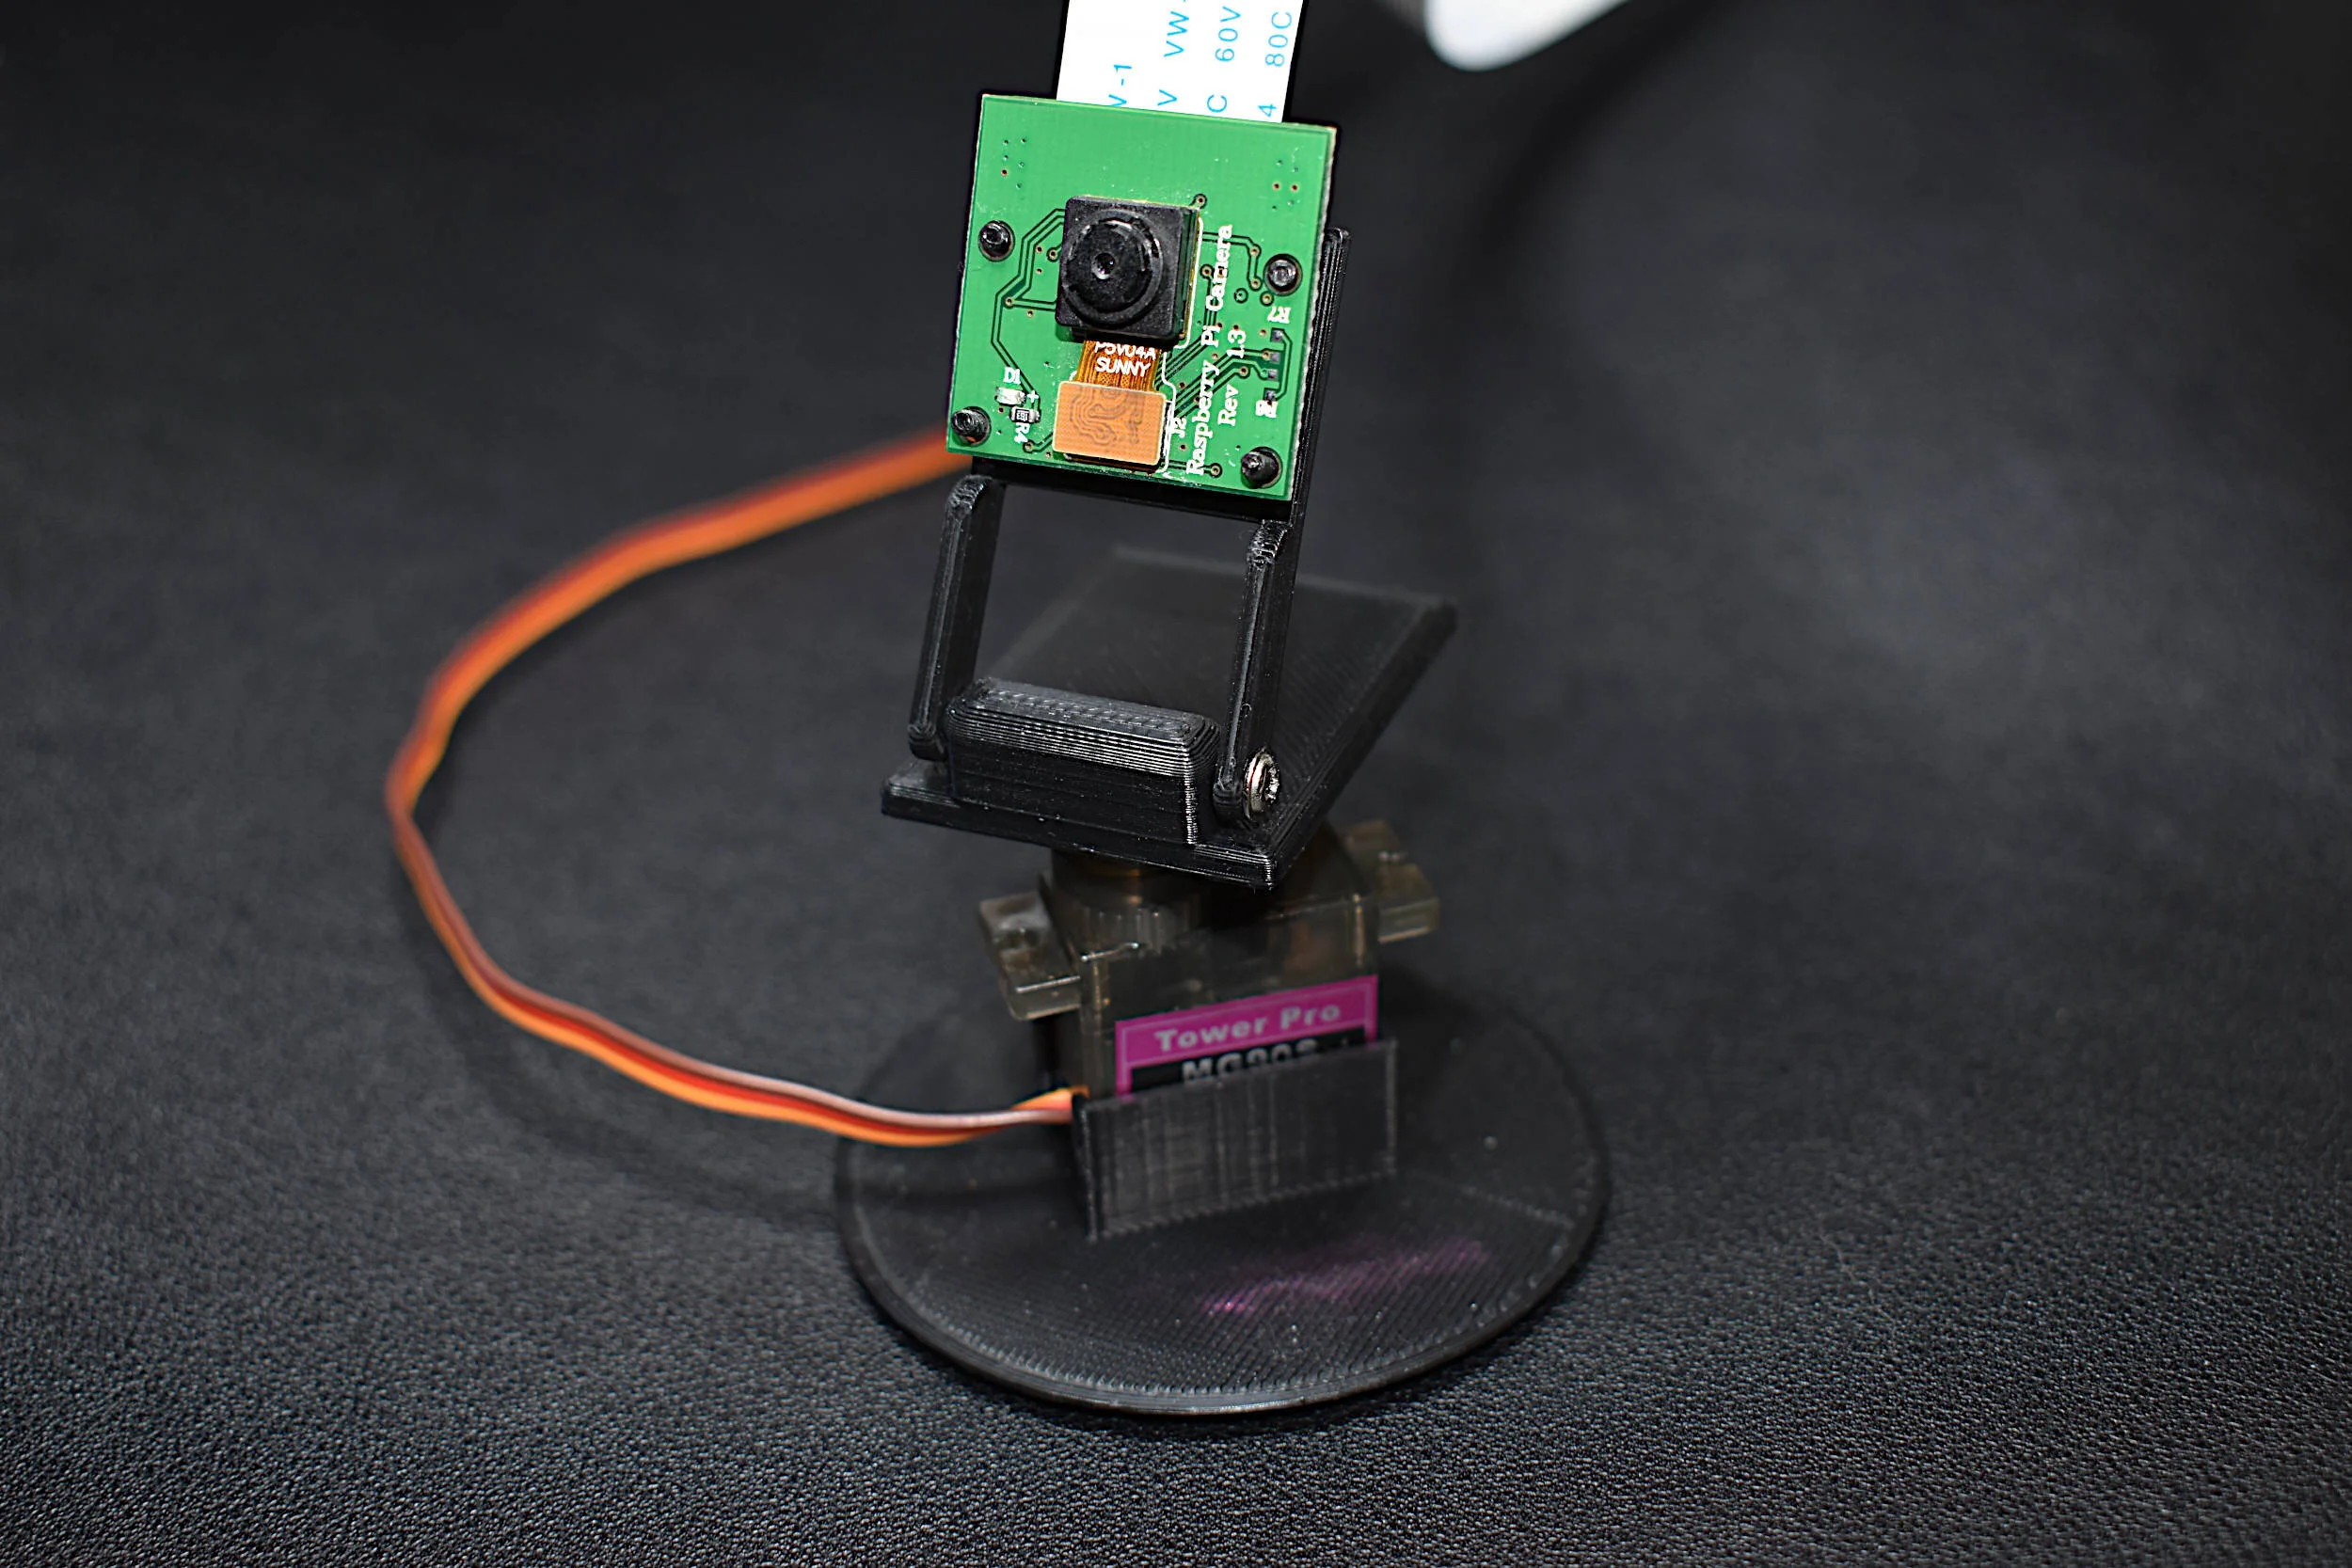
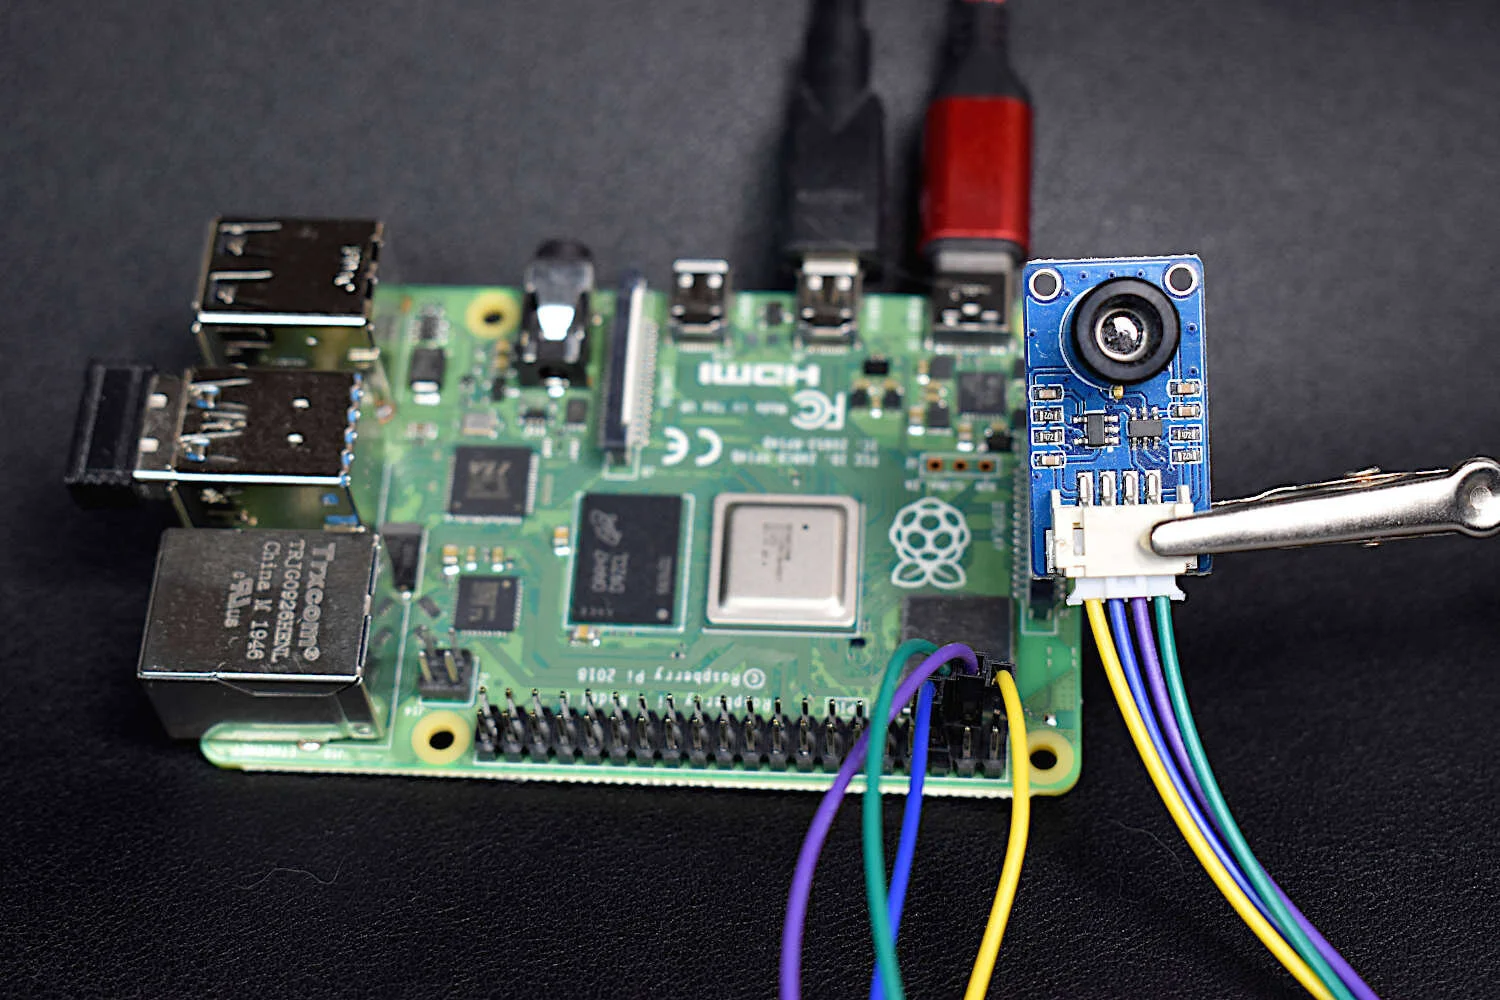
Raspberry Pi Camera Panning with a Servo Motor
In this tutorial, the RPi is used to demonstrate pulse-width modulation (PWM) and apply it to servo motor control. Then, the servo is used to control the panning of a camera - which is also controlled by the native camera port on the Raspberry Pi. This tutorial is a simple introduction that can be expanded into a full 360° controllable camera project, or a project involving a robotic arm, or any project involving servo motors or PWM-controlled devices.

Google Trends x Yahoo Finance Analysis in Python
Python has a multitude of libraries dedicated to scraping the internet in various ways. For example, Google Trends is a product produced by Google that analyzes search history and publishes the popularity of search terms over time. One user created an algorithm to pull trend data from Google using Python in a package called pytrends. Another such library uses Python to pull stock information from Yahoo Stocks in a package called yfinance. Both of these libraries will be used to plot and compare finance and trend data over time using Python scripts. The methods outlined in this tutorial could be applied to areas in finance, data analytics, and data visualization in general.

Python FTP for Data Mining and Analysis
Python’s file transfer protocol (FTP) library is used to parse weather station data from the publicly available automated surface observing system (ASOS) from the U.S.A.’s National Climatic Data Center (NCDC). Several programmatic tools available in Python are used to automate the parsing of weather data, as well as visualizing the resulting data.
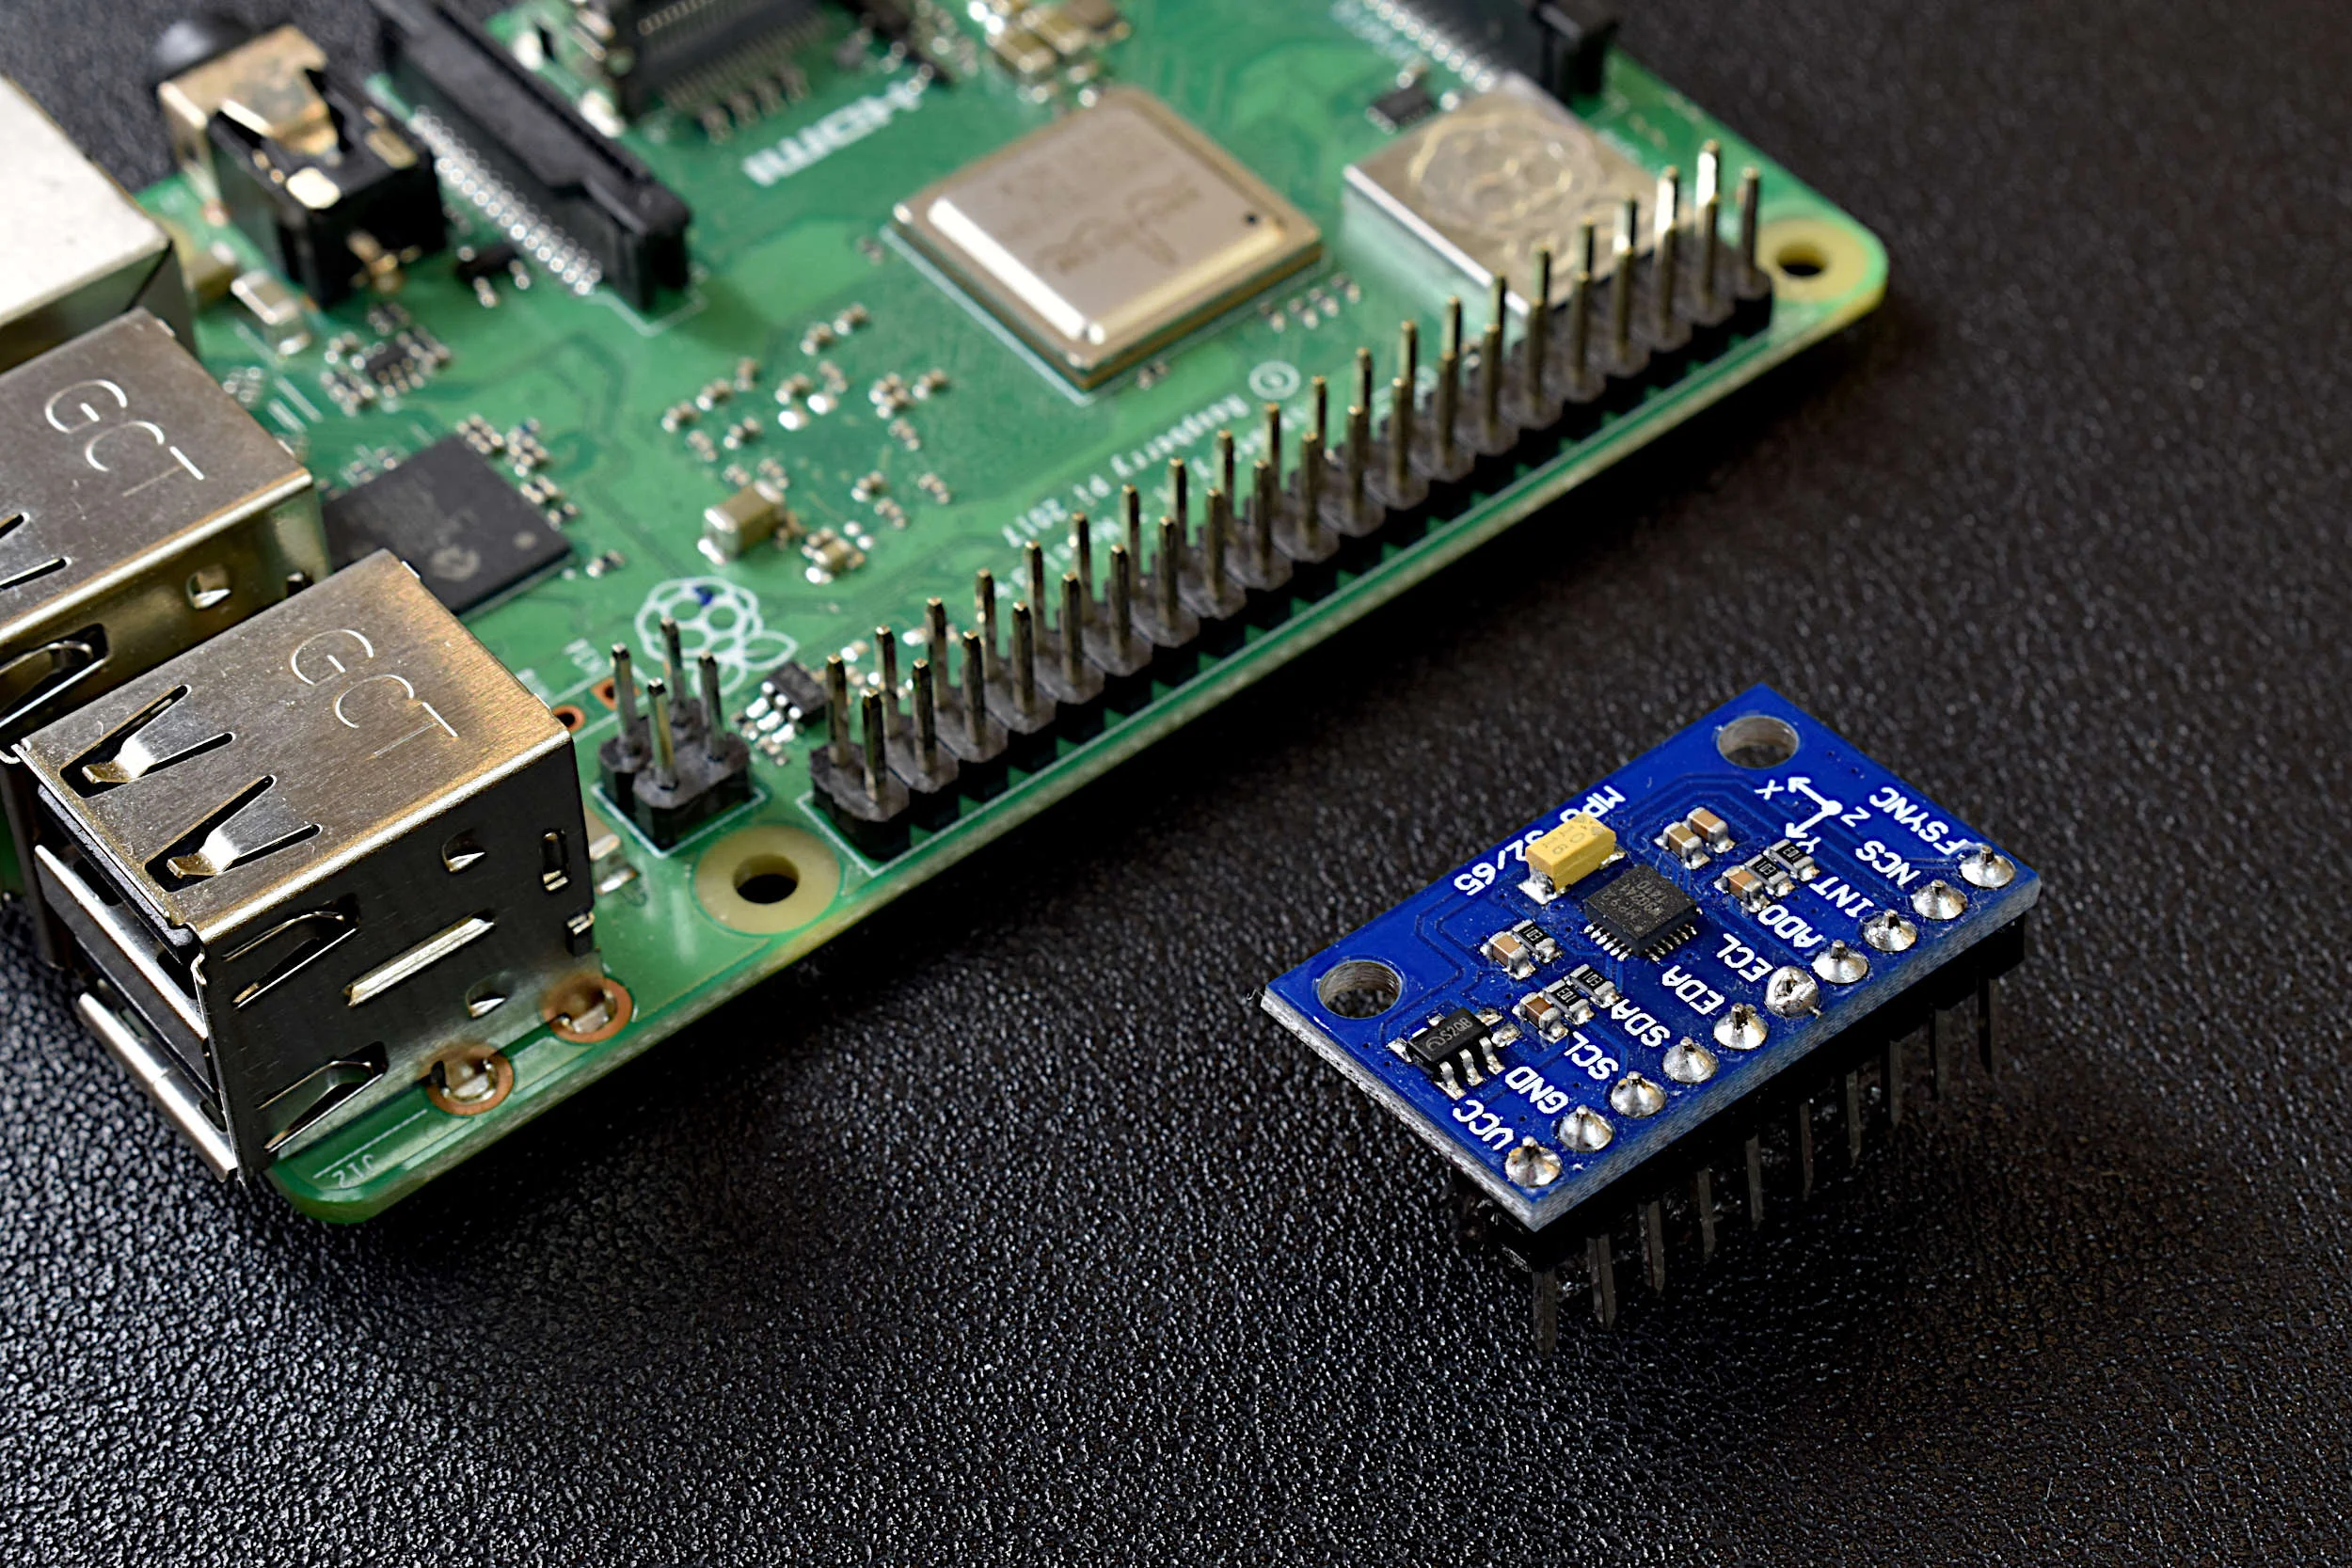
Accelerometer, Gyroscope, and Magnetometer Analysis with Raspberry Pi Part I: Basic Readings
A Raspberry Pi will be used to read the MPU9250 3-axis acceleration, 3-axis angular rotation speed, and 3-axis magnetic flux (MPU9250 product page can be found here). The output and limitations of the MPU9250 will be explored, which will help define the limitations of applications for each sensor. This is only the first entry into the MPU9250 IMU series, where in the breadth of the articles we will apply advanced techniques in Python to analyze each of the 9-axes of the IMU and develop real-world applications for the sensor, which may be useful to engineers interested in vibration analysis, navigation, vehicle control, and many other areas.
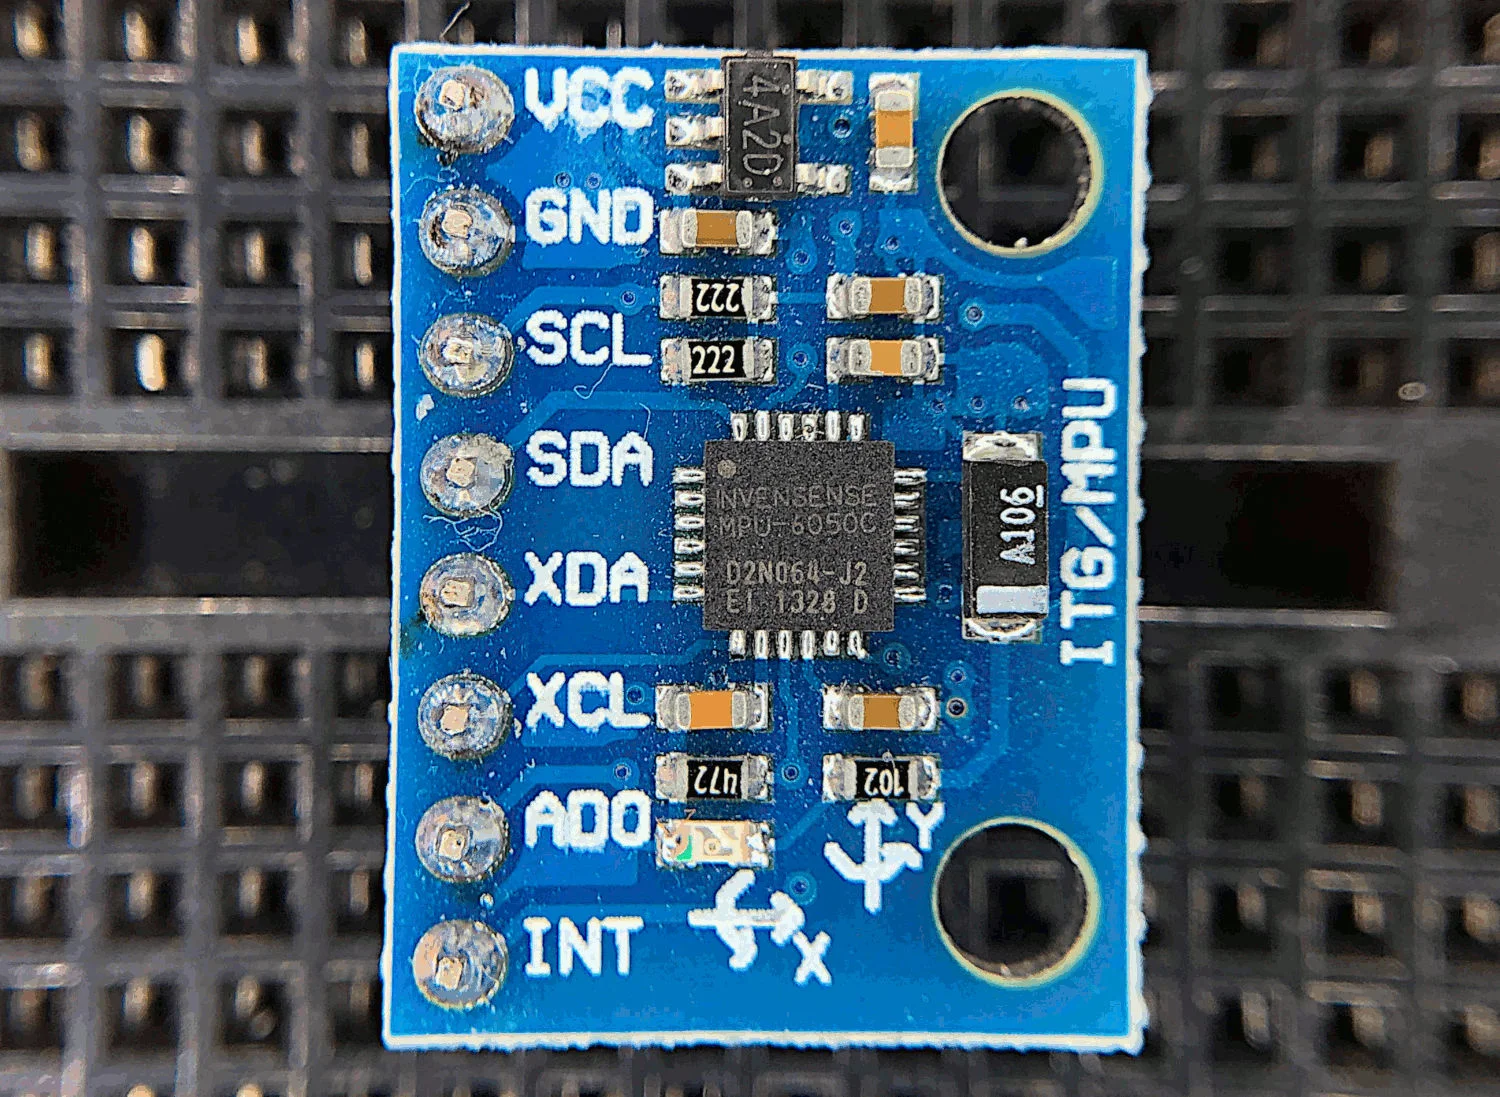
MPU6050 Arduino High-Frequency Accelerometer and Gyroscope Data Saver
The MPU6050 is a 6-DoF (degree of freedom) accelerometer and gyroscope that is designed for inexpensive, small-scale, and efficient approximation of motion. Accelerometers and gyroscopes are used in smart phones for orientation detection, vibration analysis in vehicles and machines, and even camera stabilization and motion tracking. There are countless applications for accelerometers and gyroscopes, and with devices as accessible as the MPU6050, we can really test the limits of the technology.
Infrared Thermometry Theory and Applications with Arduino and Python
In this tutorial, I will explore black body radiation, infrared detectors, and the relationship between temperature and emissivity - all with the intention of exploring how infrared (IR) detectors measure temperature from a distance. Arduino will be used, along with an MLX90614 IR thermometer, and a thermocouple for true-temperature approximation of each object. Planck’s discovery of energy quanta and their relationship to thermodynamics is the basis for radiation detectors and infrared temperature sensors. We will use Planck’s law to derive a usable equation that can relate the radiation measured by an infrared sensor to the temperature of a radiative object.