
Water Metering with the WaWiCo USB Kit and Raspberry Pi
For this project, we will be comparing the WaWiCo sensor with a conventional hall-effect mechanical flow meter. The WaWiCo sensor introduces a novel method for water metering, with non-invasive acoustic analysis. The benefit of the WaWiCo method is evident during the mechanical flow meter analysis, where we need to match pipe diameters and fittings and ensure that the flow terminates at a point. Otherwise, mechanical meters require cutting in piping — which is not an option for many users. Using a Raspberry Pi computer and a WaWiCo USB water meter kit, the frequency content of water flow for a given pipe is analyzed. Additionally, this frequency response will be used to correlate to the flow rate (in L/s) approximated by the mechanical flow meter. This brings us one step closer to being able to non-invasively measure water flow using the WaWiCo method.

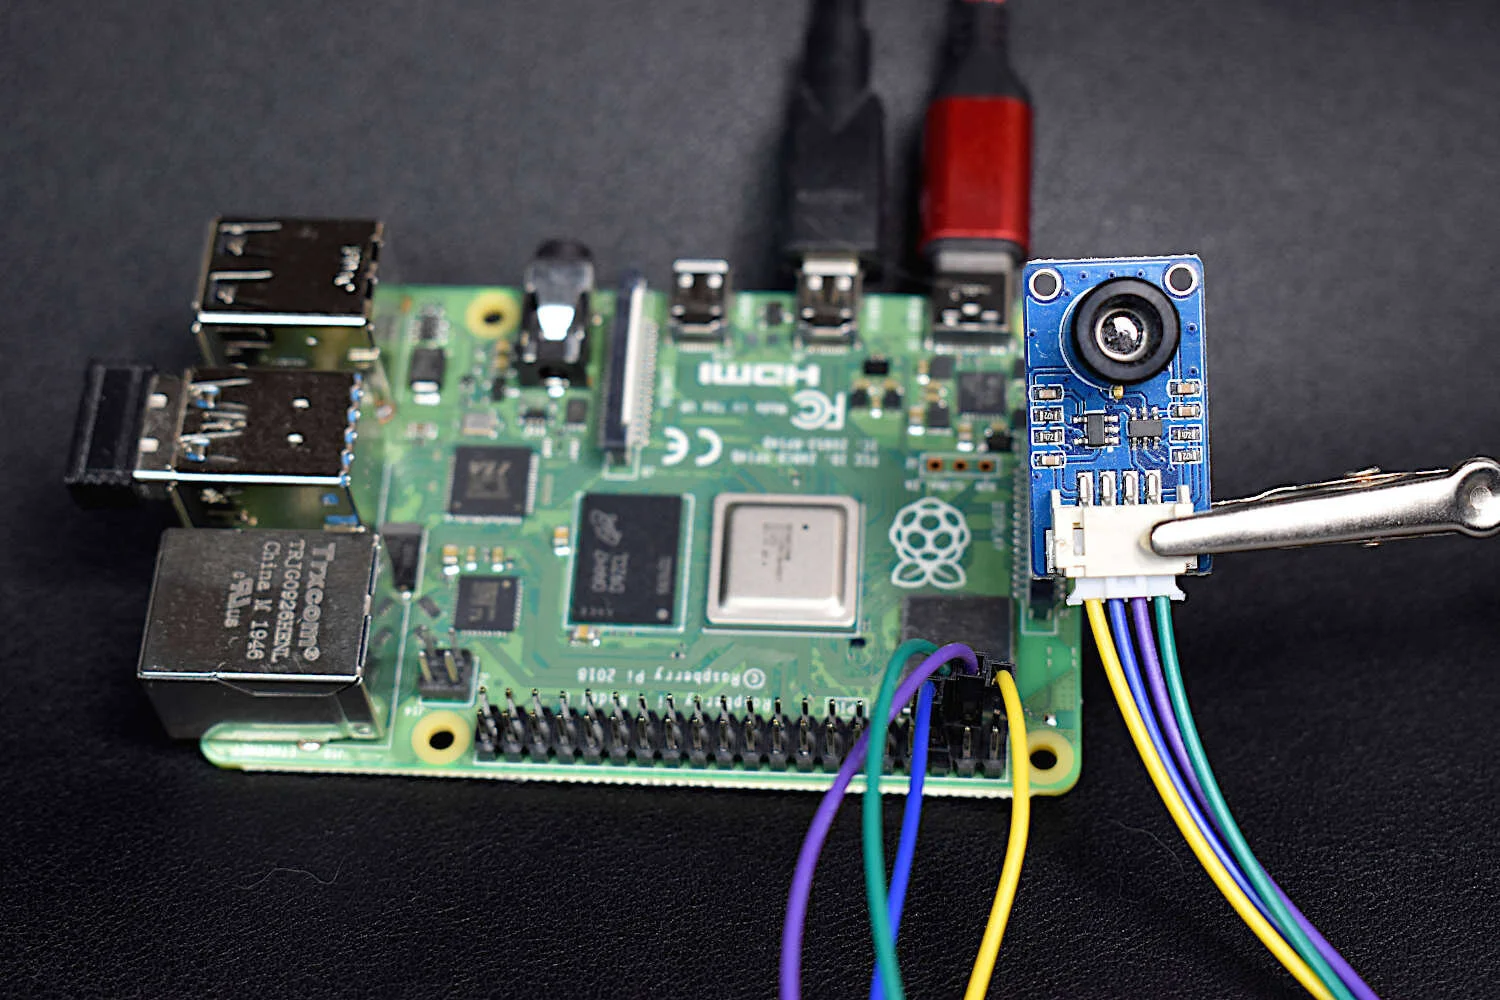
Audio Processing with The QuadMic 4-Microphone Array on the Raspberry Pi
The QuadMic Array is a 4-microphone array based around the AC108 quad-channel analog-to-digital converter (ADC) with Inter-IC Sound (I2S) audio output capable of interfacing with the Raspberry Pi. The QuadMic can be used for applications in voice detection and recognition, acoustic localization, noise control, and other applications in audio and acoustic analysis. The QuadMic will be connected to the header of a Raspberry Pi 4 and used to record simultaneous audio data from all four microphones. Some signal processing routines will be developed as part of an acoustic analysis with the four microphones. Algorithms will be introduced that approximate acoustic source directivity, which can help with understanding and characterizing noise sources, room and spatial geometries, and other aspects of acoustic systems. Python is also used for the analysis. Additionally, visualizations will aid in the understanding of the measurements and subsequent analyses conducts in this tutorial.

Gyroscope and Accelerometer Calibration with Raspberry Pi
This is the second entry into the series entitled "Calibration of an Inertial Measurement Unit (IMU) with Raspberry Pi" where the gyroscope and accelerometer are calibrated using our Calibration Block. Python is used as the coding language on the Raspberry Pi to find the calibration coefficients for the two sensors. Validation methods are also used to integrate the IMU variables to test the calibration of each sensor. The gyroscope shows a fairly accurate response when calibrated and integrated, and found to be within a degree of the actual rotation test. The accelerometer was slightly less accurate, likely due to the double integration required to approximate displacement and the unbalanced table upon which the IMU was calibrated. Filtering methods are also introduced to smooth the accelerometer data for integration. The final sensor, the magnetometer (AK8963), will be calibration in the next iteration of this series.
High Resolution Thermal Camera with Raspberry Pi and MLX90640
Thermal cameras are similar to standard cameras in that they use light to record images. The most significant distinction is that thermal cameras detect and filter light such that only the infrared region of the electromagnetic spectrum is recorded, not the visible region [read more about infrared cameras here]. Shortly after the discovery of the relationship between radiation and the heat given off by black bodies, infrared detectors were patented as a way to predict temperature via non-contact instrumentation. In recent decades, as integrated circuits shrink in size, infrared detectors have become commonplace in applications of non-destructive testing, medical device technology, and motion detection of heated bodies. The sensor used here is the MLX90640 [datasheet], which is a 768 pixel (24x32) thermal camera. It uses an array of infrared detectors (and likely filters) to detect the radiation given off by objects. Along with a Raspberry Pi computer, the MLX90640 will be used to map and record fairly high-resolution temeperature maps. Using Python, we will be able to push the RPI to its limits by interpolating the MLX90640 to create a 3 frame-per-second (fps) thermal camera at 240x320 pixel resolution.

Multiple Object Detection with Python and Raspberry Pi
The picamera and edge detection routines will be used to identify individual objects, predict each object’s color, and approximate each object’s orientation (rotation). By the end of the tutorial, the user will be capable of dividing an image into multiple objects, determining the rotation of the object, and drawing a box around the subsequent object.

Image Processing Object Detection with Raspberry Pi and Python
In this entry, image processing-specific Python toolboxes are explored and applied to object detection to create algorithms that identify multiple objects and approximate their location in the frame using the picamera and Raspberry Pi. The methods used in this tutorial cover edge detection algorithms as well as some simple machine learning algorithms that allow us to identify individual objects in a frame.

Arduino + VL53L1X Time of Flight Distance Measurement
Time of flight (ToF) is an approximation of the time it takes a traveling wave to come in contact with a surface and reflect back to the source. Time of flight has applications in automotive obstacle detection, resolving geographic surface composition, and computer vision and human gesture recognition. In the application here, the VL53L1X ToF sensor will be used to track the displacement of a ping pong ball falling down a tube. We can predict the acceleration and behavior of a falling ping pong ball by balancing the forces acting on the ball, and ultimately compare the theory to the actual displacement tracked by the time of flight sensor.

Raspberry Pi Vibration Analysis Experiment With a Free-Free Bar
Using the Euler-Bernoulli beam theory, the resonant frequencies of a beam will be measured using a thin film piezoelectric transducer and compared to the theoretical calculations. A Raspberry Pi will be used along with a high-frequency data acquisition system (Behringer UCA202, sample rate: 44.1kHz) and the Python programming language for analysis. The fast fourier transform will allow us to translate the subtle beam deflections into meaningful frequency content. This tutorial is meant to introduce Python and Raspberry Pi as formidable tools for vibration analysis by using measurements as validation against theory.