Arduino Sensor Data Logging and Visualization on iPhone
“As an Amazon Associates Program member, clicking on links may result in Maker Portal receiving a small commission that helps support future projects.”
Wireless data collection still remains an innovative component in the development of electronics and new hardware technologies. The need for wireless datalogging is, at least in part, due to the increased use of portable devices and wearables in daily life. Electronics are still getting smaller and denser through advancements made in mechanical, chemical, thermal, and packaging methods prevalent in the integrated circuit industry [read more about integrated circuits here and read up on Moore's Law here ]. Thus, there is a need to test devices in new and novel scenarios where long cables, large equipment, big budgets, and limited power availability, to name a few, are unrealistic and/or counterprouctive to the innovation lifecycle. In a previous tutorial, we delved into the MakerBLE Arduino board, which is a low-power, tiny, Bluetooth Low Energy-enabled variation of the Nordic nRF52840. It will allow us to communicate with an iOS device and record data directly from a range of different sensors and peripherals. In this entry, the MakerBLE will use its I2C port to read ambient temperature and barometric pressure from a BMP280 sensor, and transmit the results to the BLExAR iOS app. The BLExAR app will then plot the incoming data points for us to visualize and monitor over time. We will use the Arduino IDE and platform to program the MakerBLE and use existing libraries to read from the BMP280 I2C sensor. This will be the second entry in a series of tutorials (click click here for part I) centered around low-power, BLE-enabled, portable microcontroller projects; which will encompass a range of topics involving data collection, sensor peripherals (UART, SPI, I2C), message transmission, BLE peripheral/central communication, environmental monitoring, and other engineering and technology fundamentals.
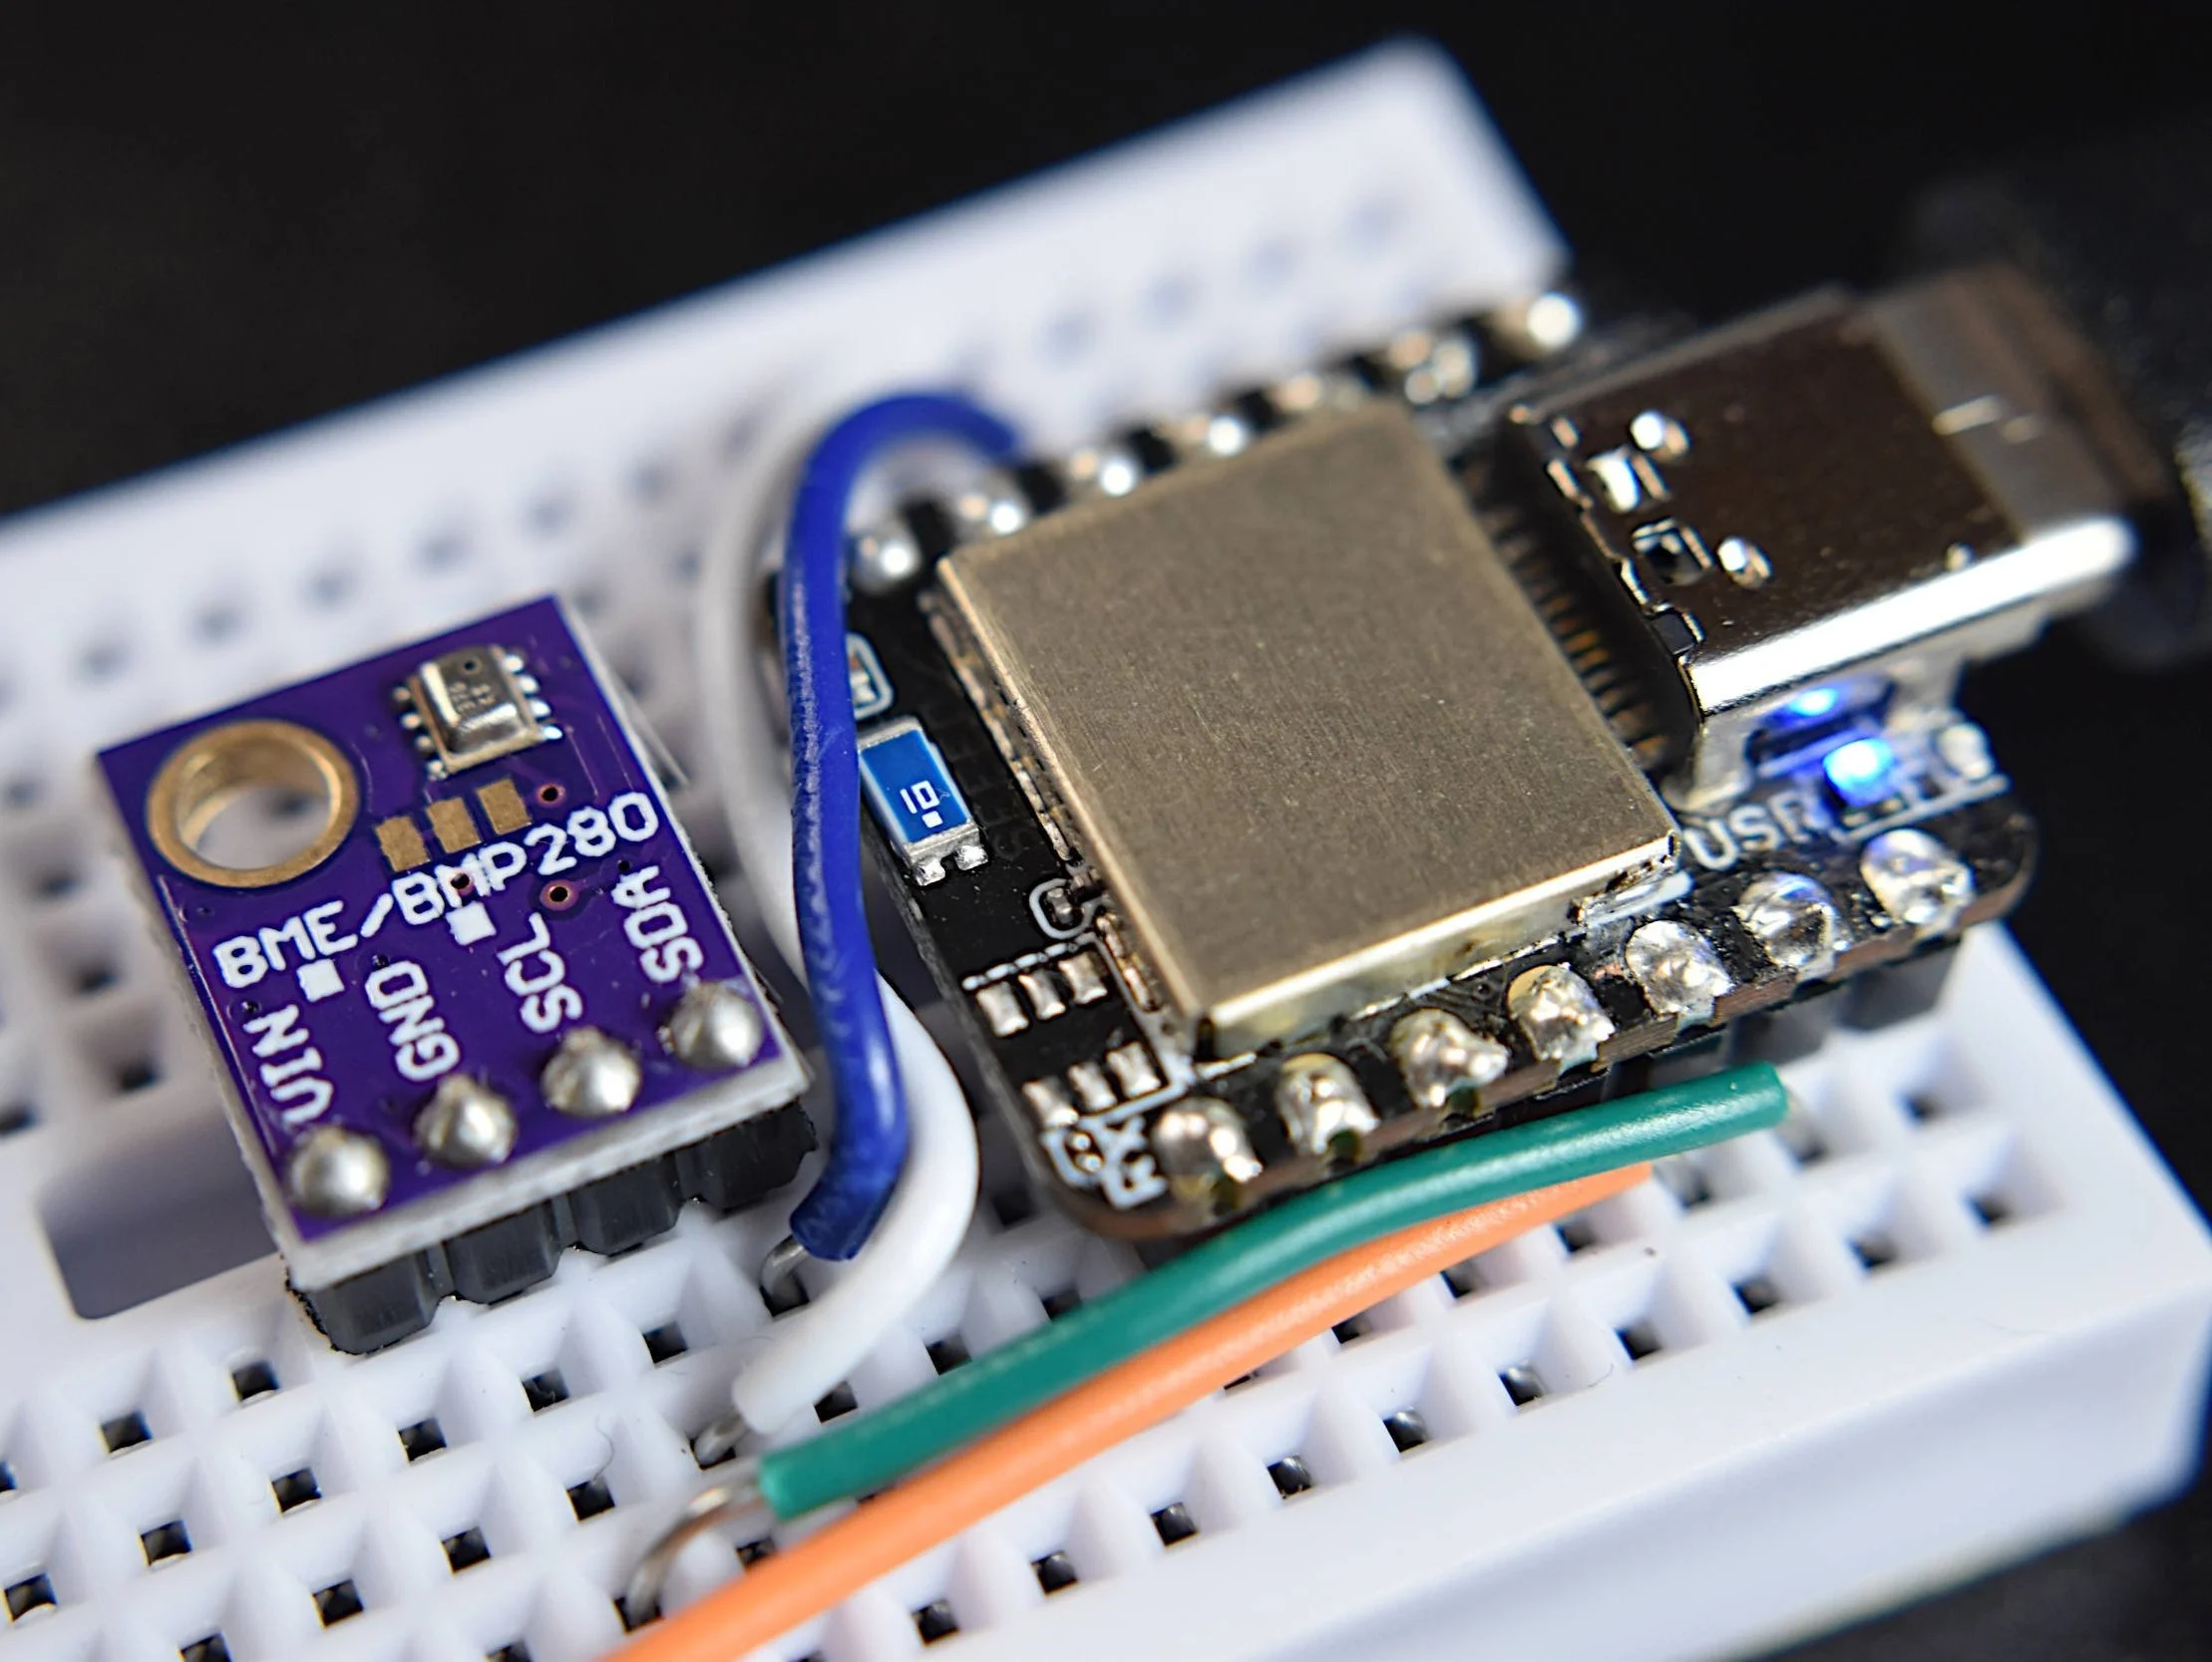
The MakerBLE board is the centerpiece to this entire tutorial series, which is why we are exploring the board’s capabilities through a series of projects involving sensors, motors, peripherals, and power constraints. Because the MakerBLE has Nordic’s nRF52840 BLE chip at its core, we are also connecting many projects to a smartphone using the BLExAR iOS app. In this entry, we are testing the MakerBLE’s ability to read a common environmental sensor (BMP280) through its Inter-Integrated Circuit (I2C) port and transmit that data over Bluetooth. The parts list to follow along with this project is given below for reference:

The MakerBLE board is a Bluetooth Low Energy (BLE) microcontroller development board based on Nordic’s nRF52840 chip. The MakerBLE acts as an Arduino board and a BLE-enabled device. It has much of the functionality of classic Arduino boards, while also having an integrated BLE chip capable of communicating via BLE 5.0. This means that many Arduino projects can be Bluetooth-enabled with just a few lines of code and the BLExAR app!
→ Getting Started Tutorial for MakerBLE Board ←
Included in the MakerBLE Package:
1x MakerBLE Board
2x 7-Pin Header
1x Black USB-C to USB2.0 Cable (1m long)
Some Features of the MakerBLE Board:
Arduino Bootloader
Nordic nRF52840, ARM® Cortex™-M4 32-bit processor with FPU operating at 64 MHz
3.3V Operating Voltage and Logic
3.3V-5V Input voltage (3.7V LiPo Battery Compatible)
Ultra-low sleep power: 5 μA, deep sleep model
Wireless capabilities: Bluetooth 5.0, NFC, and ZigBee module with onboard antenna
Multiple Peripherals: 1x Reset button, Ix UART, 1x IIC, 1x SPI, 1x NFC, 1x SWD, 11x GPIO, 6x ADC, 1x Three-in-one LED,1x User LED
Onboard 2 MB flash
Single-sided components, surface mounting design (low profile)
14 Available I/O Pins: 11 Digital, 6 Analog
Physical Dimensions: 21mm x 17.5mm
Weight: 3 g (Unsoldered), 5g (Soldered)
Arduino IDE Compatible
GitHub Repository with example scripts and projects
For the MakerBLE getting started guide (installing Arduino board package, pinout diagrams, etc.), please see the link below:

In the next section, the reading and testing of the sensor connection will be explored and explained.
The BMP280 is an absolute barometric pressure sensor designed for mobile phones, smart watches, and GPS modules. It also contains a high-resolution temperature sensor that makes the sensor ideal for environmental monitoring. The BMP280 can also be used to estimate changes in altitude, which can be useful for applications in navigation. The BMP280 has been used in a variety of maker projects ranging from indoor/outdoor position tracking to ambient condition monitoring for scientific experiments. The BMP280 is the perfect sensor for testing Arduino boards because it has widely used libraries and communicates via the I2C port, so it will allow us to test a few features of the MakerBLE while also giving us sanity checks based on our local environment.
A GitHub repository can be found for the MakerBLE board and contains many of the Arduino scripts used here and in other tutorials:

The GitHub repository for the MakerBLE will be periodically updated as projects develop and incubate. If a feature, sensor interaction or is desired, please use our contact page to notify us of your request.
We will be using Adafruit’s BMP280 library to read sensor data with the MakerBLE, so make sure to install it via the Arduino IDE’s Library Manager:

Install Adafruit’s BMP280 Library
In the Arduino IDE, navigate to: Sketch → Include Library → Manage Libraries. Type in BMP280 and install Adafruit’s library and its dependencies.
To test the Adafruit library and the wiring between the MakerBLE and BMP280 sensor, upload one of the sample sketches. Below, the “bmp280test.ino” example is given as a sample (with the alternate I2C address called and some minor edits):
/***************************************************************************
  This is a library for the BMP280 humidity, temperature & pressure sensor

  Designed specifically to work with the Adafruit BMP280 Breakout
  ----> http://www.adafruit.com/products/2651

  These sensors use I2C or SPI to communicate, 2 or 4 pins are required
  to interface.

  Adafruit invests time and resources providing this open source code,
  please support Adafruit andopen-source hardware by purchasing products
  from Adafruit!

  Written by Limor Fried & Kevin Townsend for Adafruit Industries.
  BSD license, all text above must be included in any redistribution
 ***************************************************************************/

#include <Wire.h>
#include <Adafruit_BMP280.h>

Adafruit_BMP280 bmp; // I2C

void setup() {
  Serial.begin(9600);
  Serial.println(F("BMP280 test"));
  unsigned status;
  status = bmp.begin(BMP280_ADDRESS_ALT, BMP280_CHIPID);

  /* Default settings from datasheet. */
  bmp.setSampling(Adafruit_BMP280::MODE_NORMAL,     /* Operating Mode. */
                  Adafruit_BMP280::SAMPLING_X2,     /* Temp. oversampling */
                  Adafruit_BMP280::SAMPLING_X16,    /* Pressure oversampling */
                  Adafruit_BMP280::FILTER_X16,      /* Filtering. */
                  Adafruit_BMP280::STANDBY_MS_500); /* Standby time. */
}

void loop() {
    Serial.print(F("Temperature = "));
    Serial.print(bmp.readTemperature());
    Serial.println(" *C");

    Serial.print(F("Pressure = "));
    Serial.print(bmp.readPressure());
    Serial.println(" Pa");

    Serial.print(F("Approx altitude = "));
    Serial.print(bmp.readAltitude(1013.25)); /* Adjusted to local forecast! */
    Serial.println(" m");

    Serial.println();
    delay(1000);
}
Opening the serial monitor should result in the temperature, pressure, and approximate altitude being outputted. Below is an example screenshot of the MakerBLE reading the BMP280 sensor:

BMP280 Serial Monitor Readout
Testing the BMP280 sensor using the MakerBLE Arduino board.
In the next section, the temperature, pressure, and altitude data will be sent to an iOS device and plotted in real time.
In this section, we will be using the BLExAR iOS app as a data collection tool. BLExAR is an integrated app that uses Bluetooth Low Energy to convert Arduino boards into iOS or Android-compatible devices. BLExAR permits smartphone users to control pins, record data from sensors, and send and receive general commands — all in one app. The BLExAR app is intended for makers, students, and engineers. It also includes the ability to plot data in real time, which is the focus of this section of the tutorial.
Below is a code snippet which carries out the following on the MakerBLE Arduino board:
Creates a BLE service that connects with the BLExAR app
Adds a characteristic that writes and notifies BLExAR of data transmission
Starts the BLE service
Starts the BMP280 sensor
Begins advertising the MakerBLE as a BLE device
Enters the loop that begins sending temperature, pressure, altitude (any or all via command-separated values) every 500 ms
/***************************************************************************
* Transmitting BMP280 to BLExAR iOS App using the MakerBLE Board
*  -- gathering pressure, temperature, and altitude simply and efficiently
*
*
*  by Josh Hrisko | Maker Portal LLC (c) 2022
*
*
***************************************************************************/

#include <Adafruit_BMP280.h>
#include <ArduinoBLE.h>

// Full list of Arduino BLE commands: https://github.com/arduino-libraries/ArduinoBLE
BLEService myService("0000ffe0-0000-1000-8000-00805f9b34fb"); // BLExAR BLE service
BLECharacteristic myCharacteristic("FFE1", BLEWrite | BLENotify,0x10);

Adafruit_BMP280 bmp; // BMP280 I2C device
long previousMillis = 0;  // last time the BMP280 was read, in [millisec]
int TXdelay = 500; // delay between sends

void setup() {
  if (!BLE.begin()) {
    while (1); // wait for BLE
  }

  if (!bmp.begin(BMP280_ADDRESS_ALT, BMP280_CHIPID)) {
    while (1) delay(50); // wait for BMP280 sensor to start/settle
  }

  // Build scan response data packet
  myService.addCharacteristic(myCharacteristic); // add BLE characteristic
  BLE.addService(myService); // add BLE service
  BLEAdvertisingData scanData;
  scanData.setLocalName("MakerBLE"); // set name
  BLE.setDeviceName("MakerBLE"); // set name

  BLE.setScanResponseData(scanData);// set data for scanners (BLE apps)
  BLE.advertise(); // advertise BLE device

  // raw values for fastest response times
  // full list: https://github.com/adafruit/Adafruit_BMP280_Library/blob/master/keywords.txt
  bmp.setSampling(Adafruit_BMP280::MODE_FORCED,   // Operating Mode
                  Adafruit_BMP280::SAMPLING_X1,   // Temp. oversampling
                  Adafruit_BMP280::SAMPLING_X1,   // Pressure oversampling
                  Adafruit_BMP280::FILTER_OFF,    // Filtering
                  Adafruit_BMP280::STANDBY_MS_1); // Standby time
}

void loop() {
  // wait for a BLE central connection
  BLEDevice central = BLE.central();

  // if a central is connected to the peripheral:
  if (central) {
    while (central.connected()) {
      long currentMillis = millis();
      if (currentMillis - previousMillis >= TXdelay) { // send after delay
        previousMillis = currentMillis;
        writeBMP280Str(); // write data
      }
    }
  }
}

void writeBMP280Str(){
    if (bmp.takeForcedMeasurement()) { // check for valid data measurement

    float temp, pres, alti; // pre-alloc for measurements
    String strToPrint = ""; // string to print

    temp = bmp.readTemperature(); // read temperature [C]
    pres = bmp.readPressure()/100.0; // read pressure [hPa]
    alti = bmp.readAltitude(1017.5); // approx altitude [m], with hPa pressure ref. at sea level

//    strToPrint+= String(temp,2); strToPrint+=","; // uncomment to send temp
//    strToPrint+= String(pres,2); strToPrint+=","; // uncomment to send pressure
    strToPrint+= String(alti,2); strToPrint+="\n"; // uncomment to send altitude

    writeBLE(strToPrint); // send string over BLE
  } else {
    writeBLE("Invalid BMP280 Reading");
  }
}


void writeBLE(String message){
  byte plain[message.length()]; // message buffer
  message.getBytes(plain, message.length()); // convert to bytes
  myCharacteristic.writeValue(plain,message.length()); // writing to BLE
}
After the code above is uploaded to the MakerBLE board, the BLExAR app can be opened and the user can search for the MakerBLE board via the search table:

Scanning for the MakerBLE on BLExAR
Make sure the code is uploaded to the MakerBLE Arduino board and that the iOS device has Bluetooth turned on.
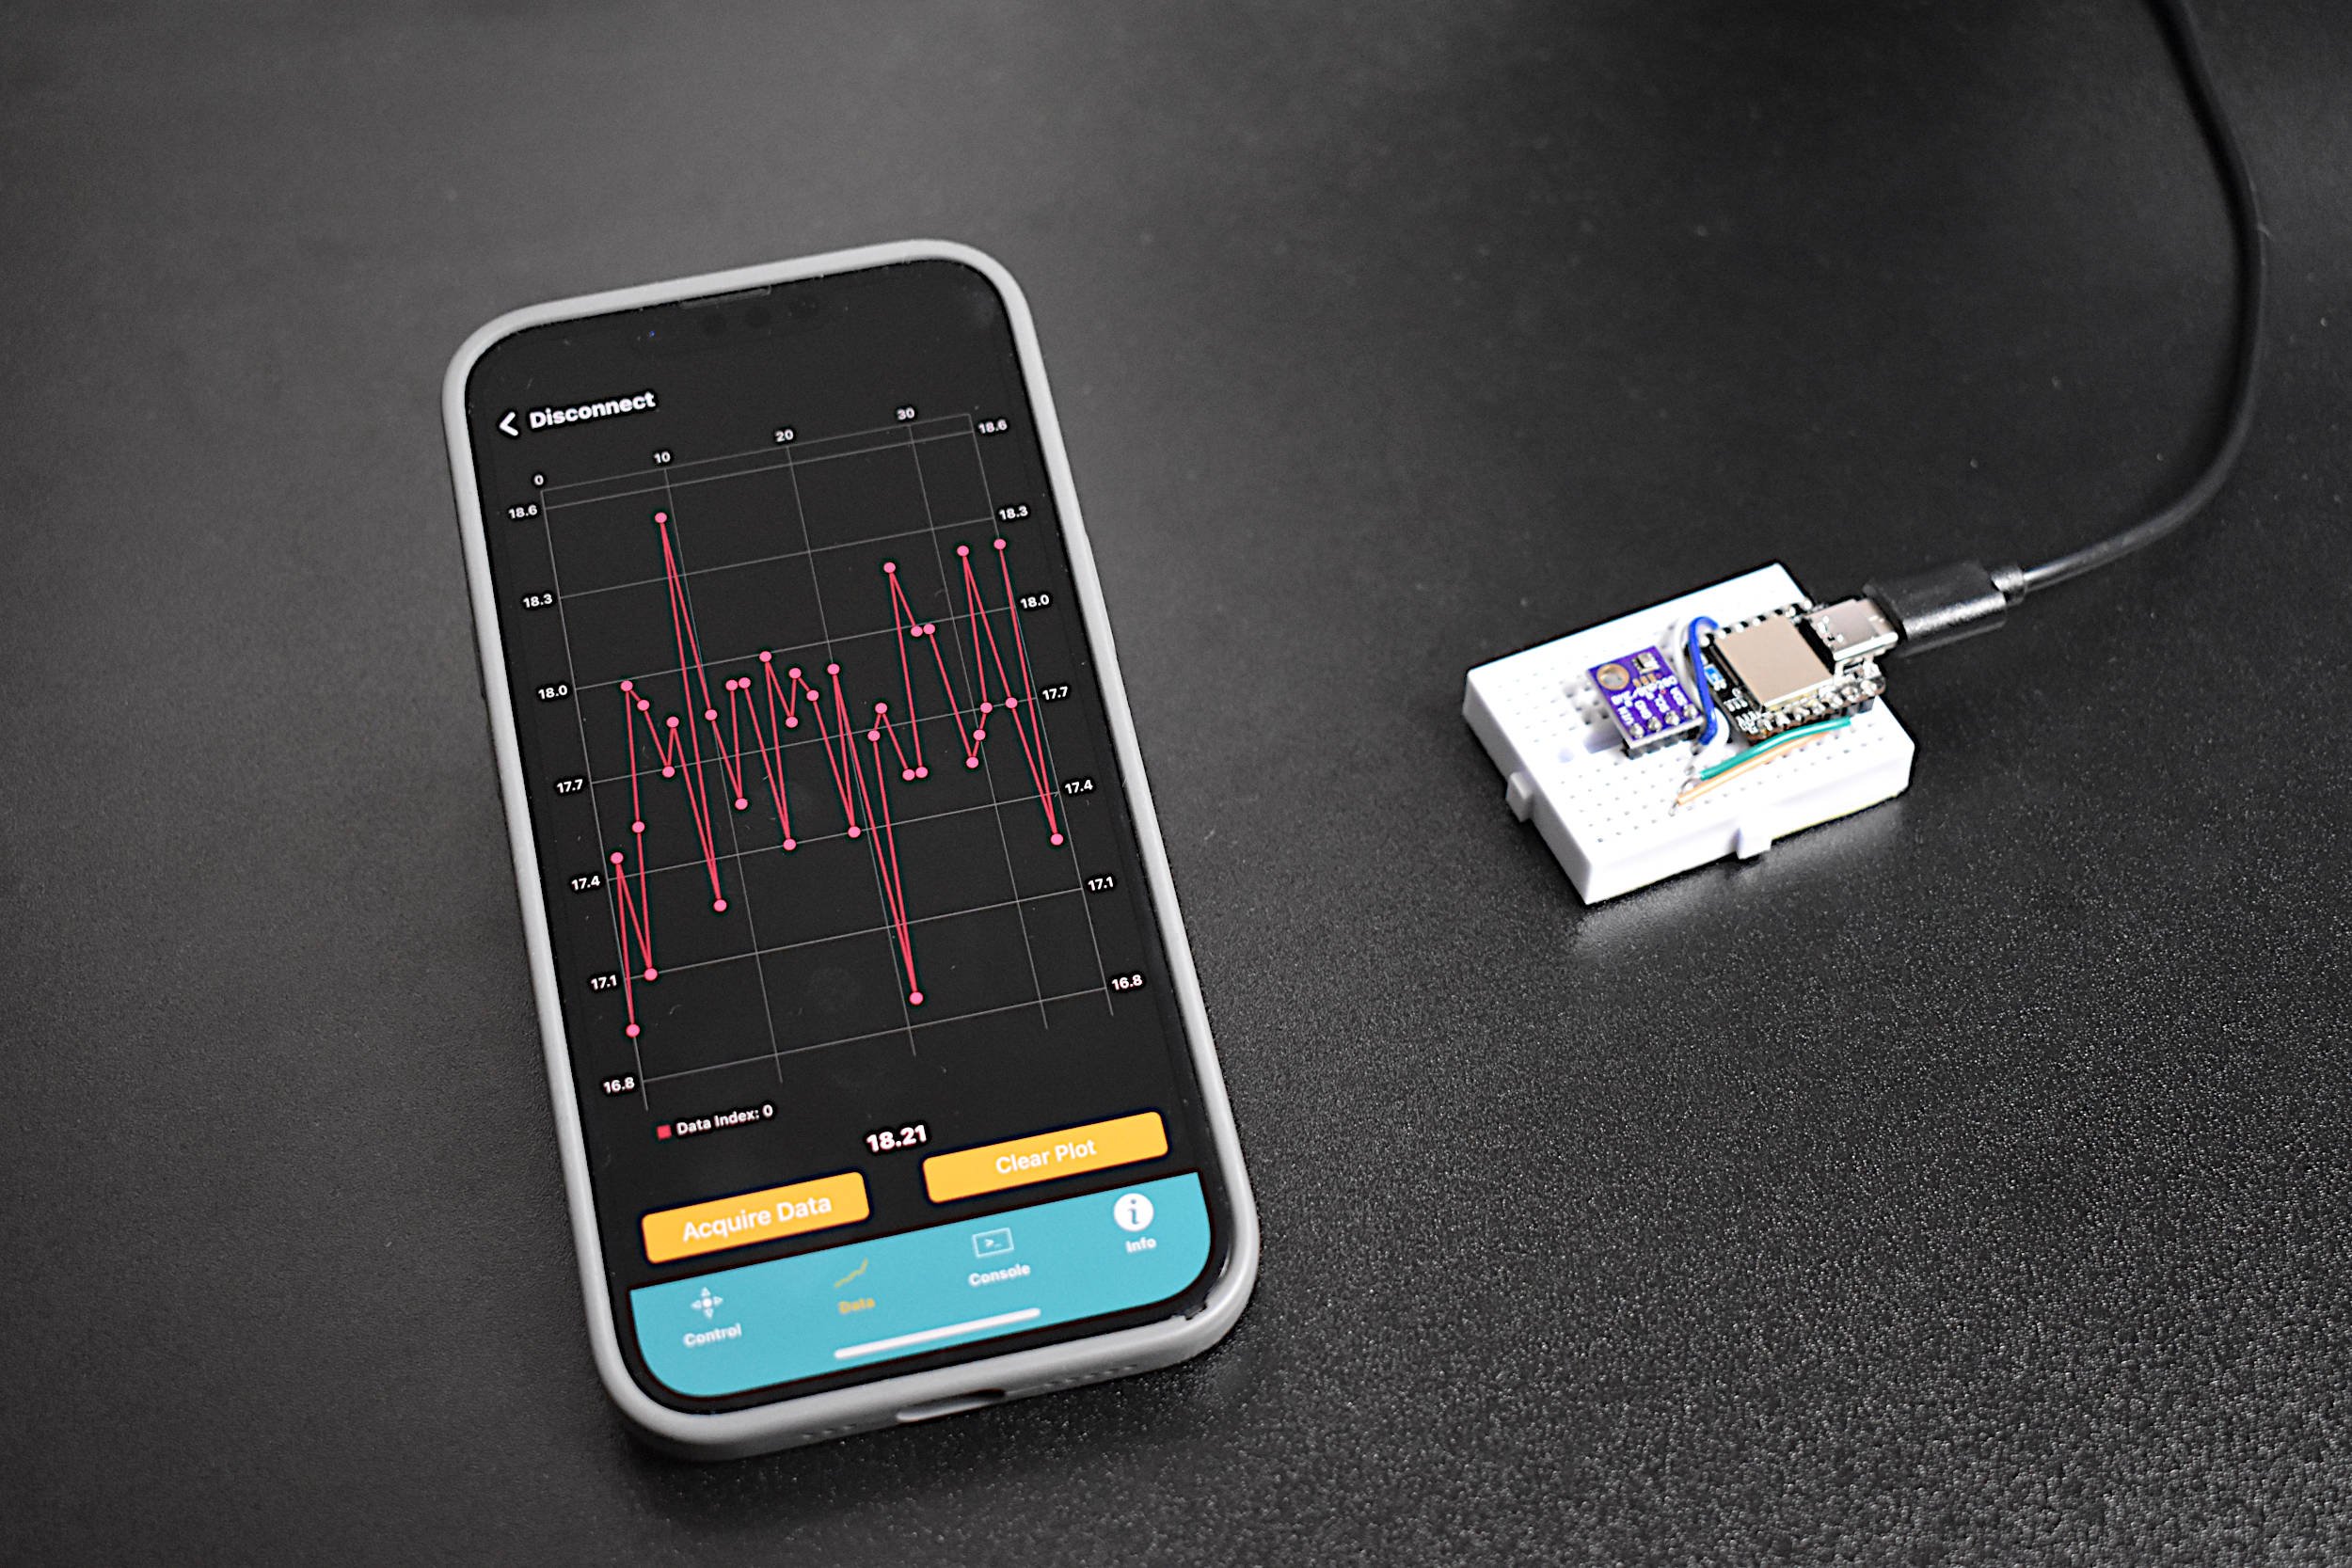
After connecting to the MakerBLE Arduino board, users should navigate to the “Data” tab of the BLExAR app. Assuming everything up to this point has been successful, data should be plotting in real-time similar to the GIF below:
Now we have a working Arduino + iOS data logger! The data can also be saved in real time via the “Acquire Data” button. When the user is finished collecting their data, they can press “Stop Acquisition” to start an email that sends the data to their own email account. This will provide users with a comma-separated value (CSV) file containing their gathered data for later analyses.
This is the second entry into the tutorial series centered around the MakerBLE Arduino board. Using the BLExAR iOS app again, we were able to monitor the incoming data from the MakerBLE board, plot the values, and save them to a comma-separated value (CSV) file. The data being sent was read from a BMP280 sensor over the I2C port by the MakerBLE board. Temperature, atmospheric pressure, and approximate altitude were all sent over the BLE connection with an iPhone.
With an nRF52840 BLE SoC at its core, the MakerBLE allows users to receive and send messages, collect data, control GPIO pins, and read from sensors. The intention of this tutorial series is to explore remote control of motors, data collection from I2C, SPI, UART, I2S sensor peripherals, message and string text analyses, BLE peripheral/central communication protocols, and general electronics testing with the MakerBLE. The aim is to reduce average component size for maker projects to improve scalability of wearables and portables in the DIY electronics space. Stay tuned for the next entry into the series!