Capacitive Soil Moisture Sensor Calibration with Arduino
“As an Amazon Associates Program member, clicking on links may result in Maker Portal receiving a small commission that helps support future projects.”
Soil moisture can be measured using a variety of different techniques: gravimetric, nuclear, electromagnetic, tensiometric, hygrometric, among others [read about the specifics types of soil moisture sensors here]. The technique explored here uses a gravimetric technique to calibrate a capacitive-type electromagnetic soil moisture sensor. Capacitive soil moisture sensors exploit the dielectric contrast between water and soil, where dry soils have a relative permittivity between 2-6 and water has a value of roughly 80 [find more specific values here]. Accurate measurement of soil water content is essential for applications in agronomy and botany - where the under- and over-watering of soil can result in ineffective or wasted resources. With water occupying up to 60% of certain soils by volume, depending on the specific porosity of the soil, calibration must be carried out in every environment to ensure accurate prediction of water content [more on this here]. Luckily, the accuracy of measurement devices has been increasing while the cost of the sensors have been decreasing. In this experiment, an Arduino board will be used to read the analog signal from the capacitive sensor, which will output voltage values which can be calibrated to volumetric soil moisture content via gravimetric methods (using volume and weight of dry and wet soil).
Parallel-Plate Capacitor
As the name suggests, capacitive soil moisture sensors use the working principle of a capacitor to approximate the moisture content in soil. Capacitance is defined as the amount of charge a material can store under a given applied electrical potential [Engineering Electromagnetics textbook]. Commonly, capacitors are visualized as parallel-plate configurations similar to what is shown in the drawing below:

In equation form, capacitance can be written as the ratio between charge and electrical potential :
And this is the commonly held relationship between the geometric properties of a parallel plate capacitor and the dielectric material present in the capacitor.
Planar Capacitance from Moisture in Soil
The capacitance measured by a soil moisture sensor is different from a parallel plate capacitor in that the plates of the capacitor are not parallel, but planar. This means that the plates are next to each other, rather than atop each other; and the dielectric material is the soil, rather than a thin layer pressed between the plates. This is visually demonstrated in the drawing below:

Finally, solving for the dielectric constant:
This essentially means that we can expect a relationship between the inverse of the voltage read by the sensor and the dielectric constant. In the next section, the volumetric water content will be separated from the dielectric constant.
Volumetric Water Content
The volumetric water content is the ratio of volume of liquid water to volume of soil. It is defined as [source]:
The above is a massive result! It states that the voltage reading taken from our capacitive-type electromagnetic soil moisture sensor can be related to the volumetric water content using a linear fit between the two via a slope, a, and intercept, b. In the next section, the parts list for calibrating this relationship will be introduced.
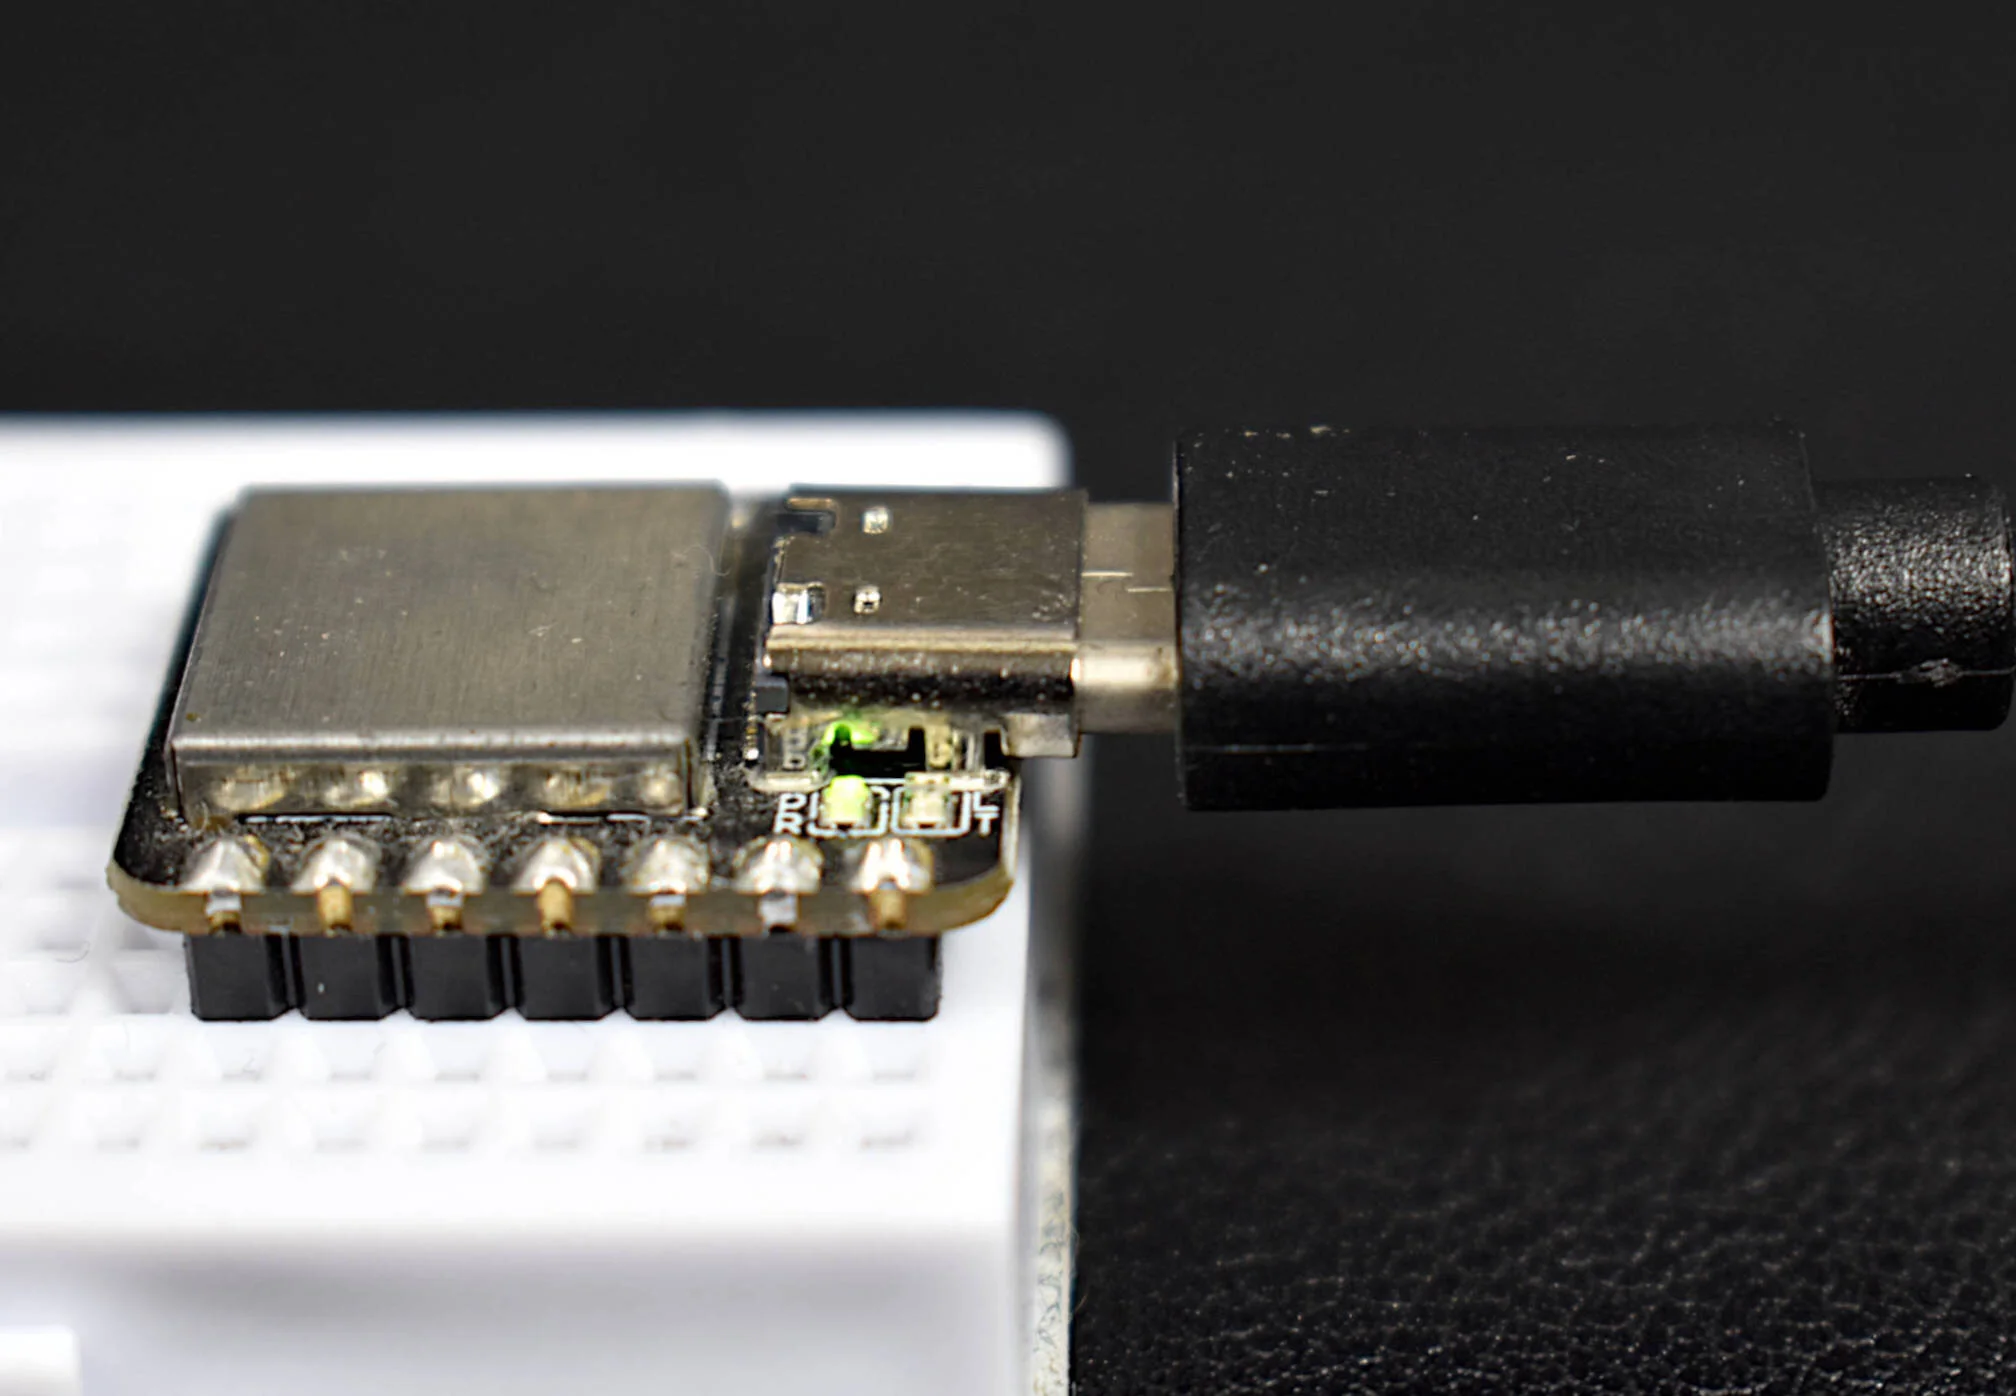
The parts used in this experiment will need to capture the two basic principles used in calibrating soil moisture sensors: measuring the volume and weight of soils, both moist and dry. Thus, along with the capacitive soil moisture sensor, a digital scale will be necessary, as well as a container or method to measure the volume of soil. The parts list used in this tutorial are given below, for reference:

Soil moisture can be measured using a variety of different techniques: gravimetric, nuclear, electromagnetic, tensiometric, hygrometric, among others. This sensor uses a capacitive method that exploits the dielectric properties of water in soil. Accurate measurement of soil water content is essential for applications in agronomy and botany - where the under- and over-watering of soil can result in ineffective or wasted resources.
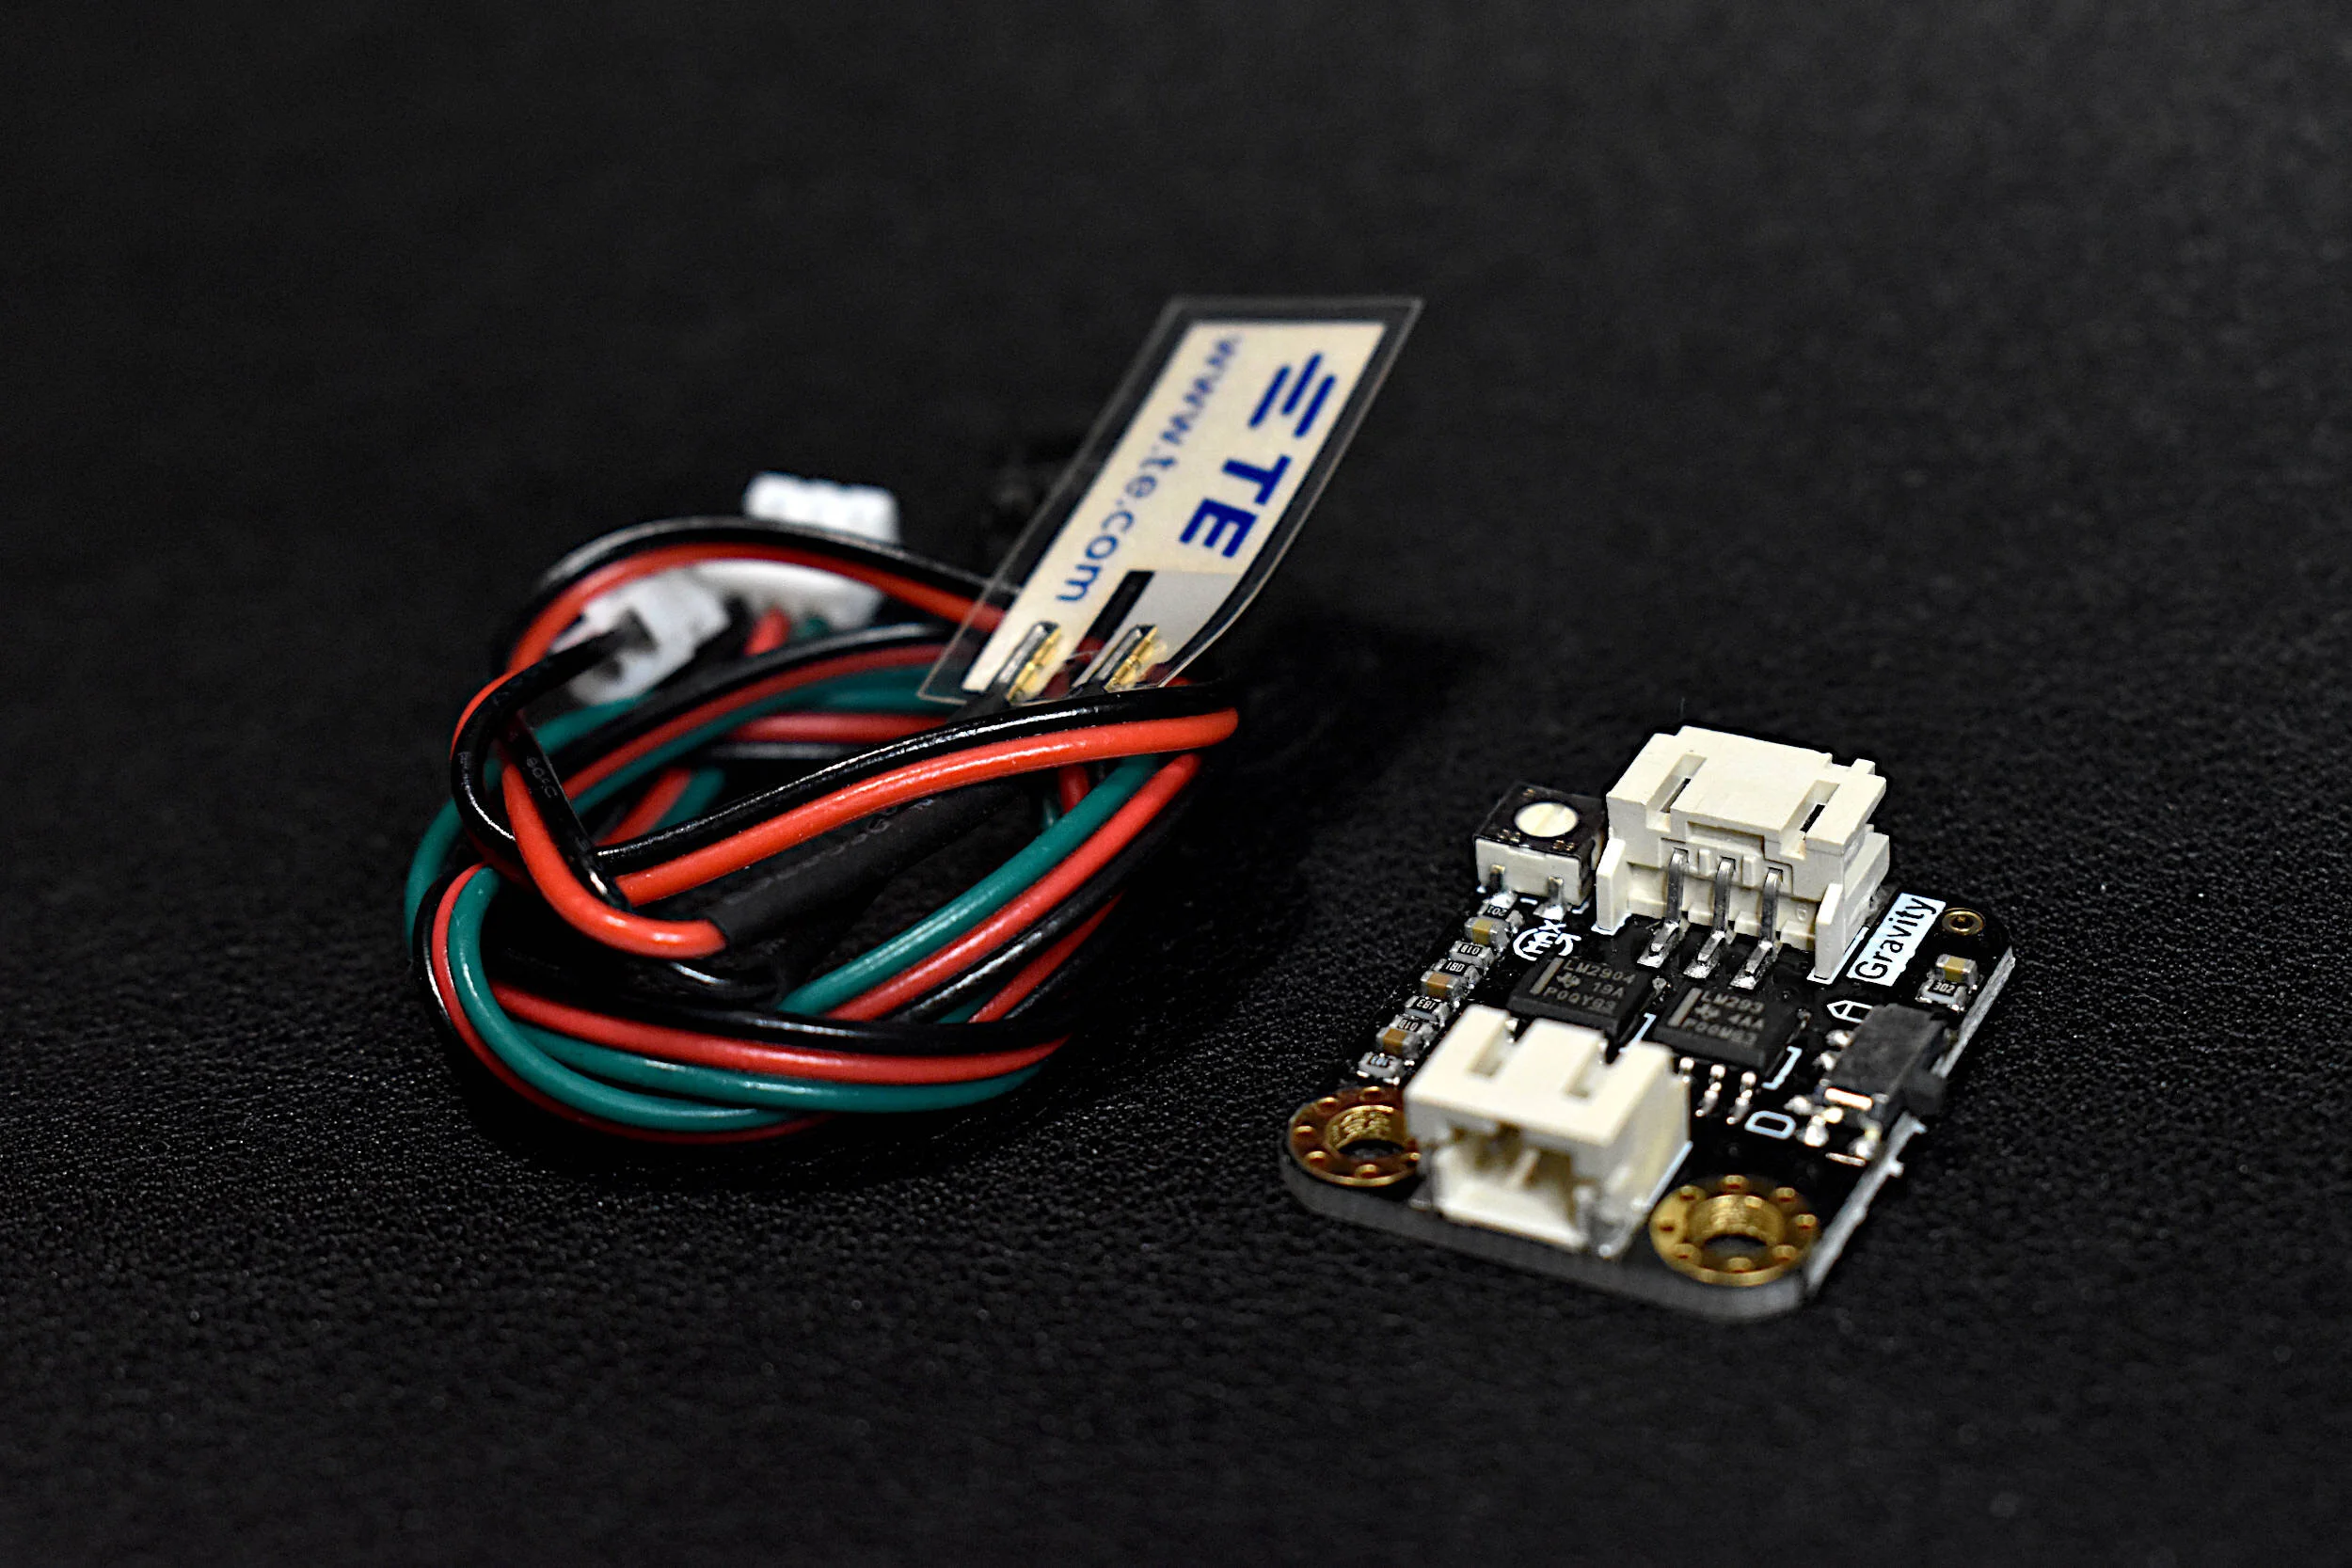
Included in the Capacitive Soil Moisture Sensor Package:
1x Capacitive Soil Moisture Sensor
1x 3-Wire Connector
Features of the Capacitive Soil Moisture Sensor:
3.3V - 5.0V Supply Range
3.3V Operating Range
Analog Output 1.5 - 3.3V
Correlated with Volumetric Water Content 0 % - 100%
Compatible with Arduino and Raspberry Pi
Full tutorial can be found on blog here.
1x Capacitive Soil Moisture Sensor - $7.00 [Our Store]
1x Arduino Uno Board - $13.00 [Our Store]
1x High Resolution Digital Scale With Calibration Masses - $25.00 [Our Store]
250ml Graduated Containers - $11.99 (6pcs) [Amazon]
Soil Samples - $8.97 (6pcs) [Amazon]
Mini Breadboard - $3.00 [Our Store]
Raspberry Pi 4 Computer - $55.00 [2GB from Our Store]
The soil samples referenced above can be substituted for any other type of soil based on the application. The soil was purchased because it arrives already dried, however, it was unnecessary as the soil needed to be moistened to break up the block of soil anyway. Therefore, it is recommended that a soil type be used that is somewhat dried already, and still loose enough to pack in a sensor.
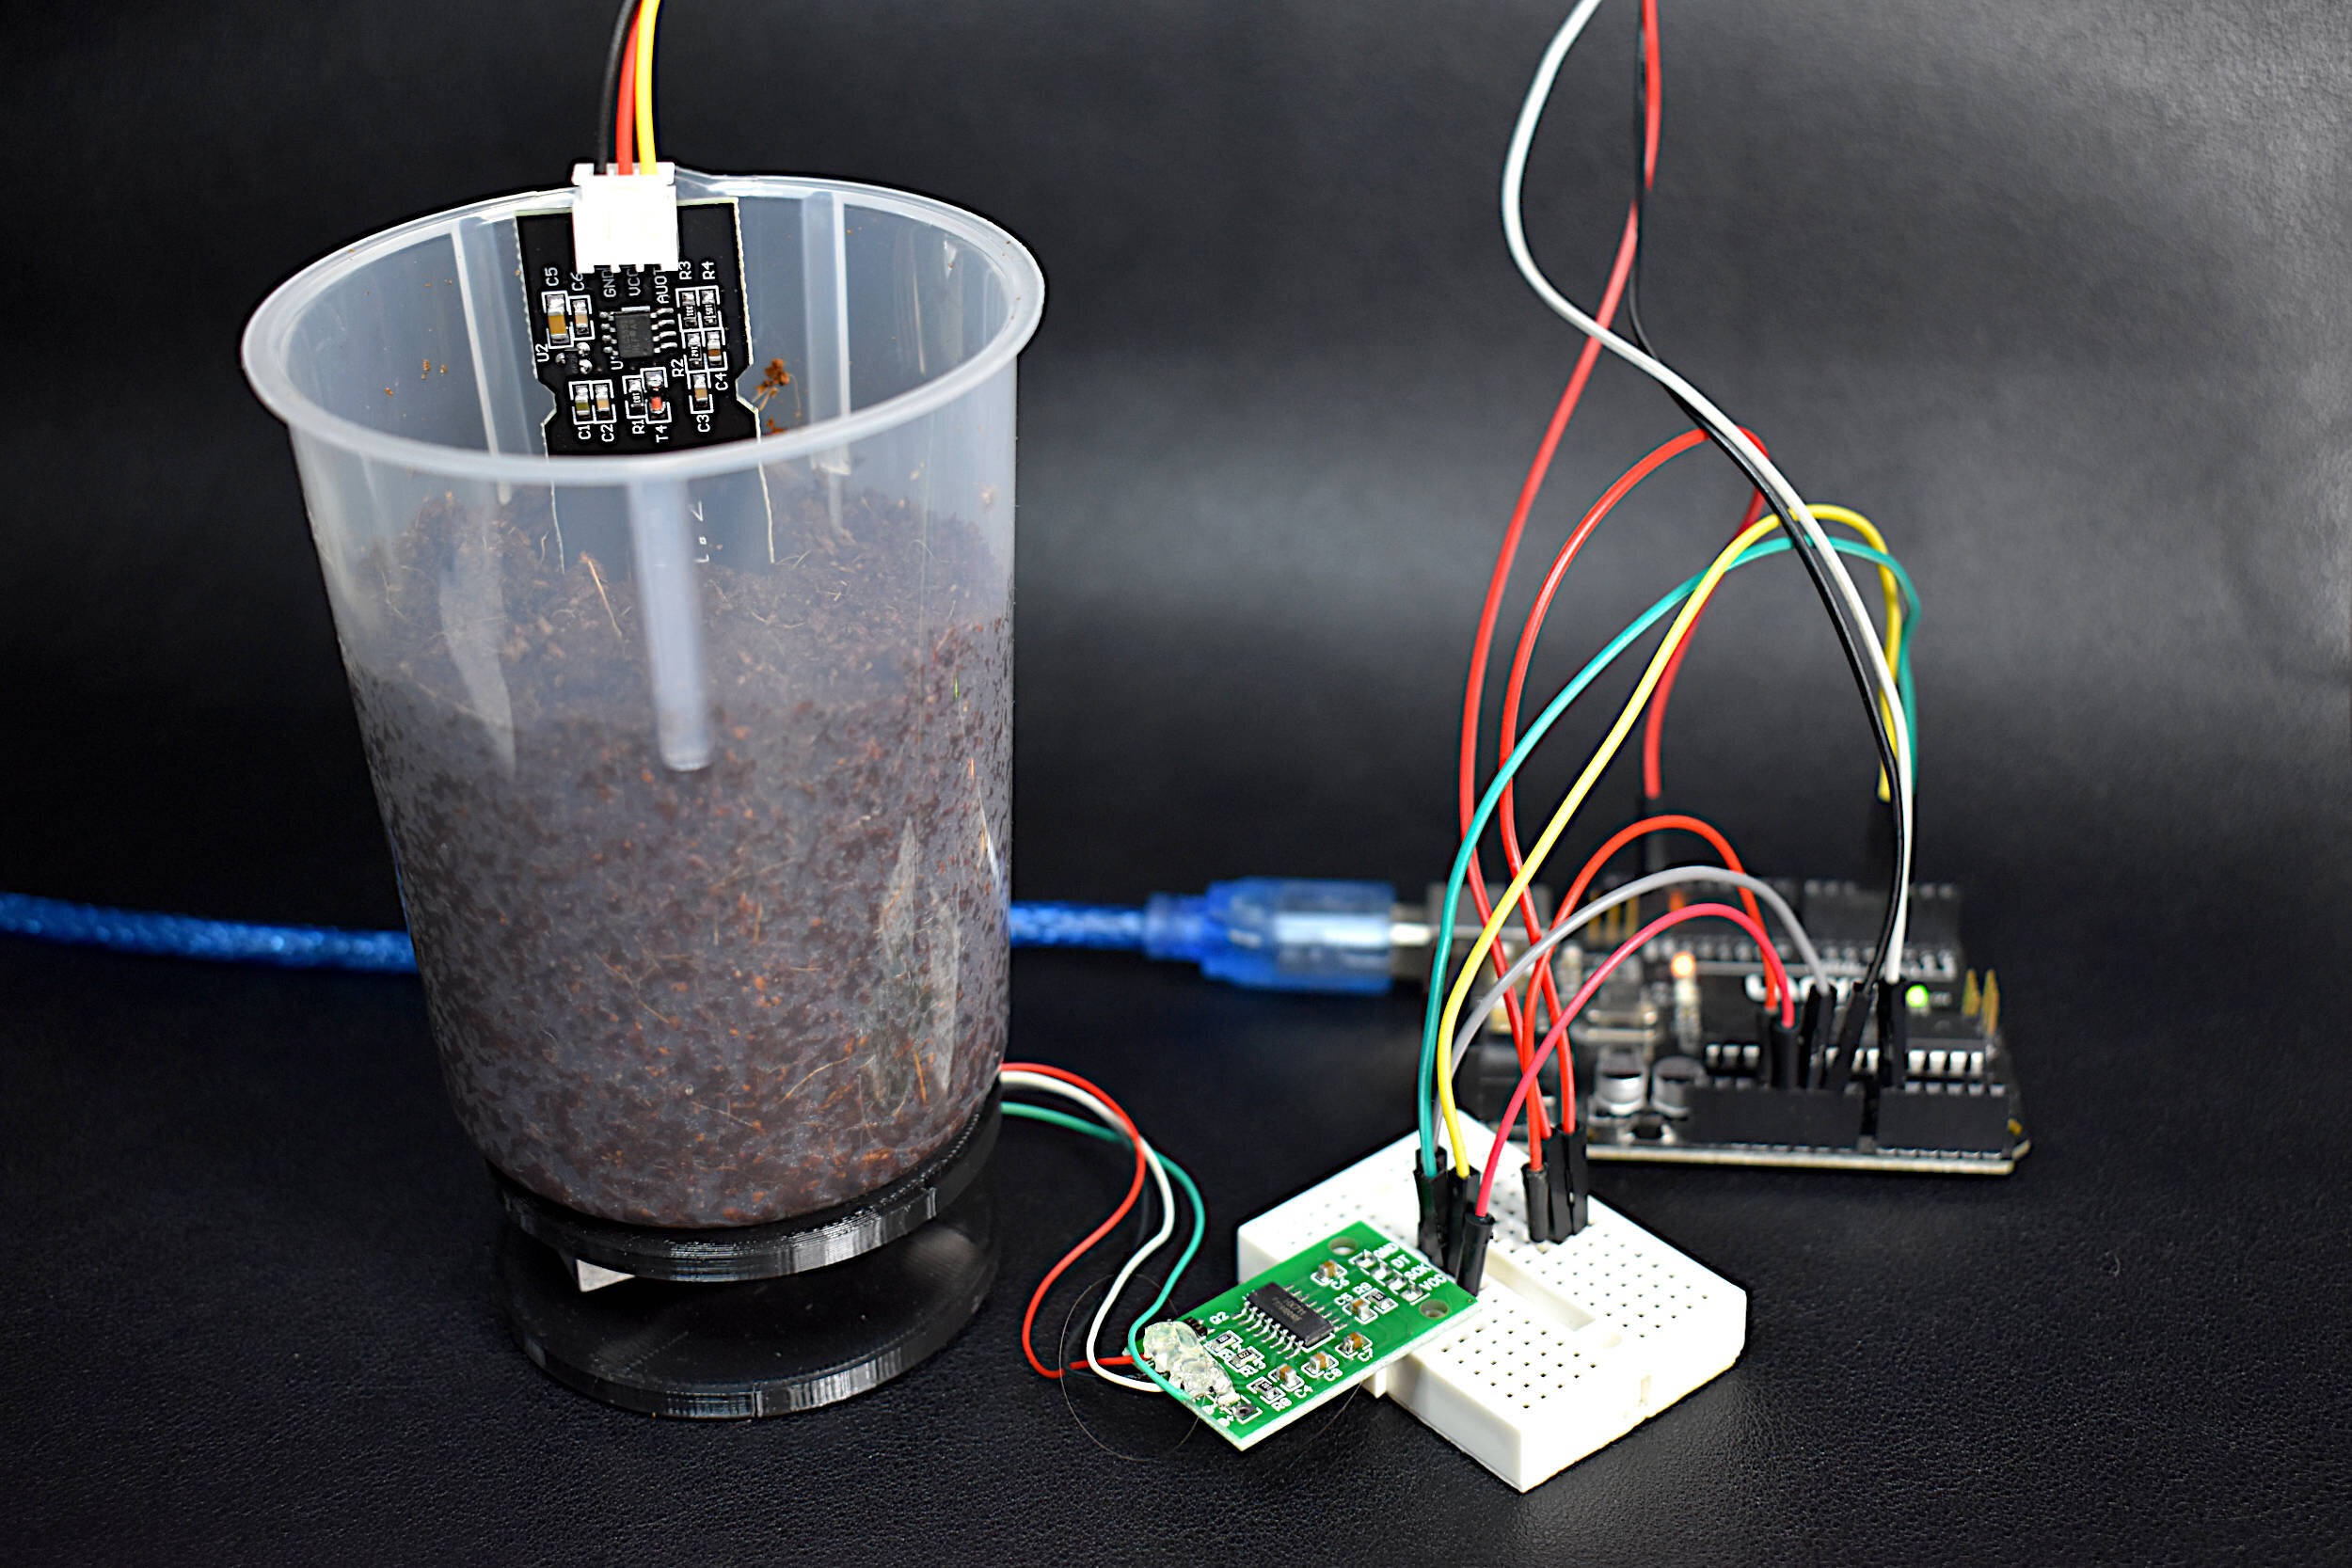
Below is the diagram for wiring the soil moisture sensor to the Arduino Uno board:

One thing to note is that the capacitive soil sensor uses 3.3V as its supply voltage, therefore, the AREF pin also should be wired to 3.3V to ensure the best resolution in the ADC around 3.3V, instead of 5.0V. Lastly, the Arduino code to test the soil moisture sensor is given below:
// Simple code for Measuring Voltage from
// Capacitive soil moisture sensor
//
int soil_pin = A0; // AOUT pin on sensor

void setup() {
  Serial.begin(9600); // serial port setup
  analogReference(EXTERNAL); // set the analog reference to 3.3V
}

void loop() {
  Serial.print("Soil Moisture Sensor Voltage: ");
  Serial.print((float(analogRead(soil_pin))/1023.0)*3.3); // read sensor
  Serial.println(" V");
  delay(100); // slight delay between readings
}
Under the assumption that the Arduino board and sensor have been wired correctly, the code above should print out values between 0V - 3.3V. If the sensor is in air, the value should be around 3.15V, and if the sensor is in a moist soil, the value will be between 1.9V - 3.0V. In the next section, the calibration procedure will be introduced, where the actual volumetric soil moisture content will be approximated by carrying out gravimetric techniques for measuring the moisture content in a soil.
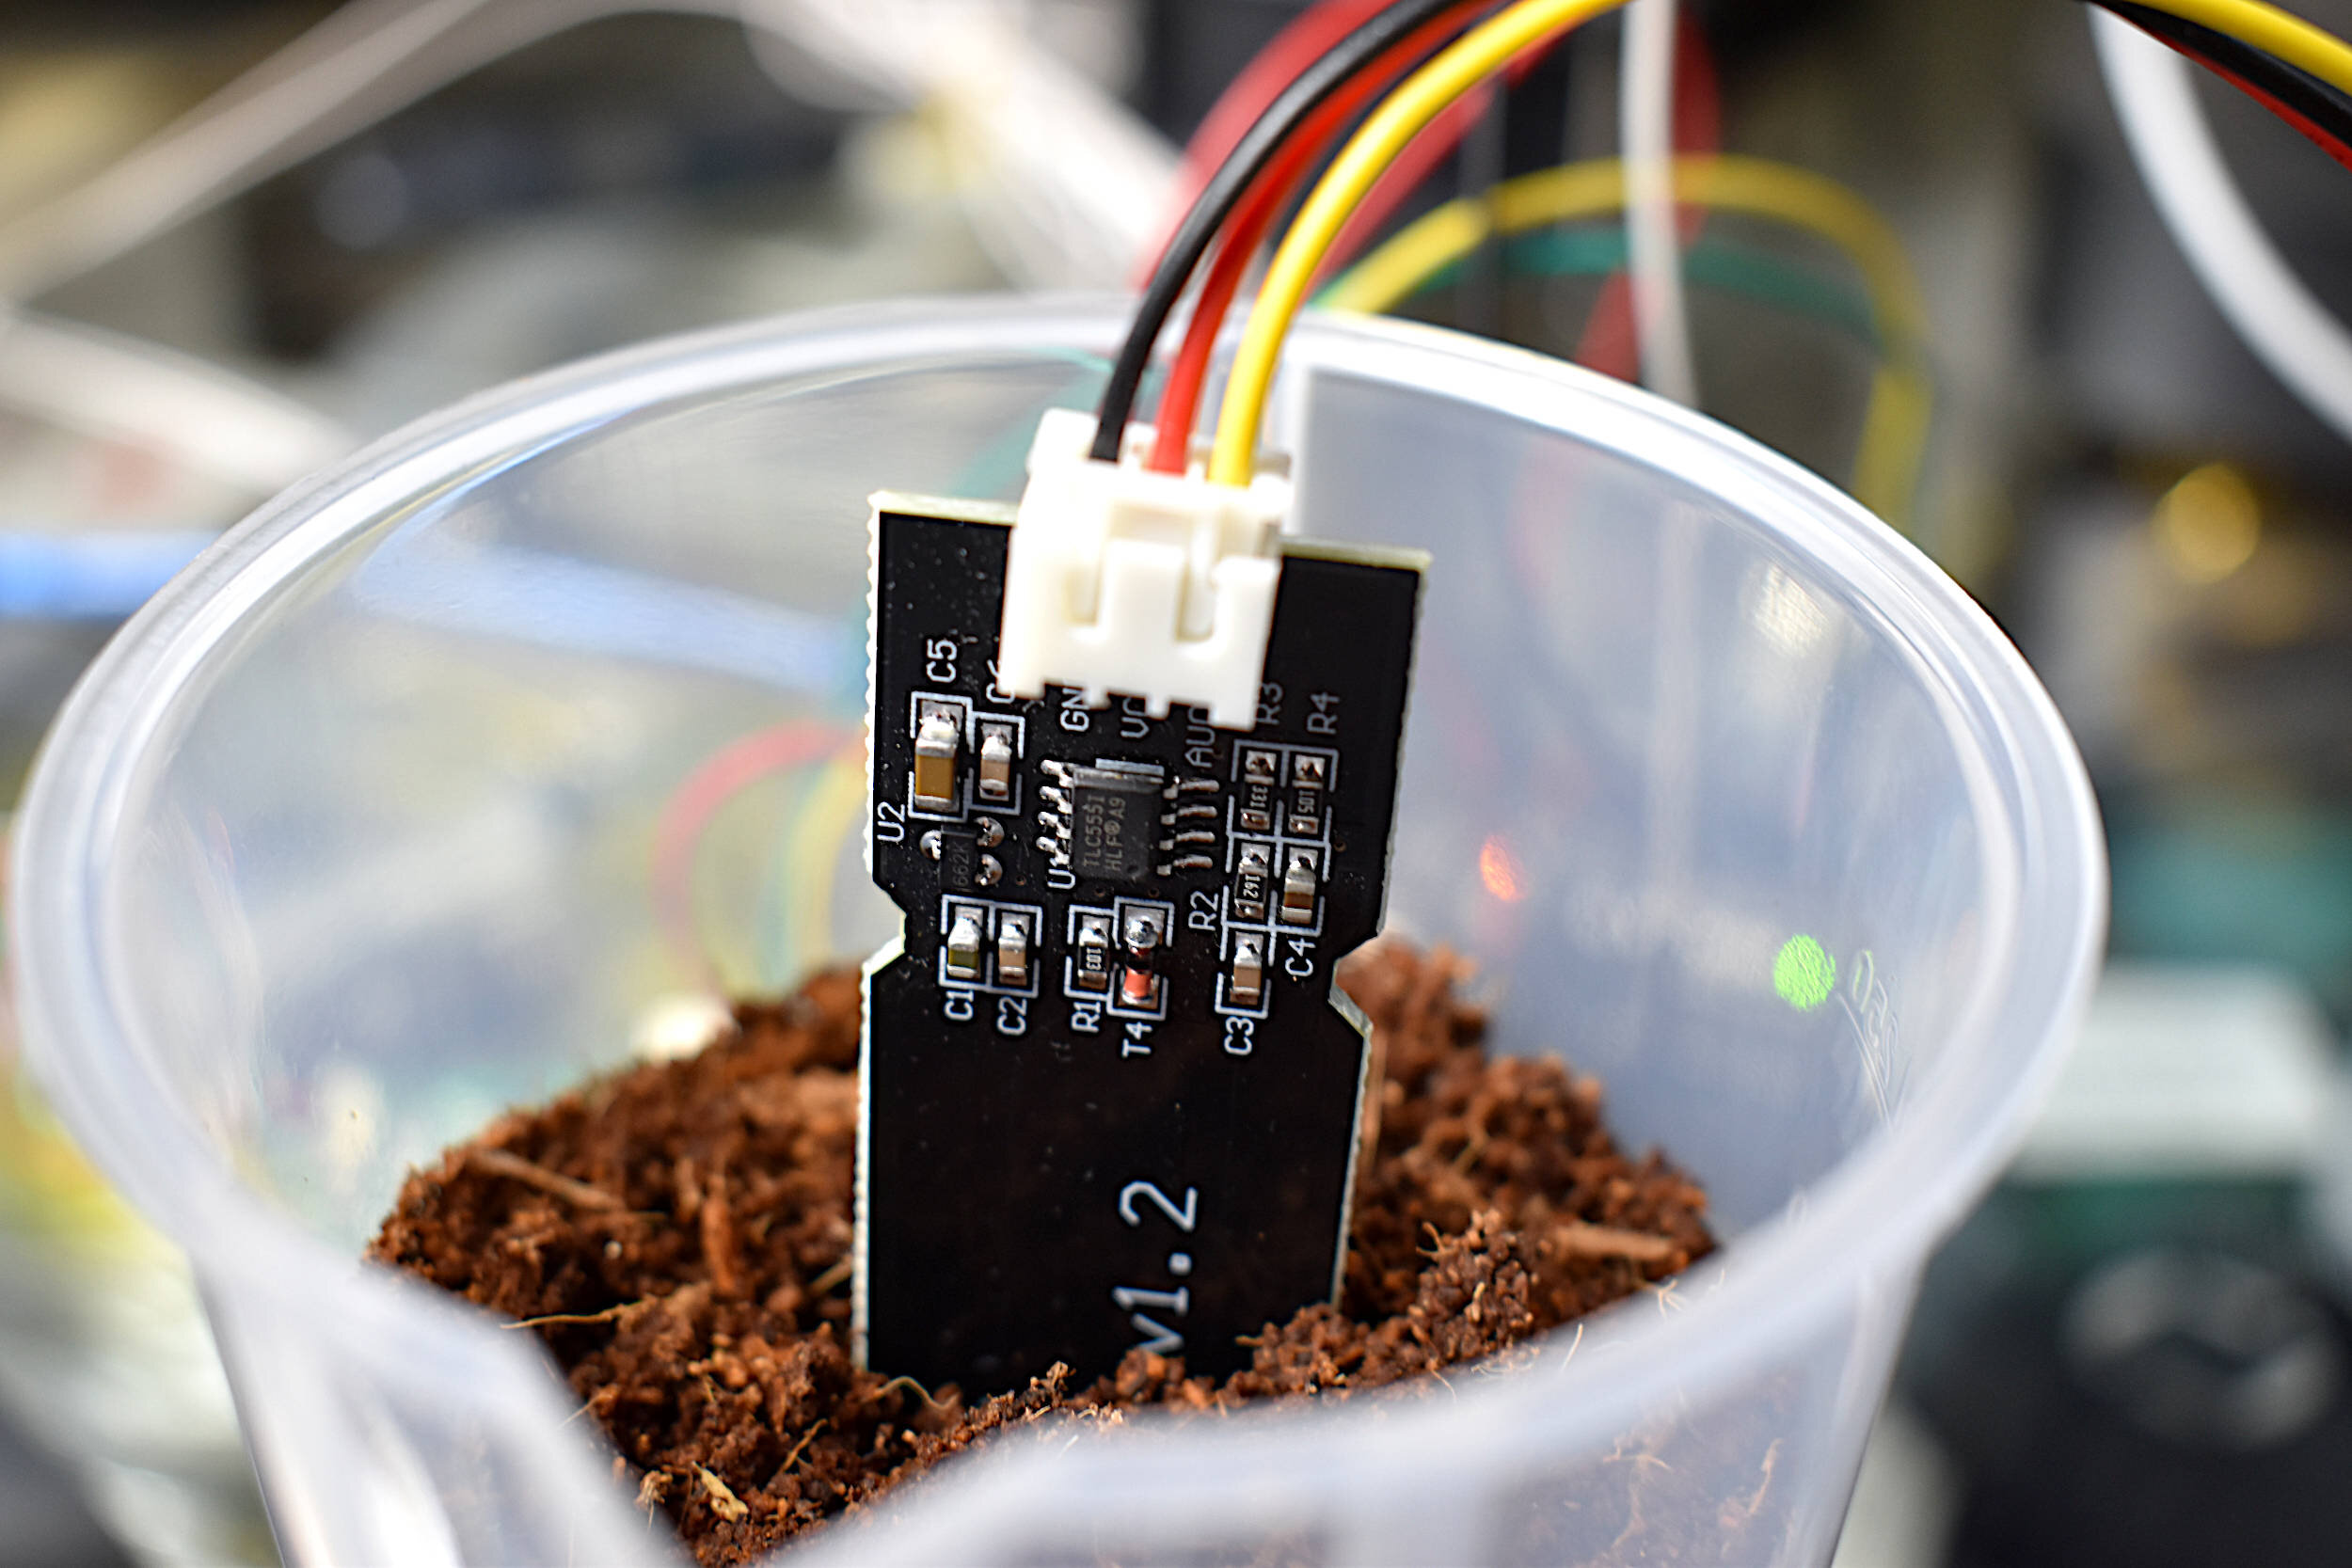
The volumetric water content, as defined in the first section, is the ratio of volume of water to volume of soil contained within a sample. Therefore, if we want to measure the instantaneous water content in a soil sample, we have to measure the volume and mass of each sample. Every time water is added to the soil, the mass of the sample will change. Soil moisture is consistently approximated by keeping the volume of each sample the same every time water is added, while also measuring the mass of every sample. The way this is done is by using one of the 250ml containers with graduated markings and making sure the soil level reaches the same level each time water is added to the soil.
Returning to the definition for volumetric water content, we can see how each component factors into the experimental process:
- mwet - The measured mass of the soil (wet or dry)
- ms - The measured mass of the dry soil
- ρs - Bulk density of soil (mass of dry soil divided by sample volume)
- ρw - density of water
Calibration Procedure:
Measure the mass of the soil sample container
Fill container to 200ml (or any volume) with dry soil
Measure mass of the dry soil in the container
Wet the soil with 10ml of water (this is 5%, but any higher % is okay)
Mix the wet soil around to ensure the water is evenly distributed, then refill the container to 200ml
Measure the mass of the wet soil
Repeat steps 4., 5., and 6. until the soil is saturated and starts to seep water
Once the procedure of watering has reached saturation, lay the 200ml of soil out on an array of wax paper to allow it to dry out
When the soil is dry, measure the mass of this dry soil - this will be the mass of the dry soil used for soil density
The above procedure can take up to 7 days, when factoring the drying procedure. The experimental process can take roughly 10-minutes per measurement (packing, watering, settling), and with about 6-10 measurements per experiment - the actual work can be 1-2 hours. Thus, after the initial few days of drying the soil, plus 2 hours of experiments, along with a few days of drying the soil out - the full-scale experiment takes about 7 days. The way to ensure the fastest experimentation is to lay the soil out very thinly on the wax paper. This will give about 7 days per soil calibration.
Drying soil (left) and near saturation soil (right)

A Note on Packing Soil:
Take care to pack the soil into the 200ml container. The best method for packing soil effectively is to pack layer-by-layer to ensure a vertically even distribution of soil. This will also ensure the most consistent results from the sensor.

10ml of Water to be Added to the Soil Sample
A Note on Capacitive Sensor Settling Time:
The capacitive soil moisture sensor can take some time to equalize and give a steady reading, so be sure to wait approximately 1 minute after the sensor settles to a given value. It should settle in 1-5 minutes, depending on the saturation level of the soil.
Under the assumption of a successful calibration, we can take the data and analyze it. This will be done in the next section, where the results will be presented and analyzed in order to properly calibrate the linear relationship between the inverse of the sensor voltage and the gravimetric approximation of volumetric water content in soil.
The soil presented in the parts list above is a coconut coir. A study on coconut coir states that the bulk density of coconut coir dust is roughly 0.074 g/ml, which is quite low for a soil density. For most sandy soils, the bulk density is around 1g/ml. Thus, the calibration given here may be considerably different compared to many soils.
Below is the example spreadsheet used to capture all of the information that is needed for calibrating the soil moisture sensor:

We can see that our calculated bulk density for our coconut coir soil is roughly 0.132 g/ml, which is reasonable considering our soil is somewhere between dust and pulp (the pulp can be seen as the elongated sections of soil). The resulting calibration data and fit is given in the figure below:
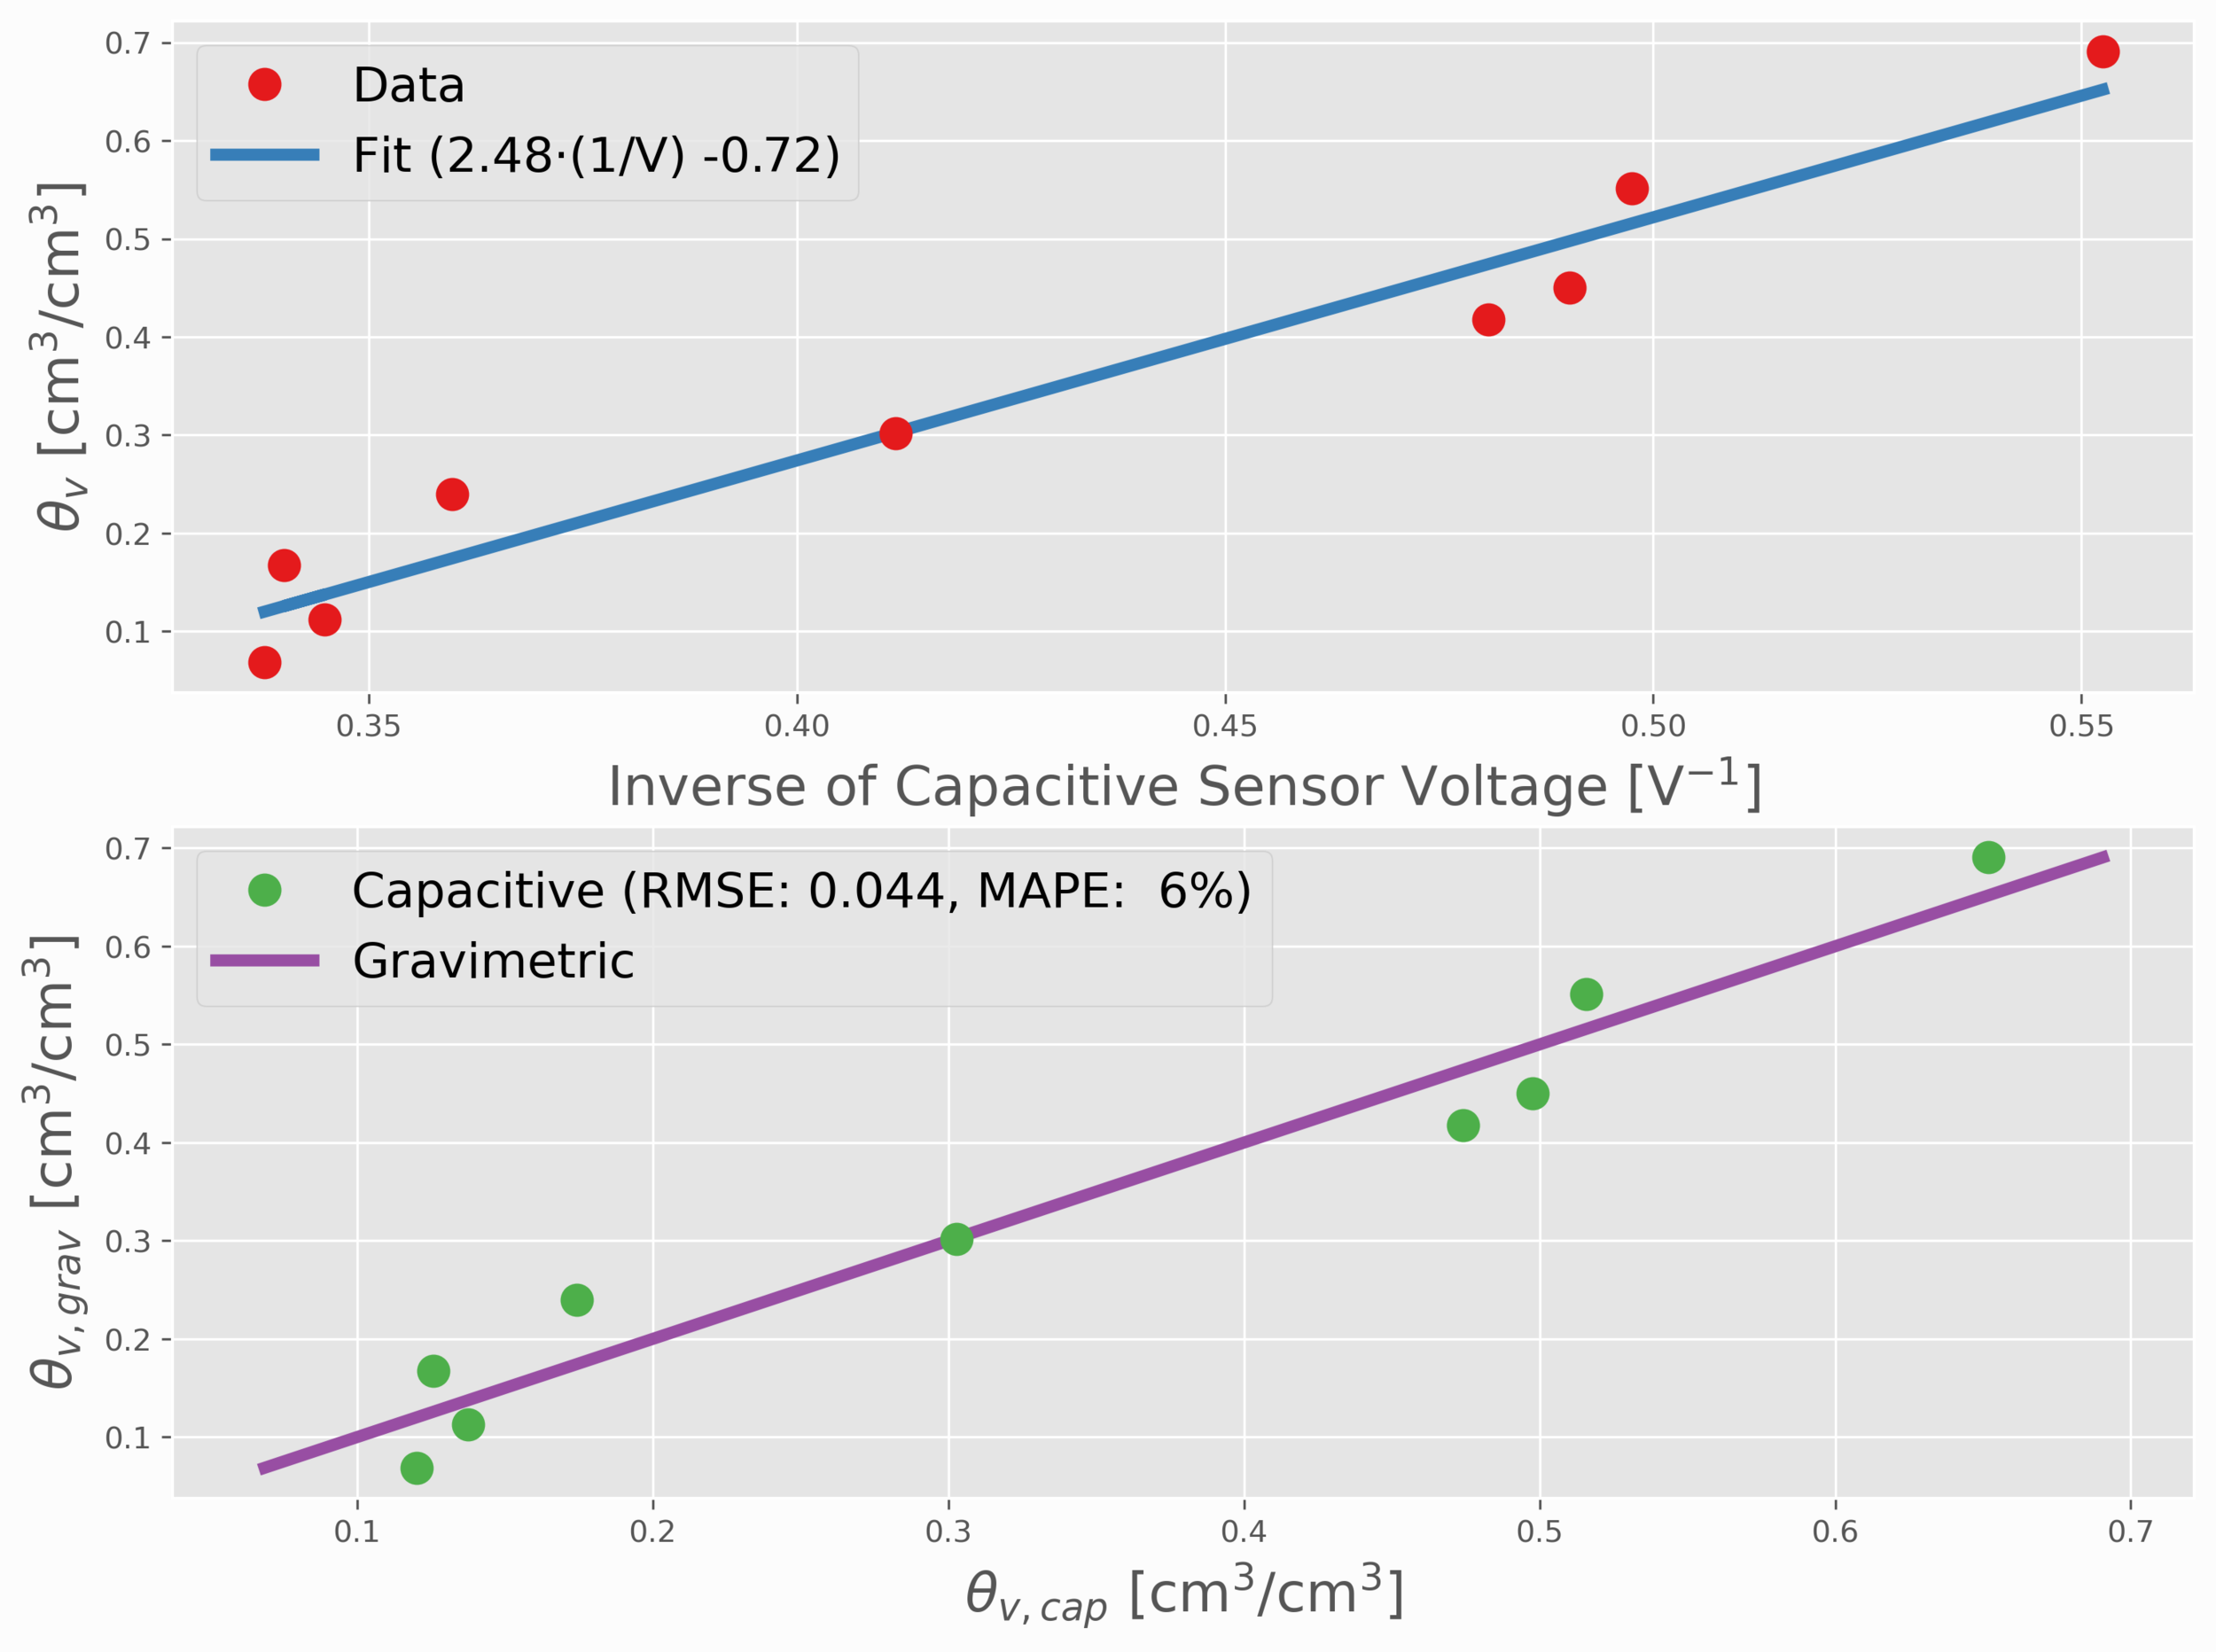
For the soil that is used in our case, we can see that the calibration produces an error of roughly 6% across the range of measured volumetric water content. The fit, for our soil and particular sensor, was found to be the following:
This is the equation that can now be used to predict the water content in our soil, under a given voltage measurement from the capacitive sensor.
The new calibrated implementation code for the prediction of volumetric water content in soil using the capacitive sensor is given below for the Arduino board:
// Simple Arduino code to predict volumetric
// water content in soil using a capacitive
// soil moisture sensor
//
int soil_pin = A0; // AOUT pin on sensor

float slope = 2.48; // slope from linear fit
float intercept = -0.72; // intercept from linear fit

void setup() {
  Serial.begin(9600); // serial port setup
  analogReference(EXTERNAL); // set the analog reference to 3.3V
}

void loop() {
  float voltage,vol_water_cont; // preallocate to approx. voltage and theta_v
  Serial.print("Voltage: ");
  voltage = (float(analogRead(soil_pin))/1023.0)*3.3;
  Serial.print(voltage); // read sensor
  Serial.print(" V, Theta_v: ");
  vol_water_cont = ((1.0/voltage)*slope)+intercept; // calc of theta_v (vol. water content)
  Serial.print(vol_water_cont);
  Serial.println(" cm^3/cm^3"); // cm^3/cm^3
  delay(100); // slight delay between readings
}
And this completes the calibration of the capacitive soil moisture sensor!
The theory, calibration, and operation of a capacitive-type soil moisture sensor was introduced here as a way to predict volumetric water content in soils in an efficient and easy manner. Using an Arduino board and digital scale, the real-time measurement of both the mass of the soil and the readings from the capacitive sensor were recorded. By adding water to dry soil, the mass of the soil changes across the same volumetric sample. This gives users the ability to approximate the water content in soil by measuring the weight against a dry sample of the soil - giving an instantaneous approximation of soil moisture content. The voltage was then linearly correlated to the gravimetric moisture approximations, to give an effective relationship between the reading from the capacitive sensor and the water content in the soil. The method used here produced an error of about 6% for readings, indicating a fairly good approximation of the water content in the soil used in our case (coconut coir). This calibration procedure demonstrated that these low-cost capacitive-type soil moisture sensors are capable of predicting the water content in soils to a fairly high degree of accuracy, with little required outside of the device itself, which is in direct contrast to the time it takes to traditionally measure the water content in soils.
Some relevant tutorials and publications:
Kizito, F., Campbell, C.S., Campbell, G.S., Cobos, D.R., Teare, B.L., Carter, B., & Hopmans, J.W. (2008). Frequency, electrical conductivity and temperature analysis of a low-cost capacitance soil moisture sensor. https://www.sciencedirect.com/science/article/pii/S0022169408000462
https://www.onsetcomp.com/files/15922-C%20Calibrating%20ECH2O%20Soil%20Moisture%20Sensors.pdf
See More in Engineering and Sensors: