Haptic Feedback Joystick with Arduino
“As an Amazon Associates Program member, clicking on links may result in Maker Portal receiving a small commission that helps support future projects.”
Haptics in the context of modern technology refers to the interaction between human touch and responses provided by computer interfaces in an attempt to emulate real-world stimuli. The real-world stimuli can be auditory, physical, or visual. For example, in the case of haptic vibration, a motor can provide feedback to users as they experience shaking due to driving, explosions, or physical contact while playing a video game [learn more about haptics here and here and here]. In this tutorial, we design and explore haptic vibrational feedback due to movements of an analog joystick. The Arduino platform will be used to read the analog joystick and control the response of a vibration motor shaking in the user's hand. An ESP32 D1 Mini microcontroller is selected as the microcontroller that will be programmed to control the haptic response. The ESP32 is chosen due to its fast processor, which will decrease the time delay between joystick reading and the haptic feedback response. The goal of this tutorial is to introduce users to haptic feedback and the interplay between humans and computer interfaces capable of responding to touch inputs.
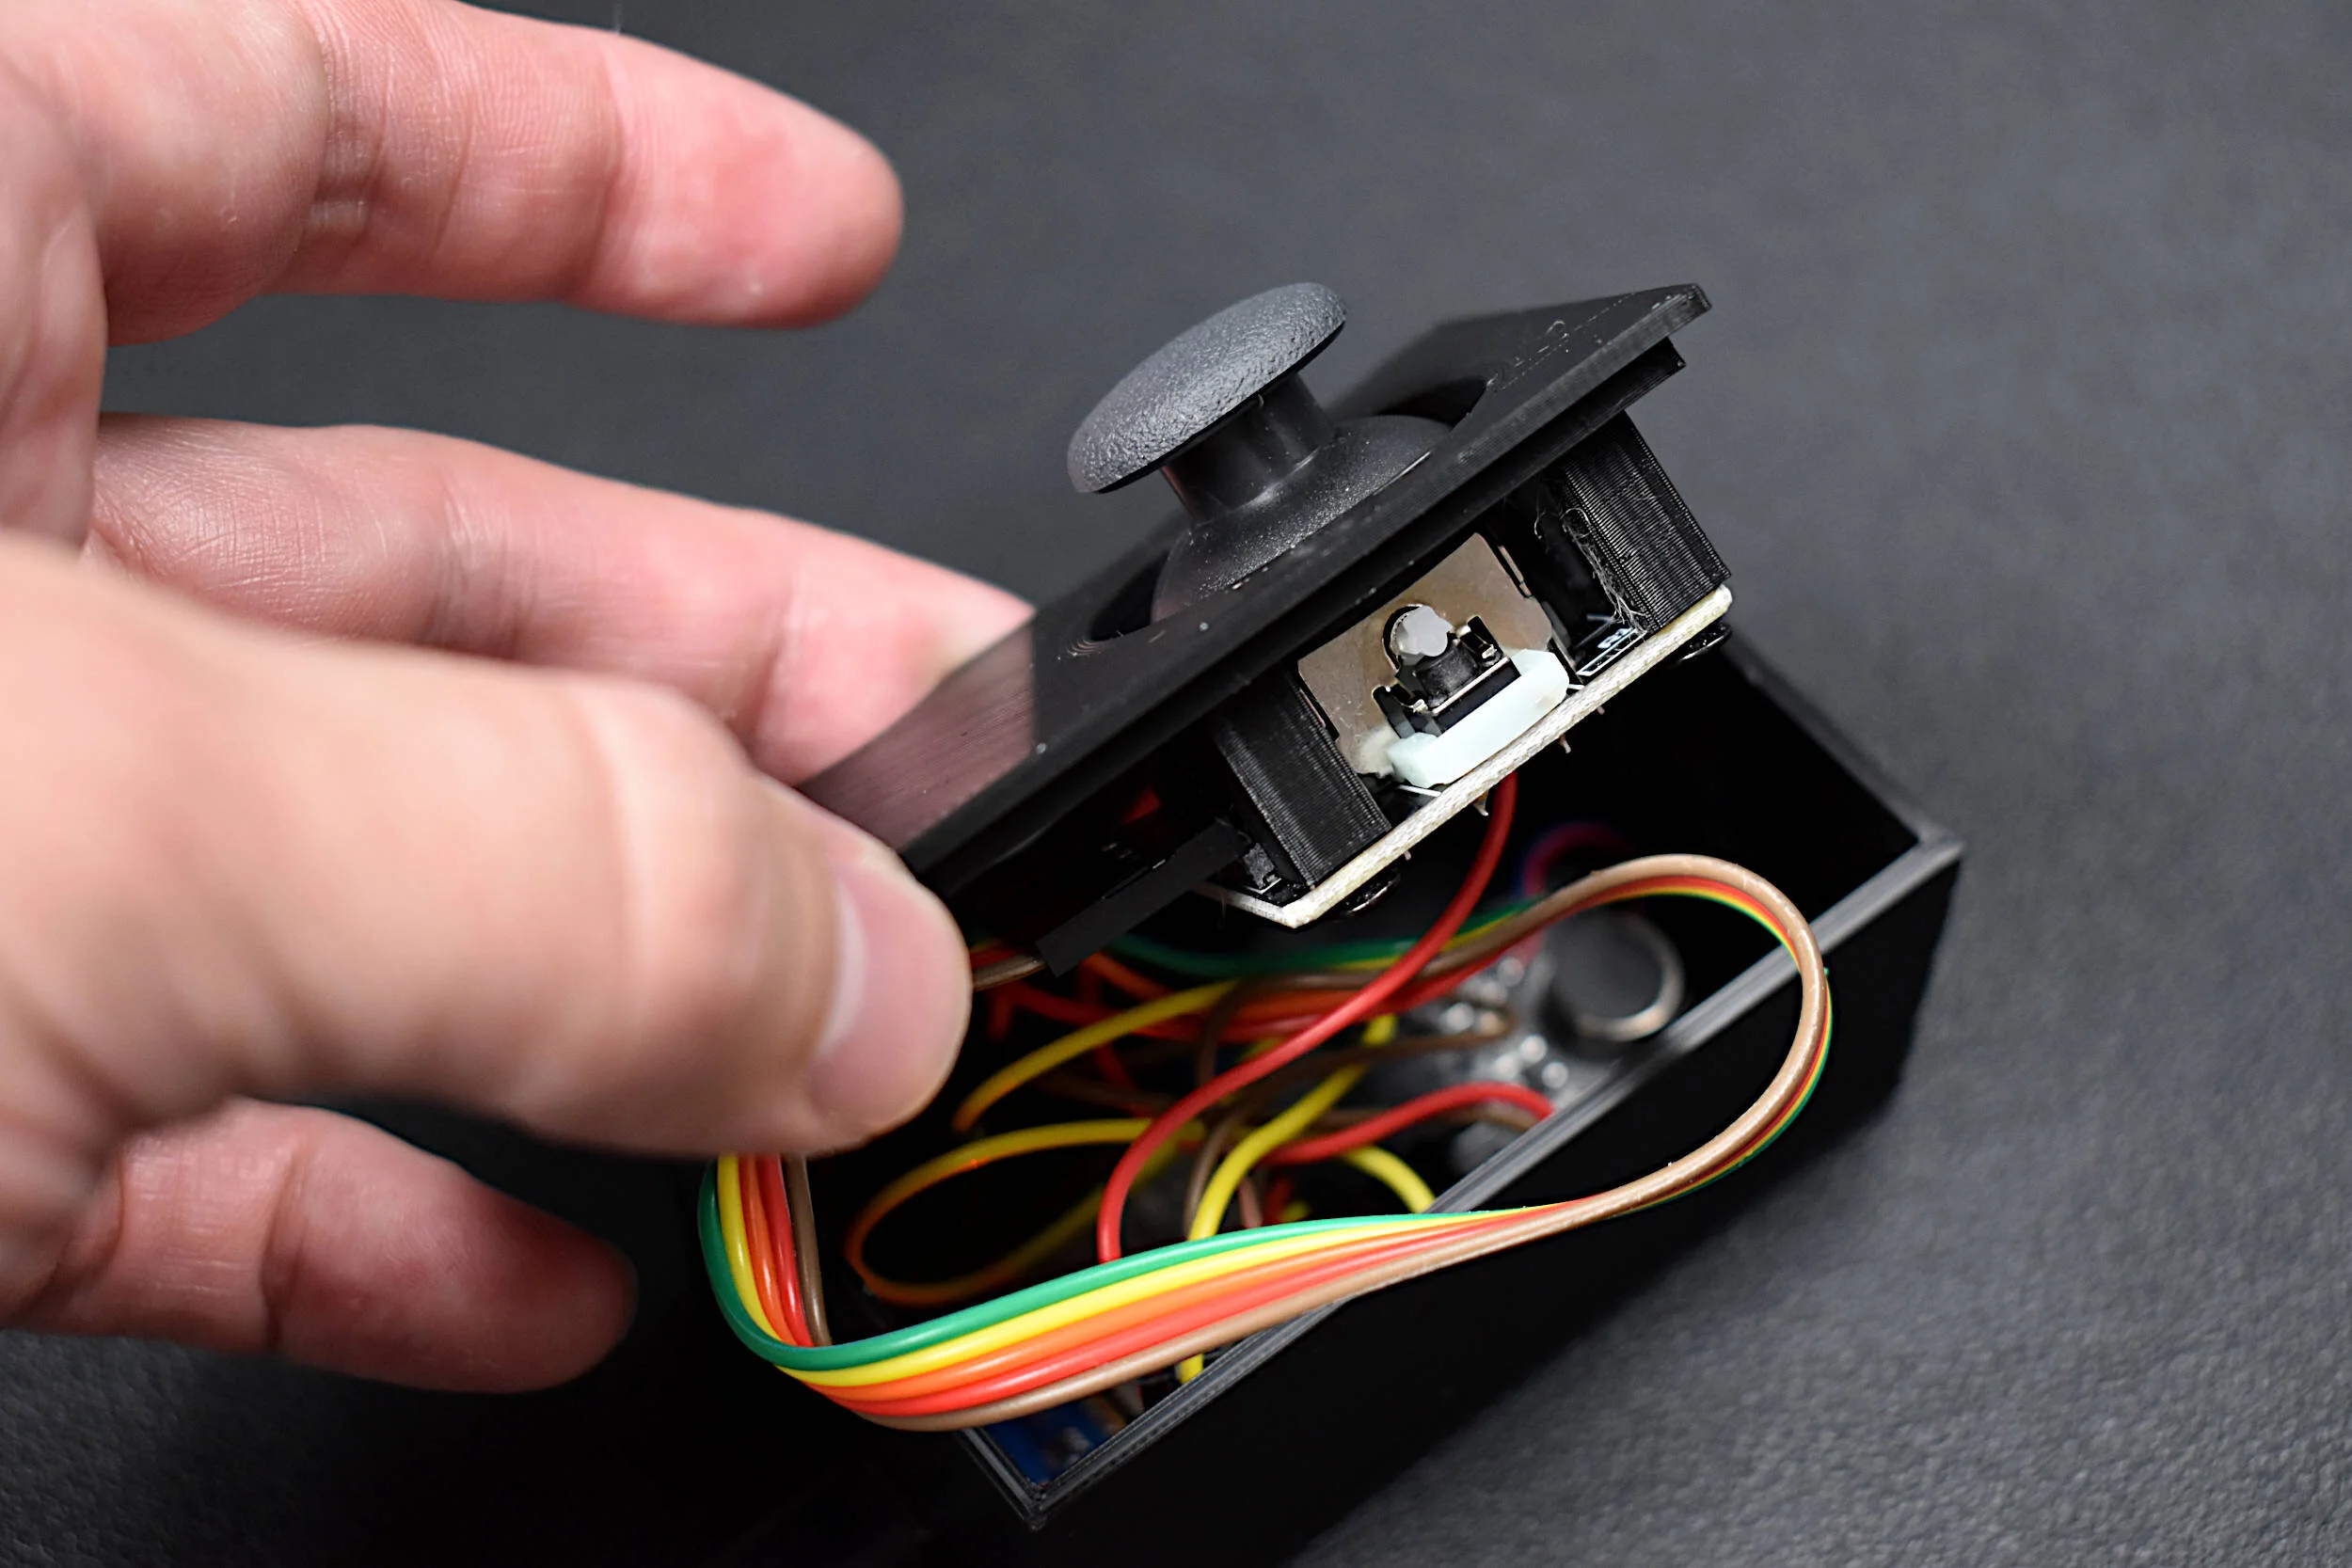
The components used in this tutorial have been compiled into a kit for convenience, which consists of the ESP32 D1 Mini microcontroller, the analog joystick, the vibration motor, and the 3D printed handheld enclosure. We’ve also listed the components one-by-one below in the event that the user has all or most of the components already at their disposal. The component list is also followed by the wiring diagram for the tutorial.
Haptic Joystick Kit - $25 [Our Store]
Individual Component List:

Haptics in the context of modern technology refers to the interaction between human touch and responses provided by computer interfaces in an attempt to emulate real-world stimuli. We designed a haptic vibrational feedback kit using the movements of an analog joystick. The Arduino platform can be used to read the analog joystick and control the response of a vibration motor shaking in the user's hand. An ESP32 D1 Mini microcontroller is selected as the microcontroller that is included in the kit. The ESP32 is chosen due to its fast processor, which will decrease the time delay between joystick reading and the haptic vibrational feedback response. This kit is meant to introduce users to haptic feedback by integrating simple components into a handheld device compatible with Arduino. The resulting handheld device delivers vibrational responses based on changes in joystick position. The full tutorial that deploys this kit is given here.
Included in the Haptic Vibration Joystick Kit:
1x Haptic Vibration Motor/Buzzer
1x Analog Joystick
1x ESP32 D1 Mini Microcontroller (w/ Micro USB Cable)
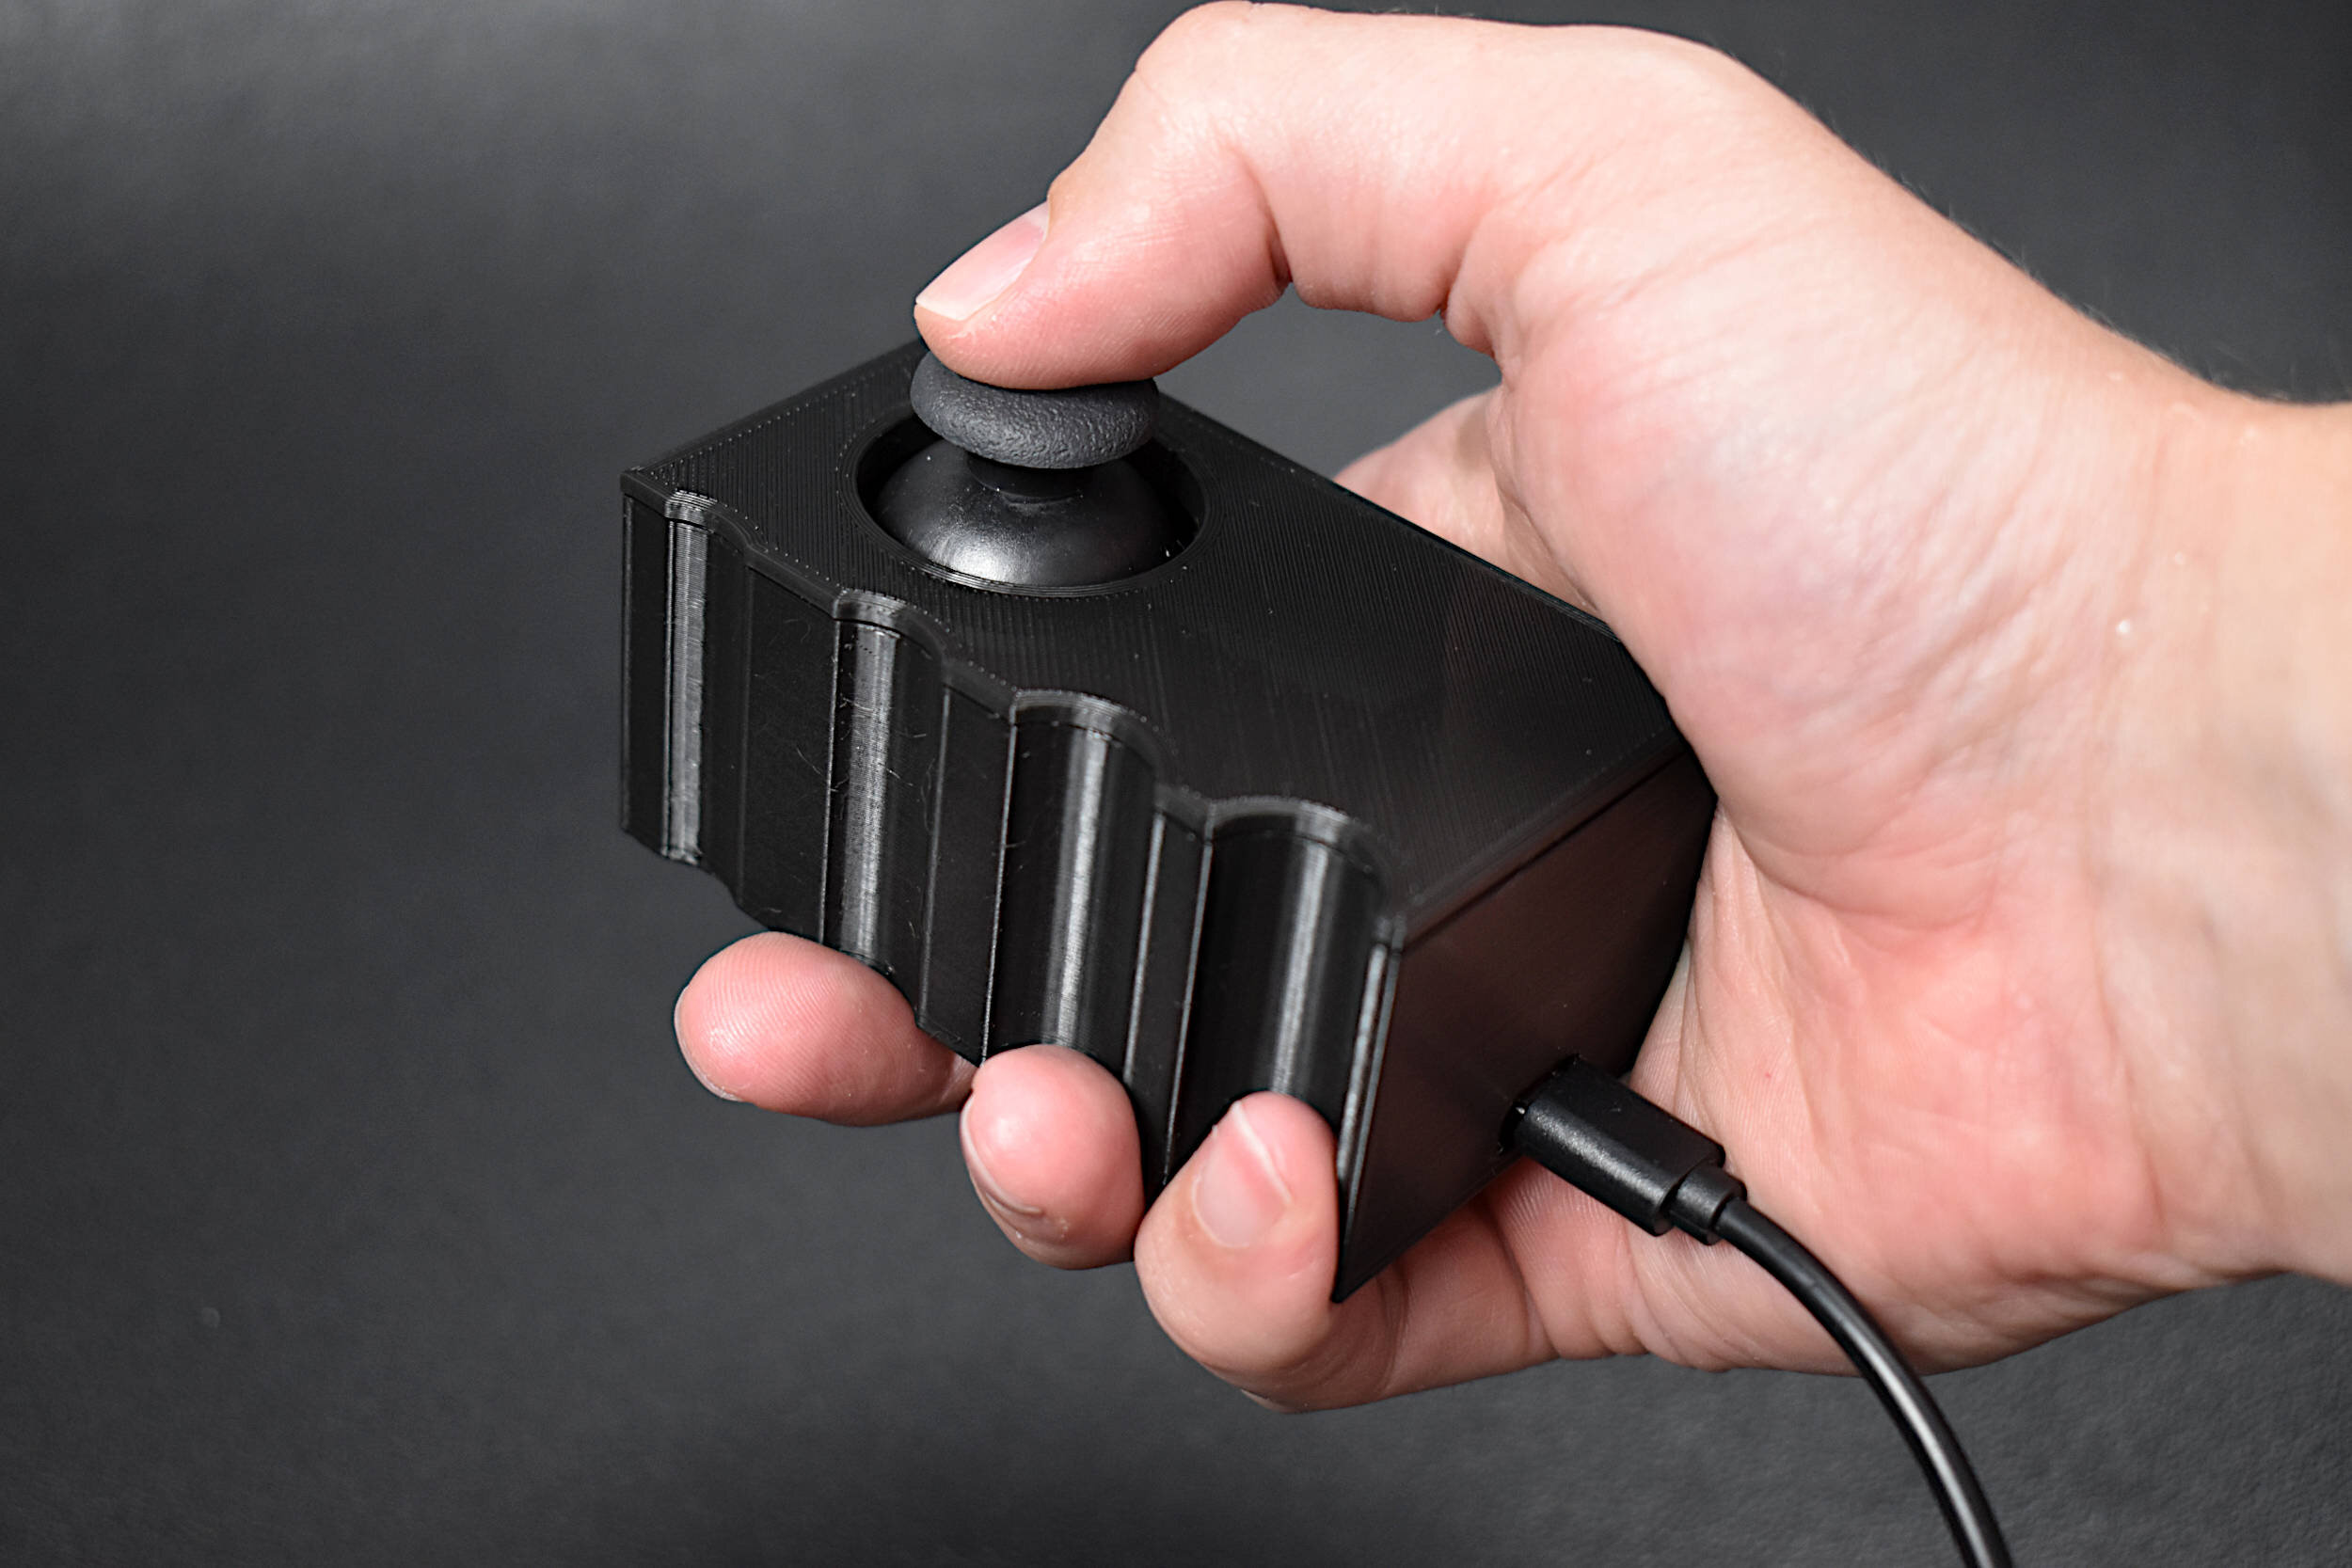
1x 3D Printed Joystick Enclosure
5x M3 Screws for Affixing Motor and Joystick to Enclosure
8x Male-to-Female Jumper Wires
Features of the Haptic Vibration Joystick Kit:
3-Degree-of-Freedom Joystick (x, y, button)
3.7V Vibration Motor
3D Printed Enclosure for Real-Time Haptic Feedback Response
ESP32 D1 Mini Microcontroller (BLE/WiFi Compatible)
The pinout for the ESP32 D1 Mini is given below for reference, in the case that users want to change pins for the joystick or motor, or even add more sensors or motors to the project:

ESP32 D1 Mini Pinout
Image courtesy of: https://github.com/r0oland/ESP32_mini_KiCad_Library
Lastly, the wiring diagram between the ESP32 D1 Mini and the vibration motor and joystick is given below:


Component Wiring Table
ESP32 + Joystick + Vibration Motor
The wiring configuration given above is used in the Arduino codes provided in the next section. Thus, any changes made to the wiring diagram will need to be implemented in the subsequent Arduino codes.
The Arduino code used in conjunction with the wiring configuration provided above can be found at the project’s GitHub page:

The code is also given below for reference:
/***************************************************************************
* ESP32 Haptic Joystick
* -- using vibration motor + joystick + ESP32 D1 Mini
*
*
*  by Josh Hrisko | Maker Portal LLC (c) 2021
*
*
***************************************************************************/

int joy_pins[4] = {35,34,14}; // pins being used for joystick
float bit_depth = pow(2.0,12); // ADC conversion ratio
float Rx_offset = 0.0; // offset in x-dir
float Ry_offset = 0.0; // offset in y-dir

const int buzz_pin = 2;  // corresponds to GPIO2 on ESP32

void setup(){
  Serial.begin(115200);
  pinMode(joy_pins[0],INPUT); // VR_x pin
  pinMode(joy_pins[1],INPUT); // VR_y pin
  pinMode(joy_pins[2],INPUT_PULLUP); // SW pin
  pinMode(buzz_pin,OUTPUT); // output for buzzer
  Serial.println("VRx,VRy,SW");
  delay(100);
  Rx_offset = float(analogRead(joy_pins[0]))/bit_depth; // calc offset
  Ry_offset = float(analogRead(joy_pins[1]))/bit_depth; // calc offset
}

void loop(){
  float Rx = float(analogRead(joy_pins[0]))/bit_depth-Rx_offset; // instantaneous x-joystick
  float Ry = float(analogRead(joy_pins[1]))/bit_depth-Ry_offset; // instantaneous y-joystick
  int   SW = digitalRead(joy_pins[2]); // instantaneous z-joystick (press down)
  Serial.print(Rx); Serial.print(","); // print for debugging (-0.45 to +0.55)
  Serial.print(Ry); Serial.print(","); // print for debugging (-0.45 to +0.55)
  Serial.println(SW); // print press (0-1)
  delay(1);

  if (Rx<-0.1){
    buzz_now(1,100,0,0); // (joystick left) buzz without delays
  } else if (Ry<-0.1){
    buzz_now(2,100,100,0); // (joystick down) buzz on/off equally for 100ms
  } else if (Rx>0.1){
    buzz_now(1,600,200,0); // (joystick right) long buzz 600ms on, 200 off
  } else if (Ry>0.1){
    buzz_now(3,80,80,150); // (joystick up) buzz with 'train' style rhythm
  } else if (SW==0){
    buzz_now(2,150,150,300); // (joystick press) heartbeat rhythm (dual buzz, with delay)
  }
}

void buzz_now(int buzz_count,int delay_1,int delay_2,int final_delay){ // buzz function
  for (int ii=0;ii<buzz_count;ii++){ // loop
    digitalWrite(buzz_pin,HIGH); // set buzzer on
    delay(delay_1); // keep on for delay_1 [ms]
    digitalWrite(buzz_pin,LOW); // set buzz off
    delay(delay_2); // keep off for delay_2 [ms]
  }
  delay(final_delay); // final delay before restarting or moving on
}
The code does out the following:
Sets the analog joystick pins as inputs (analog inputs on pins 34/35, and digital input on pin 14)
Sets digital pin 2 as a digital output for the vibration motor
Reads offset values from the joystick (for centering response from -0.5 to +0.5, rather than 0-1)
Reads joystick inputs (Rx, Ry, SW)
Excites the vibration motor based on the Rx, Ry, SW values

Haptic Responses from Joystick
Now we can test the haptic responses of the vibration motor based on the joystick movements. First, moving the joystick to the left results in a constant vibration, which we have prescribed in the function ‘buzz_now()’ - which contains the specific response of the vibration motor controlled by the ESP32 microcontroller. The following breaks down the if() statement in the loop() above, telling us what happens when the joystick is moved to given positions:
(Rx<-0.1) buzz_now(1,100,0,0); // (joystick left) buzz without delays
Joystick Left ←: Constant Motor Vibration
(Ry<-0.1)
buzz_now(2,100,100,0); // (joystick down) buzz on/off equally for 100ms 
Joystick Down ↓: 200ms delay between vibrations (~300BPM)
(Rx>0.1){
buzz_now(1,600,200,0); // (joystick right) long buzz 600ms on, 200 off 
Joystick Right →: Heavy vibration with a short off delay
(Ry>0.1){
    buzz_now(3,80,80,150); // (joystick up) buzz with 'train' style rhythm
Joystick Up ↑: Three pulses with a train-like momentum
(SW==0){
    buzz_now(2,150,150,300); // (joystick press) heartbeat rhythm (dual buzz, with delay)
Joystick Press: Dual pulse similar to heart beat
These different haptic vibration feedback profiles can be customized to fit the user’s desired application, whether it relates to buzz length or buzz number or delay between buzzes - it’s completely customizable down to the resolution of the vibration motor. For the motor used here, we’re able to buzz on/off within about 50-80ms, which is likely the limit of the hardware. Delays smaller than 50ms tend to blend together as one buzz. The user may want to change the number of buzzes to relate to cardinal directions, or even change the delay between buzzes based on navigational accuracy (longer delay for further away, shorter delay for closer). There are many opportunities available to the user based on customization and desired outcome!
Below is a video demonstration of our haptic joystick for the different joystick movements. Make sure to turn on audio to hear the buzzes created by the vibration motor:
A vibration motor and joystick were used to create a haptic feedback device using the Arduino platform. As a response to specific changes in joystick position, we prescribed vibration motor actions corresponding to the movement of the joystick. This allowed us to create haptic vibration feedback similar to those used in video games and virtual reality systems. The goal of this tutorial was to introduce users to haptic technology that can immerse users into the digital world using physical feedback mechanisms, such as vibration. Different tunings of the vibration motor can provide users with instructions based on their input, which makes this type of application useful for enhancing digital media, as referenced above, or situations such as visually impaired navigation, feedback in auditory-restricted environments, and delivering quiet notifications to users. Haptics can be incredibly useful in emulating the real world and immersing users into scenarios that may otherwise be dangerous or difficult to experience. Vibrational haptic feedback is just one of a series of haptic mechanisms, and this tutorial was just a simple entry into a wide ranging and evolving field of human computer interaction.
See More in Arduino and Engineering: