Arduino - Randomly Blinking Multiple LEDs With Only 9 Lines of Code
Arduino Code:
int leds[6] = {8,9,10,11,12,13};

void setup(){
  for (int jj; jj<sizeof(leds)/sizeof(int);jj++){
    pinMode(leds[jj],OUTPUT);
    delay(10);
  }
}

void loop(){
  digitalWrite(leds[random(0,sizeof(leds)/sizeof(int))],HIGH);
  delay(random(20,200));
  digitalWrite(leds[random(0,sizeof(leds)/sizeof(int))],LOW);
}
In the simple code above, with only 9 lines of code, the Arduino can natively cycle through 14 different LEDs (digital pins 0-13). This is a powerful result, because it demonstrates the power of loops and the 'random()' function in Arduino's IDE. This code would be great where any light display may be of interest. For example, during the holidays, or for a nighttime event, or even an art exhibit.
Above, the LEDs are stored in the integer array 'leds[],' where you can create up to 14 different outputs by assigning Arduino digital pins to each LED. In the code above, I chose pins 8-13, and in the photo to the right I used pins 8, 9, 10 to control three LEDs.
Next, the for loop states that the program should run through the outputs mentioned above in 'leds[]' and configure them as outputs. And finally, the loop runs infinitely and tell the output pins when to turn on and off via the 'digitalWrite()' function in Arduino. The 'random()' function tells the program to randomly select a number between 0 and the size of the array 'leds[].' This ensures that each LED will be turned on and off randomly.
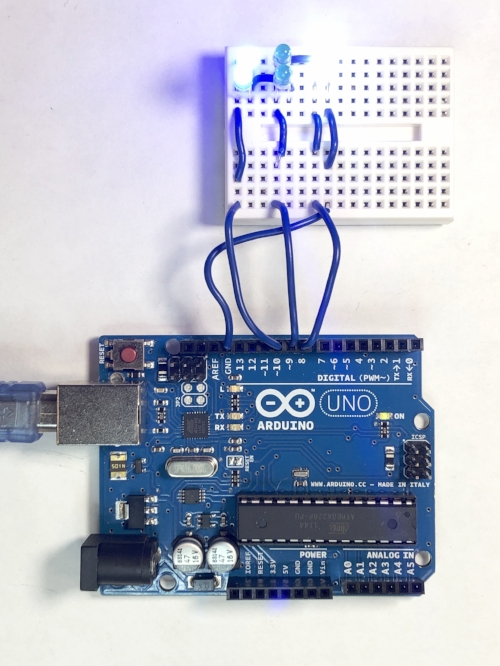
Figure 1: Always remember to wire your LEDs from anode to cathode (long leg to short leg). The anode should be connected to an Arduino digital output, and the cathode should be wired to ground.
If you enjoyed this short tutorial and code synopsis, then follow the link to the left to learn about a touch-sensitive device that will turn different LEDs on and off depending on the frequency of touch. That tutorial is an extension of this, and also includes slightly advanced coding and electronics wiring.

See More in Arduino:


