Driving Any Stepper Motor for Less Than $1 with The L293
Stepper motors are brushless motors that have magnetic and electromagnetic stators and rotors. Changes in electric current alter the magnetic field of a motor's stator or rotor, resulting in a turn, or step, of the shaft. This is also why stepper motors have multiple wires - to ensure that (at least) two individual electromagnets are capable of offsetting their rotor, which results in a continuous stepping of the motor. This dual electromagnetic configuration also enables the bi-directional nature of stepper motors.
Following the minimal introduction on stepper motors above, one should be more enlightened as to why we will be using a four-wire sequence on our motor below. We are assuming that our motor is a 4-wire, bipolar stepper motor. This enables us to move the motor forward and backward. We are also assuming the motor operates between 4.5V - 36V, which is set by the motor driver (L293D, datasheet here; also, purchase at Amazon with this link).
This tutorial is meant to demystify stepper motors and the complications that come with wiring them. Often, people will buy stepper motor drivers that are overpriced or clunky; but I present a simple wiring diagram and the cheapest alternative IC for wiring a 4-wire, bipolar stepper motor. The driver used, the L293D, is popular and often used in commercial drivers. It is powerful, inexpensive, and easy-to-use. I will cover the wiring and the simple code needed in conjunction with the Arduino IDE. By the end of this tutorial, you should be able to drive any low-power, 4-wire stepper motor for less than $1.
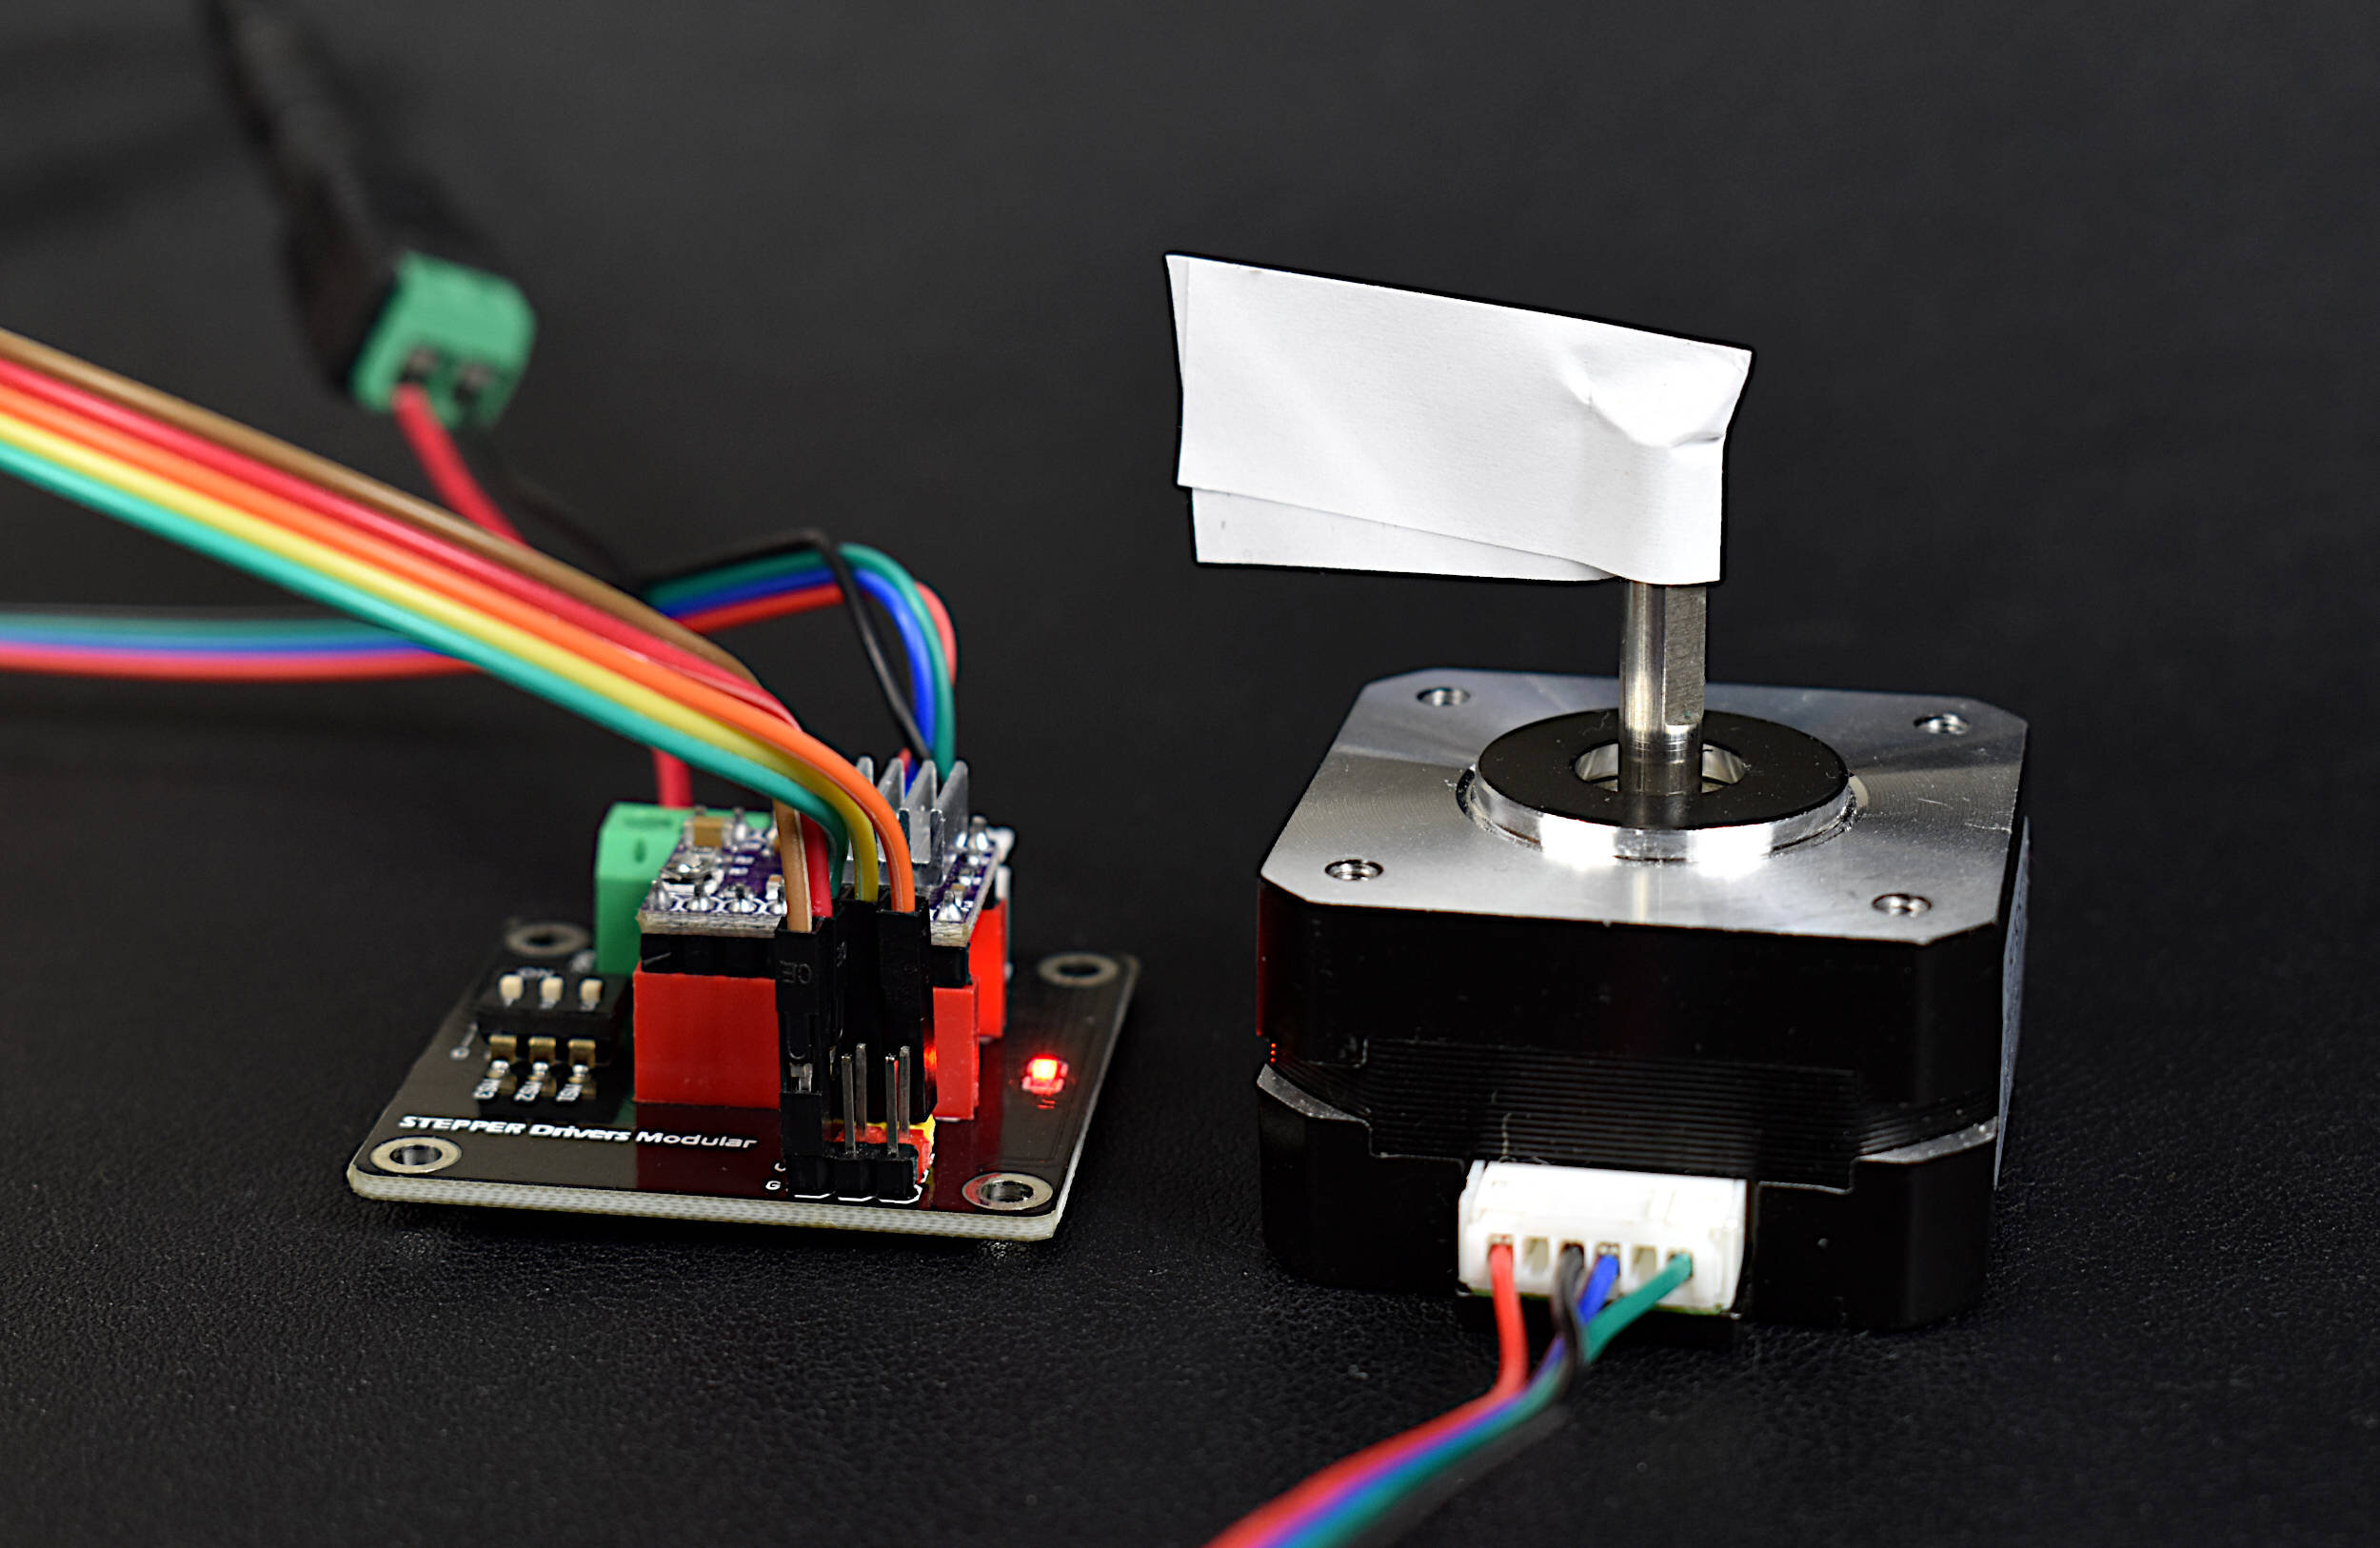
L293D and Several mini stepper motors that I acquired to test the L293D circuit with Arduino.
Parts List:
I recommend using a stepper motor that is higher in quality compared to the traditional 28BYJ-48 steppers (similar to this tutorial, see here), simply because those often come with bulky drivers and are not particularly fast, worth their cost, or effective. I have also included links to an inexpensive Arduino Uno, some jumper wires, and a set of L293D drivers. You can, of course, pick these up for cheaper, but Amazon is often my first choice because of reliability and speed. You can also use any 4-wire stepper and Arduino board you may have lying around, which will make this tutorial even cheaper. Under the assumption that the user has all of the components above, apart from the L293D, this project should cost less than $1 USD, accounting for the individual cost of a L293D.
Wiring the L293D
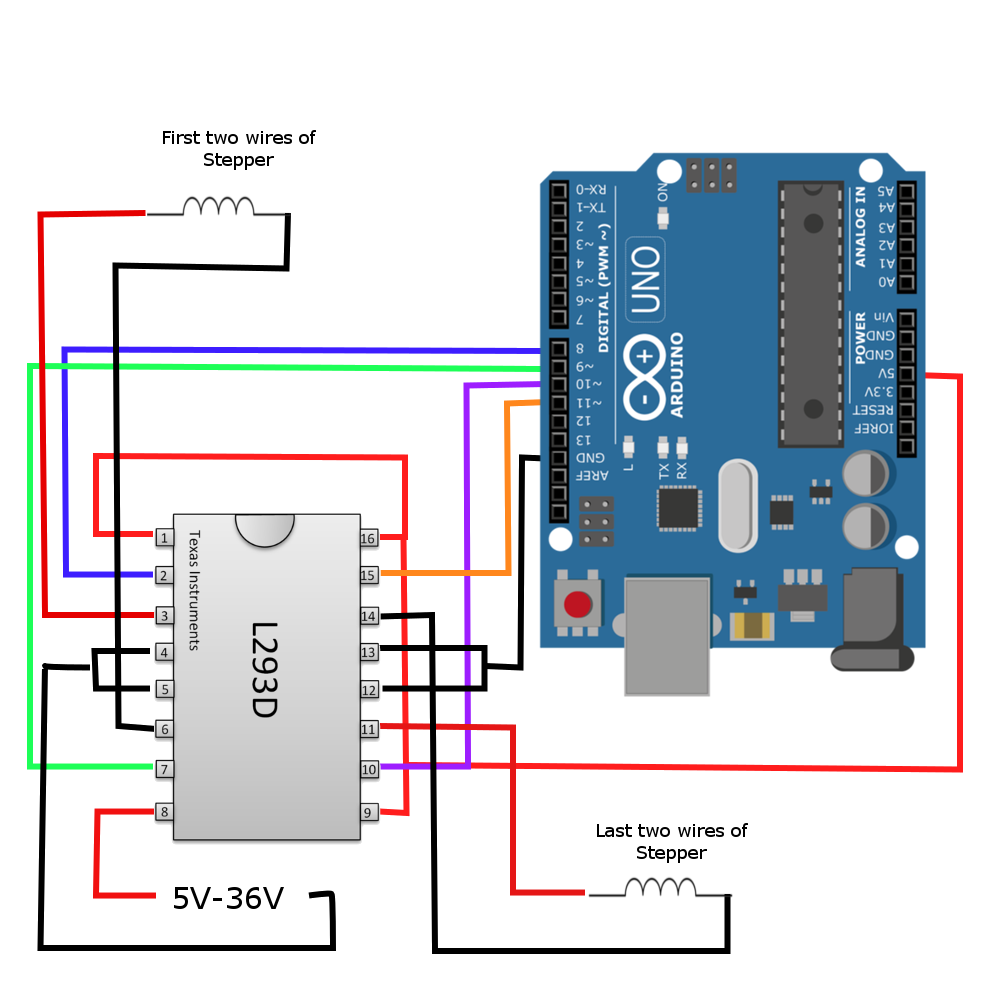
The wiring may seem involved, but the sequences are very complementary. Pins 8-11 correspond to the electromagnets in the stepper motors.
| L293D Pin | Device Pin | L293D Pin | Device Pin | |||
|---|---|---|---|---|---|---|
| 1,9,16 | 5V (Arduino) | 3 | +A (Motor) | |||
| 12,13 | GND (Arduino) | 6 | -A (Motor) | |||
| 2 | 8 (Arduino) | 8 | 5V-36V (Arduino or Battery) | |||
| 7 | 9 (Arduino) | 4,5 | GND (Arduino or Battery) | |||
| 10 | 10 (Arduino) | 11 | +B (Motor) | |||
| 15 | 11 (Arduino) | 14 | -B (Motor) |
Below is a screenshot of the Arduino Stepper Library webpage. If you'd like to explore their resources, follow this link. I will be working under the assumption that the user's Arduino library already has the Stepper Library installed, and that the functions below have been explored to some degree.
From here, the user should have installed the Stepper Library and wired the stepper motor, L293D, and the Arduino board. The code below is taken from the Arduino Stepper examples folder:
/*
 Stepper Motor Control - one revolution

 This program drives a unipolar or bipolar stepper motor.
 The motor is attached to digital pins 8 - 11 of the Arduino.

 The motor should revolve one revolution in one direction, then
 one revolution in the other direction.


 Created 11 Mar. 2007
 Modified 30 Nov. 2009
 by Tom Igoe

 */

#include <Stepper.h>

const int stepsPerRevolution = 200;  // change this to fit the number of steps per revolution
// for your motor

// initialize the stepper library on pins 8 through 11:
Stepper myStepper(stepsPerRevolution, 8, 9, 10, 11);

void setup() {
  // set the speed at 60 rpm:
  myStepper.setSpeed(60);
  // initialize the serial port:
  Serial.begin(9600);
}

void loop() {
  // step one revolution  in one direction:
  Serial.println("clockwise");
  myStepper.step(stepsPerRevolution);
  delay(500);

  // step one revolution in the other direction:
  Serial.println("counterclockwise");
  myStepper.step(-stepsPerRevolution);
  delay(500);
}
NOTE: When using the code above, be sure to tailor the values for 'stepsPerRevolution' to the total steps in your stepper motor (if known); and also be sure to adjust the 'myStepper.setSpeed()' to the speed of your stepper. It may be that your stepper does not have proper documentation - which is normal for some cheaper motors. If this is the case, try starting with common values and going through trial and error to see where your motor behaves best. Some commond values may be RPM = 60, stepsPerRevolution = 50-100. Start there and try different values if there are jitters in your motor during motion.
This tutorial was meant to disentangle the complexity of the stepper motor and provide a simple driving circuit for any 4-wire configuration. Within the limits of the L293D, I proposed a simple, affordable, and versatile wiring diagram for stepper motors. The L293D and Arduino Uno are the only components needed to control a single bi-polar stepper motor and actuate: a robotic arm, a remote-controlled car, a 3-D printing axis or extruder, and so much more.
Many of the tools used above were taken from the public domain. The Arduino Stepper Library and the code used to drive the sample motor were taken directly from Arduino's website. The availability of resources available to makers enables users to learn from a variety of topics and levels of difficuty. The basics of the forward and backward stepping motor empowers the user with endless opporunities to create. I chose to strip down the stepper motor because I felt there was a certain stigma associated with it. There are several wires, a complex driver circuit that often contains LED lights; there are several types of motors, unipolar and bipolar. This is why I reduced the project down to two simple parts: a bipolar motor and the driver. The rotates in two directions and the driver controls the rotation - simple.
And after going through this tutorial I want the user to find clarity in stepper motors and view the simplicity of their engineering, but understand the complexity of their application. I hoped to endow the maker with a sense of liberation from the market overcomplications of steppers. And I hope someone will take this tutorial further by creating something wonderful!
See more in Engineering:


