Arduino - Sending A String Over Bluetooth Using The HM-10
Wireless technology is undeniably taking over as a primary method of communication between computers, smartphones, and tablets. Wires are a thing of the past, where Bluetooth and Wifi are the burgeoning present and future internet of things. Bluetooth in particular is omnipresent due to its low-energy innovations and universal compatibility. For makers, Bluetooth low energy (BLE) is a crucial component of the network of devices that communicate to create the connected world in which we live.
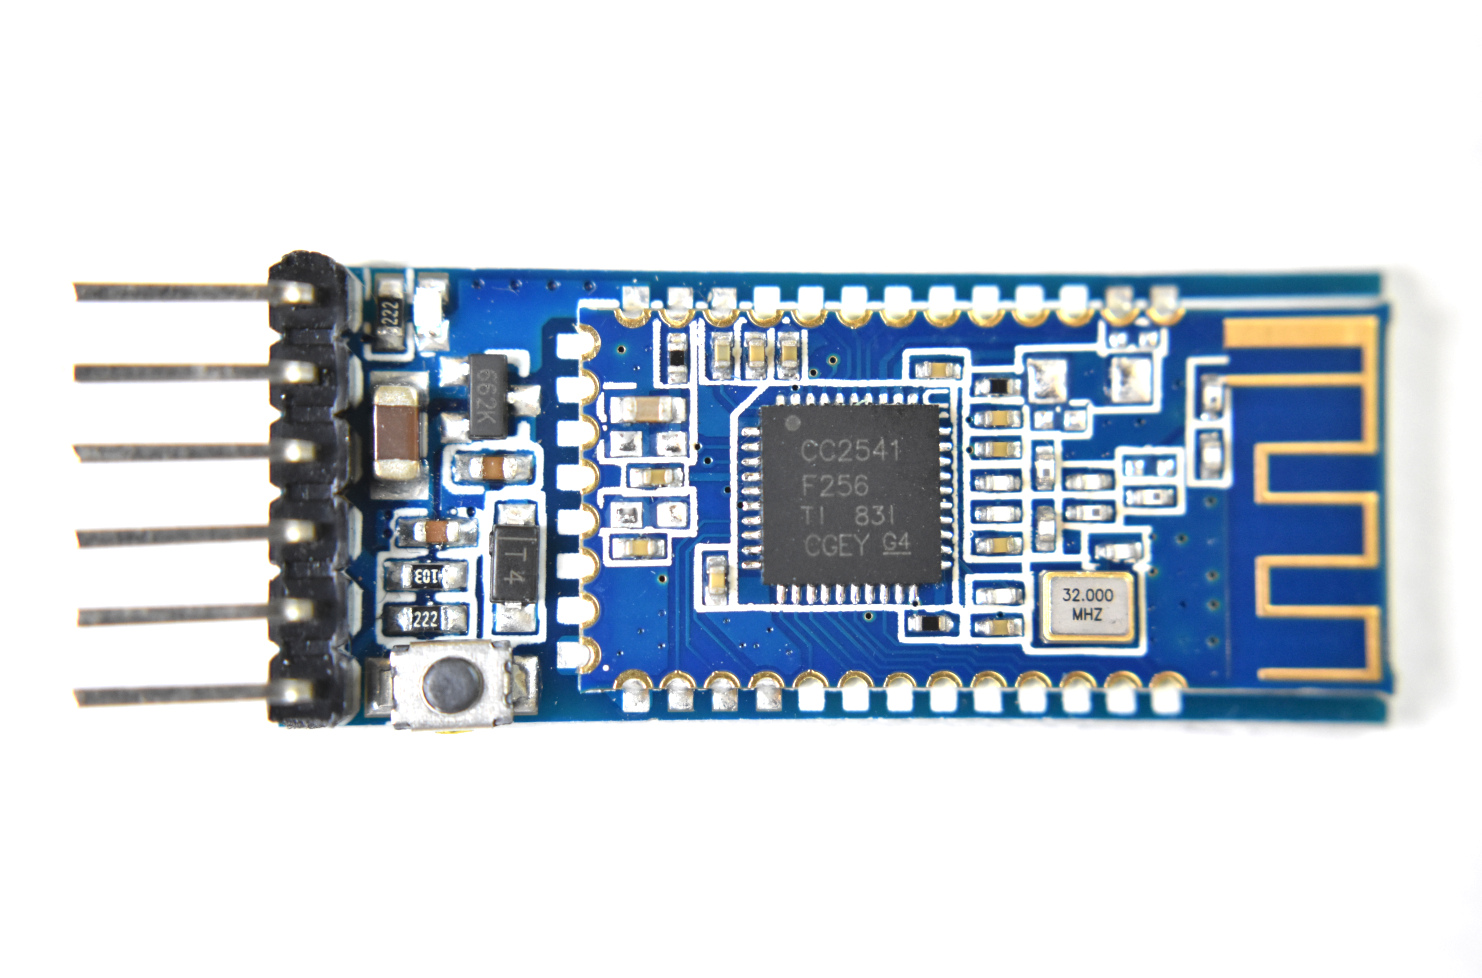
As an introduction to Bluetooth with Arduino or Raspberry Pi, I recommend using a component called the HM-10 [datasheet here]. The HM-10 is a Bluetooth low energy module that employ Bluetooth 4.0, which is currently the most widely used protocol for wireless devices (along with Wifi, but I will discuss this later). All of the current iPhones, Androids, and Google phones use Bluetooth 4.0, and it will likely be around for quite a while. The module is powered at 3.3V and consumes around 50mA (peak), 8.5mA (nominal), and can sleep with a current between 400uA - 1.5mA. It claims to have an open-space transmission range of 100m, and boasts transfer rates at 2 kilobytes per second. The underlying chip is a Texas Instruments CC-2540/2541 [see here]. The HM-10 is particularly germane because it cooperates nicely with the Arduino software with a mere four lines of code in the IDE.

HM-10 Bluetooth low energy Module
Ideal for bluetooth interfacing with a smartphone and an arduino

Wiring The HM-10 to Interface With Arduino
Wiring the HM-10 to the Arduino Uno board should go as follows:
Arduino | HM-10
D2 | TX
D3 | RX
GND | GND
3.3V | VCC
#include <SoftwareSerial.h>

SoftwareSerial ble(2, 3); // RX, TX

void setup() {
  // Open serial port
  Serial.begin(9600);
  // begin bluetooth serial port communication
  ble.begin(9600);
}

// Now for the loop

void loop() {
  Serial.println("Sending Bluetooth Message...");
  ble.write("Testing...");
  delay(500);

}

After uploading the sketch to the board, the Arduino is fully setup to send a message to a Bluetooth low energy receiving device in a central role. This could be an iPhone, tablet, Android, or even another HM-10, provided that the module is set to the central role. The HM-10 is by default set to a peripheral role, wherein it sends data, however, programming it to act as a central device is not very difficult [see datasheet].
iOS App for Receiving the String
In order to receive the string (and send them as well), I use the BLExAR app from the iOS app store (here is a link). While scanning for the HM-10, you will notice several devices showing up. The HM-10 should be called 'HMSoft' or 'CC2541' - sometimes it’s ‘ It is possible that another name will show up, if you programmed the HM-10 via AT commands and changed its name via 'AT+NAMExxxx.' Once you have selected the HM-10 module, you will be able to communicate via Bluetooth and receive the string you programmed above!
BLExAR iOS Arduino App
- Blog title image courtesy of Arduino AG under Creative Commons AttributionShareAlike 3.0.
Related Items from our Shop:

See more in Arduino and IoT: